Creating Custom View Example
The purpose of this system is to outline how to create a custom view.
Overview#
Purpose: The purpose of this system is to outline how to create a custom view.
Scope: This procedure applies to Zendesk Team.
Responsibility: It is the responsibility of each employee to ensure the process set out in this procedure is followed.
Objective: The objective of this procedure is to guide employees on how to create a custom view in Zendesk
(Bragan logo will always remain on top as standard.)
To add a view#
- In Admin Center, click the Workspaces icon
- Click Add view.
Agents in custom roles might not have the option to add a view, depending on their permissions setting.
- At the top of the page, enter a name for the view.
- Enter a Description for your view.
- Select an availability option to determine Who has access to the view:
Any agent, available to all agents. Agents in specific groups, available only to agents in the groups specified. You can enter one or more groups in this field. If you enter multiple tags, hit Enter between each tag. Only you, available only to you as a personal view.
- Under Tickets must meet all of these conditions to appear in the view, add the conditions to define this collection of tickets (see Building view condition statements below).
You can also add conditions under Tickets can meet any of these conditions to appear in the view.
- Click Preview to test the conditions.
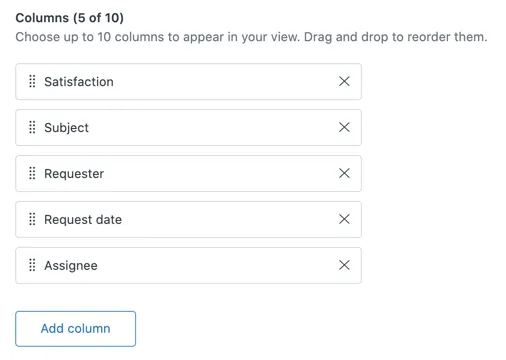
- Set the formatting options:
Drag the view Columns into the order you want. Click Add column to add up to 10 columns.
Status is always shown in the view before the columns. You don't have to add it manually to the table. Multi-select fields are not supported in table columns.
Under Group by, select the ticket data field you want to group the tickets in the view, then select Ascending or Descending.
Tip: If you select Request date from the Group by dropdown list, any settings you change in the Order by dropdown list will not be applied.
Under Order by, select the ticket data field you want to use as the default data to order the tickets in the view, then select Ascending or Descending.
- When you are finished, click Save. The view is created.
Please see the attached video for reference.
Video & Media#
🎥 Creating Custom View Example 1
Notes#
This section is important so Adhoc points and issues can be logged. Also, Q&A can be logged for suggestions for potential issues encountered. Also, log important notes needed for this system. Additional Notes:
Views are a way to organize your tickets by grouping them into lists based on certain criteria.
Potential Issues:
1 - ISSUE ENCOUNTERED: Stuck on Loading
RESOLUTION: Refresh Browser
2 - ISSUE ENCOUNTERED: Broken Links
RESOLUTION: Get the external link as this will allow other people to access the SOP without the need for login credentials and avoid broken links.