Handling website failed orders
This SOP is used to ensure that orders that did not go through successfully at the
Overview#
Purpose: This SOP is used to ensure that orders that did not go through successfully at the checkout page will be handled properly.
Scope: This applies to all CS Team both Team IRL and Team PH. This only applies to website orders.
Responsibility: This SOP aims to ensure that the customer will be assisted properly and for them to have a good buying experience despite of the failure of their order at the checkout page.
Objective: The objective of this procedure is:
- to guide employees on how to handle website failed orders.
Procedure#
A customer searches for products, adds to the cart, applies coupons (if applicable), and proceeds to checkout. The customer faces technical issues or time delays or network failure while making payment. The transaction is unsuccessful and the order is canceled or will show pending in Magento. In such a case, the customer has to populate the cart with the products again, apply coupons, and make a payment. There’s a possibility that the customer may still encounter the same error. As a customer, you will understand how inconvenient it will be.
In this process, we will aim for the customer to have a good buying experience on our website.
On a weekly basis, we are checking in Magento all the orders that did not successfully go through.
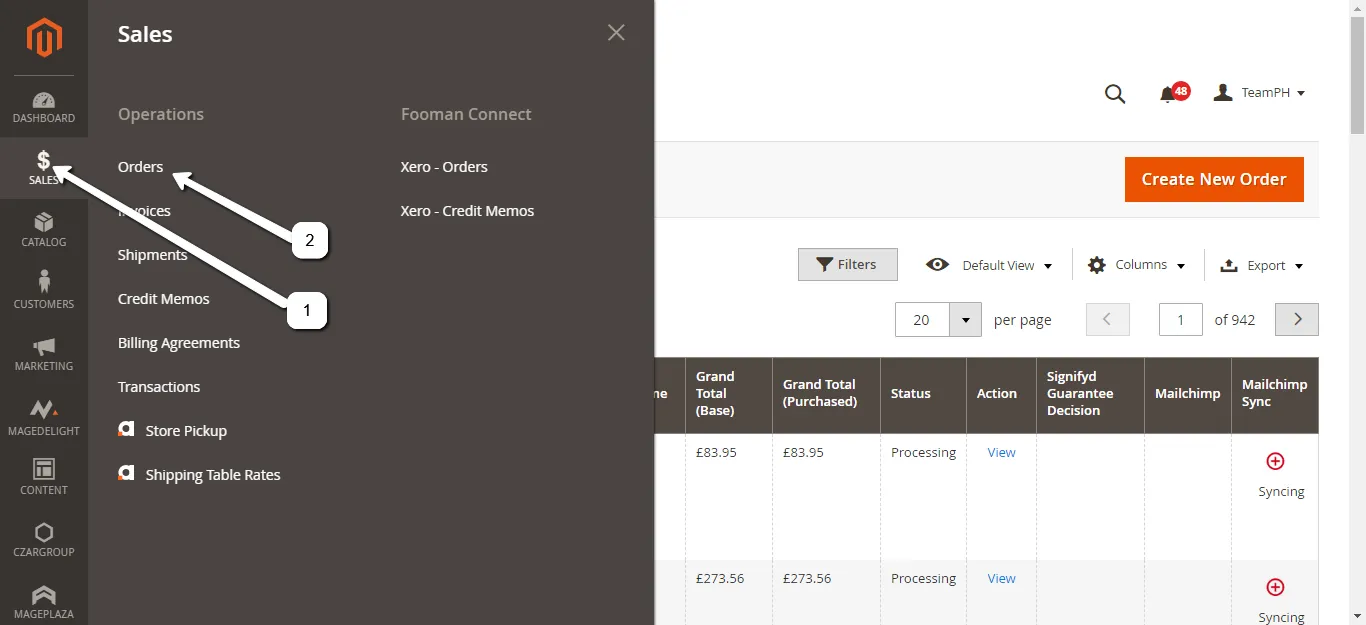
Step 1 Login to Magento at www.bragan.net with credentials provided by IT or Management.
Step 2 Go to SALES Menu on the left>>Click ORDERS
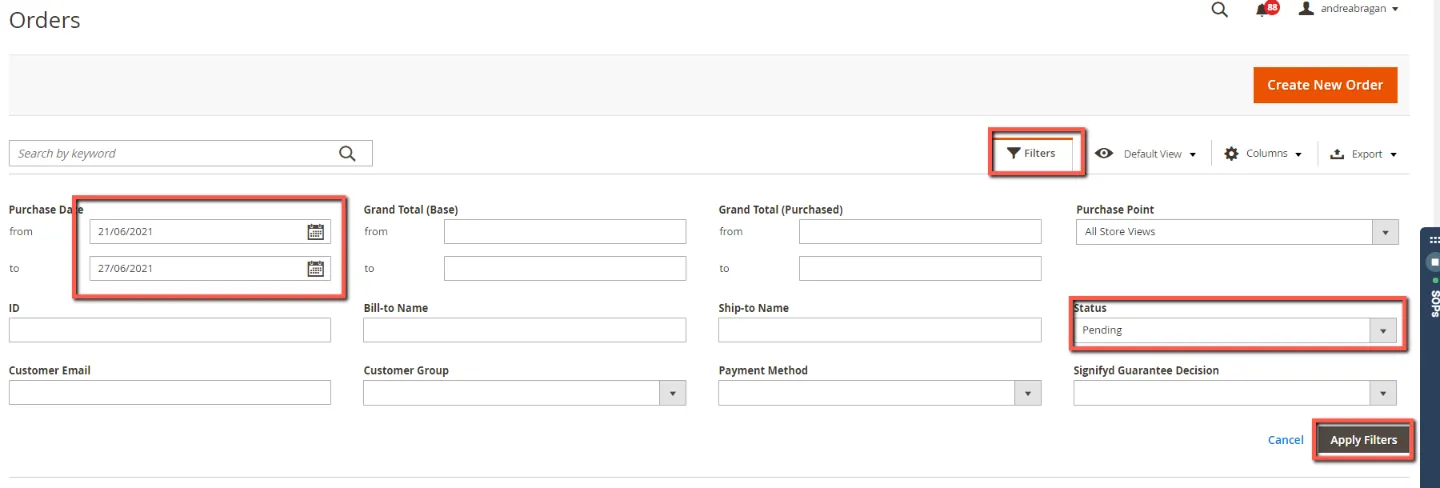
Step 3 Click Filters tab
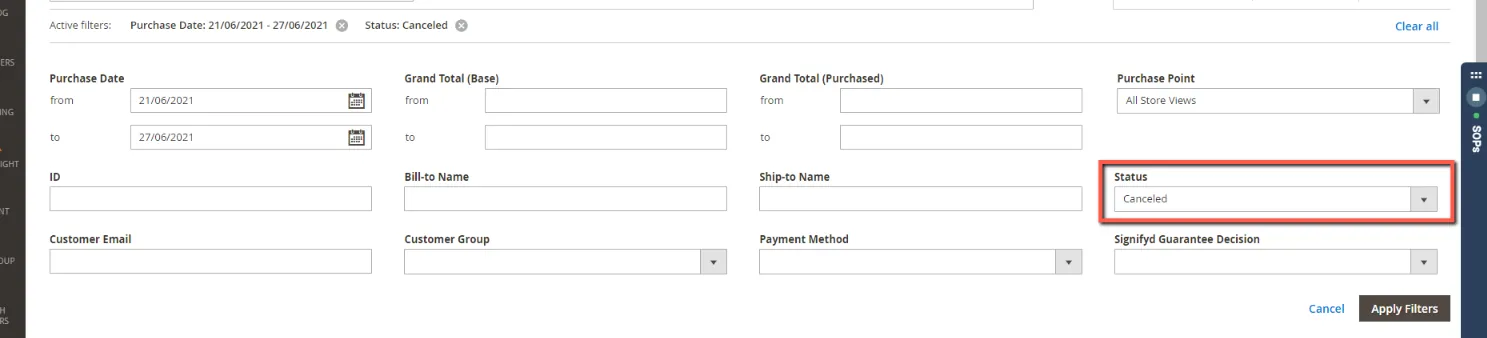
and Select the Period covered in the Purchase Date. Choose “Pending” Status in the dropdown. If you are Filtering those with Cancelled choose “Canceled”
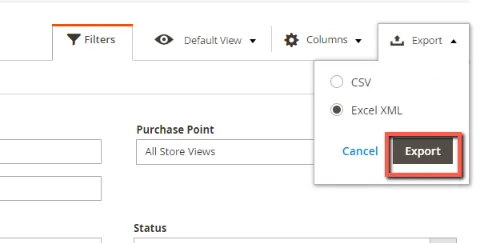
Step 4 Export the reports
in Excel Format(preferred). Click Export tab>>Select Excel>>Click Export
Step 5. Open the Download Report and Edit.
Combine Pending and Cancelled transactions into one Excel file
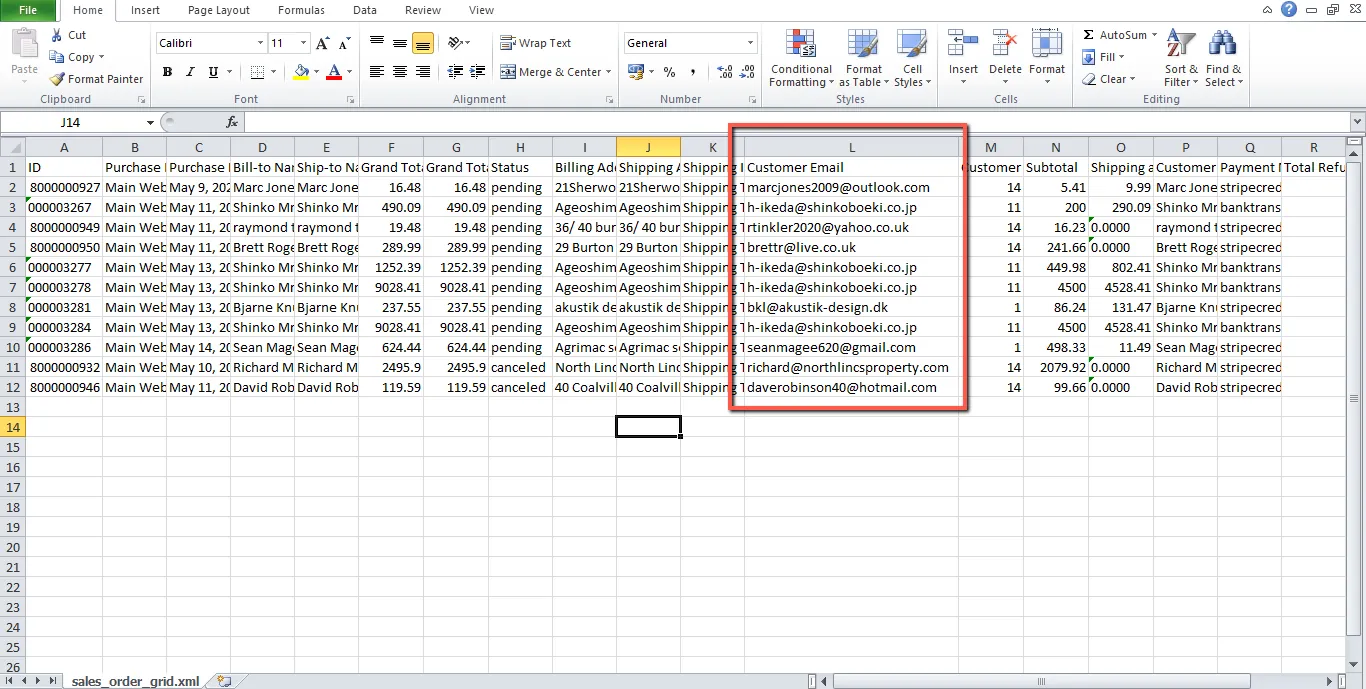
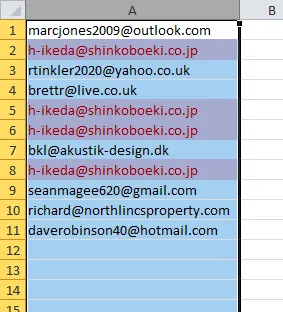
Step 6. Get Customers’ emails.
You can sort and delete duplicate emails. Delete everything except customer emails (column L). You can also use conditional formatting to delete duplicate emails. This way we are sending only 1 email notification per customer. This will avoid spam and confusion on customers.
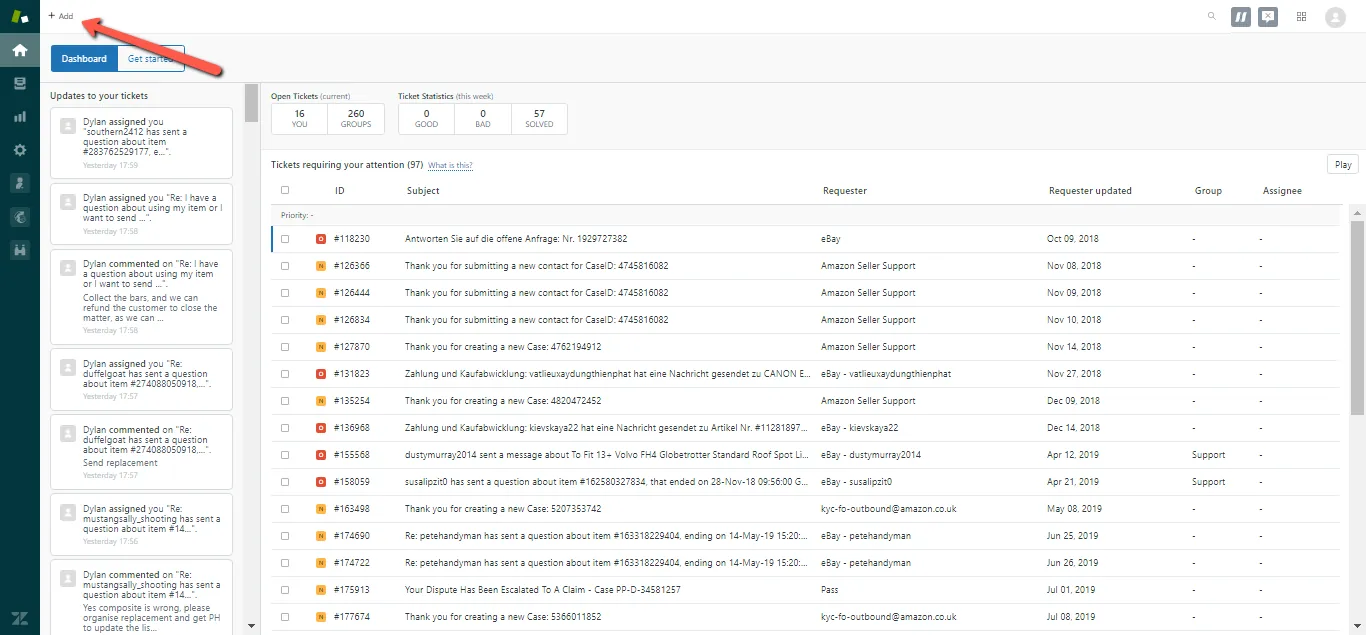
Step 7. Create Zendesk emails.
Sending the email in Zendesk. Open Zendesk and compose new email by clicking the ADD button on the upper left side of the screen.
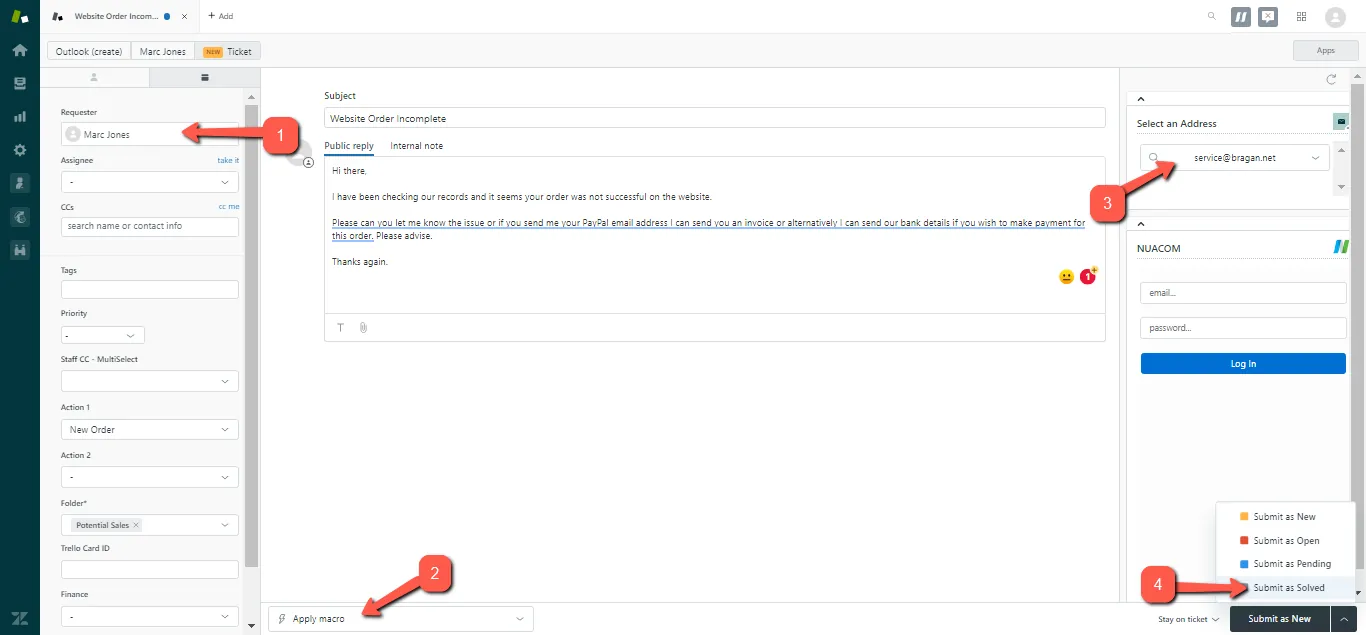
7.1 Enter the Customer Email in the requester’s field box. You can also enter the CCs below.
7.2 Use 106 macro (website failed orders)
7.3 Select [email protected] as email address
7.4 Select “Submit as Solved”
Notes#
This document is very important to know how to handle properly website failed orders or orders that did not go through successfully at the checkout page.
This section is important so Adhoc points and issues can be logged. Also, Q&A can be logged for suggestions for potential issues encountered. Also, log important notes needed for this system. Additional Notes:
The agent suggesting the update should be the one to carry through the edit. The suggestions for edit should be confirmed in real-time in the group and for the card to be cleared the same day. Creating a new version will break the link for systems that are linked to training/onboarding Trello Cards. This will also affect the systems linked to some email macros. Do not create a new version this will overpopulate the SystemHub. Editing the current system is the best practice to avoid potential issues.
Potential Issues:
1 - ISSUE ENCOUNTERED: Stuck on Loading
RESOLUTION: Refresh Browser
2 - ISSUE ENCOUNTERED: Broken Links
RESOLUTION: Get the external link as this will allow other people to access the SOP without the need for login credentials and avoid broken links.