How to Add Members, Assign System & Roles in SystemHUB
SystemHUB is Bragan’s Procedure Management Tool.
Overview#
Purpose: SystemHUB is Bragan’s Procedure Management Tool. The purpose of this document is to outline to new and existing staff how to use SystemHUB.
Scope: This procedure applies to all Bragan personnel.
Responsibility: It is the responsibility of each employee to ensure the process set out in this procedure is followed.
Objective: The objective is to standardize the use of SystemHUB so all applicable members of staff have the knowledge to do so efficiently and correctly.
Adding Members to SystemHUB#
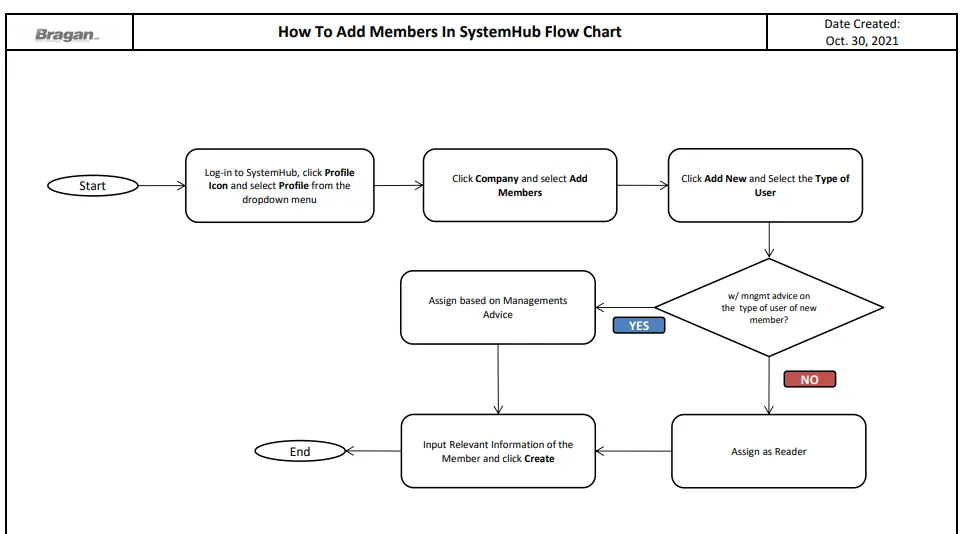
Step 1.
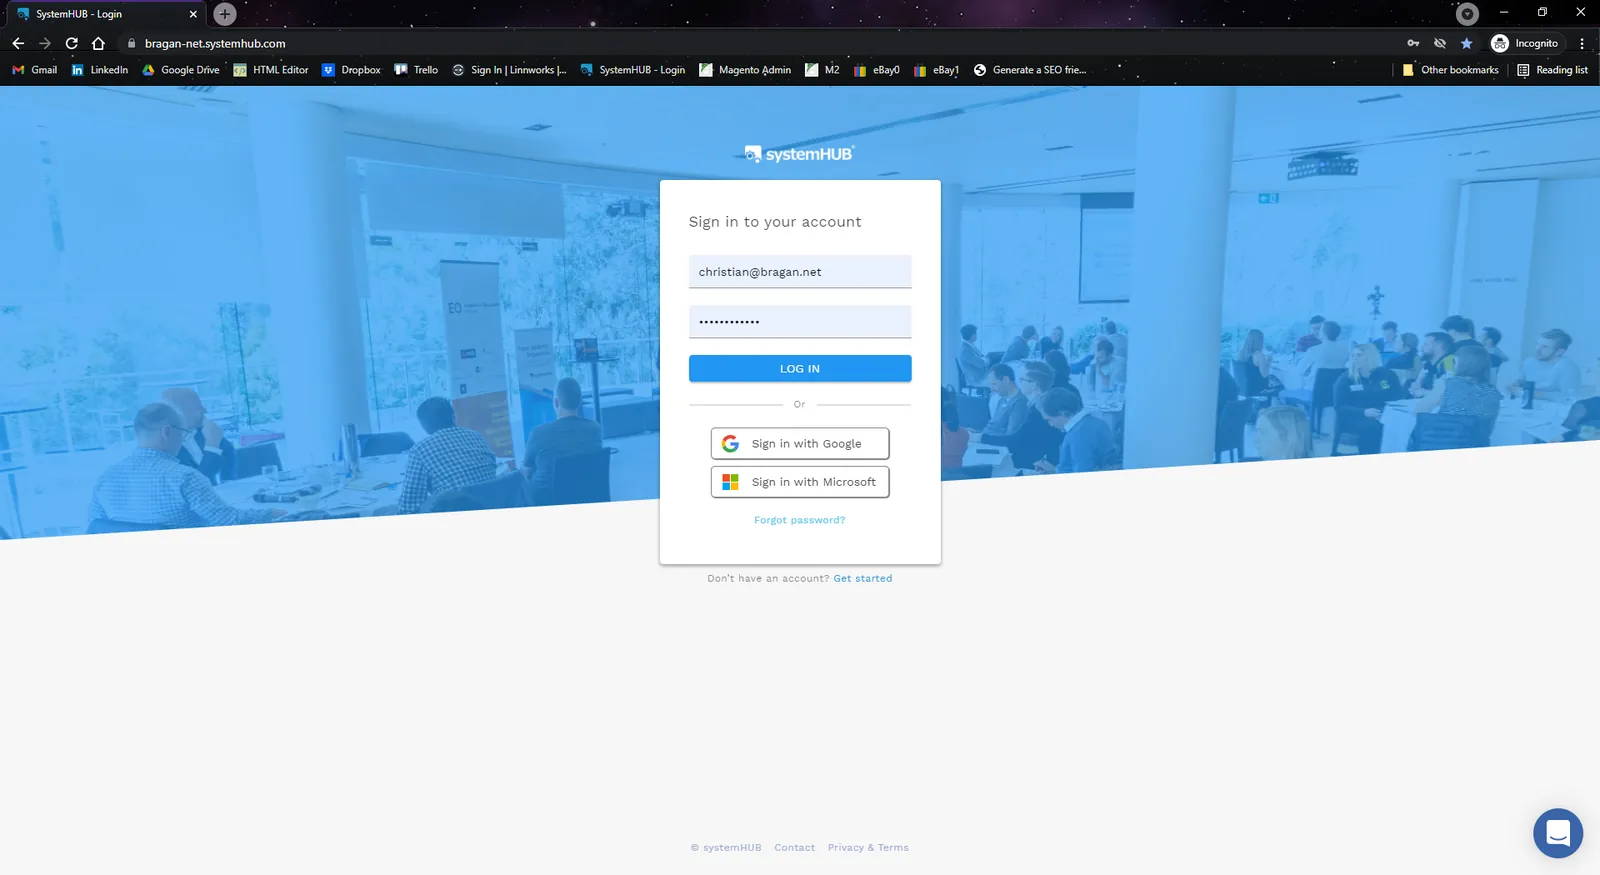
Go to bragan-net.systemhub.com and log in using credentials provided by management shown in FIG. 1.1.
Step 2.
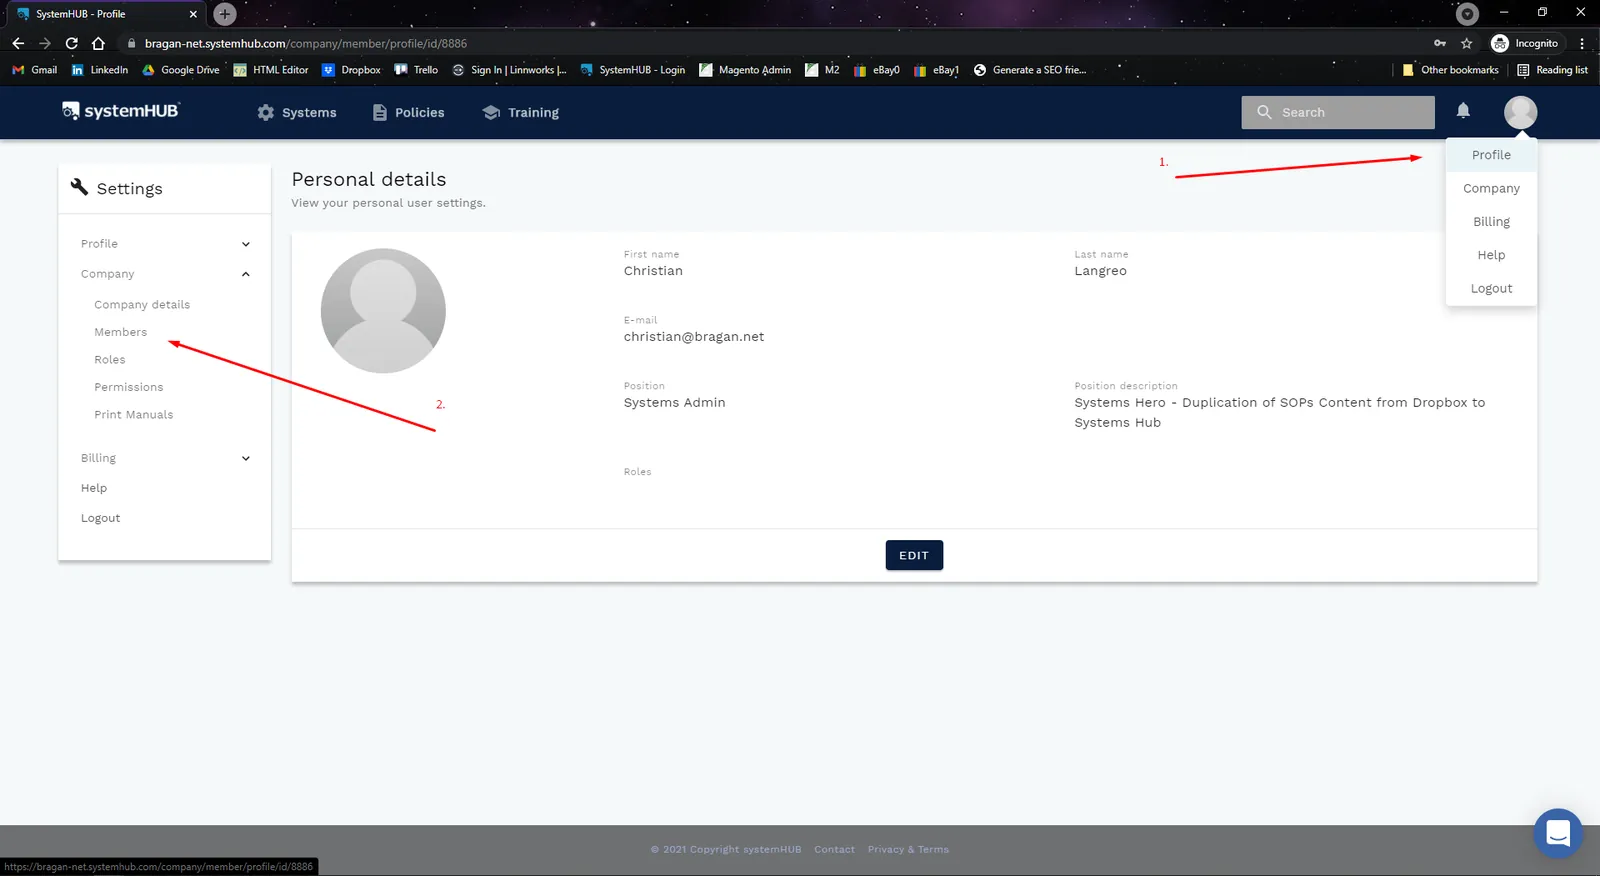
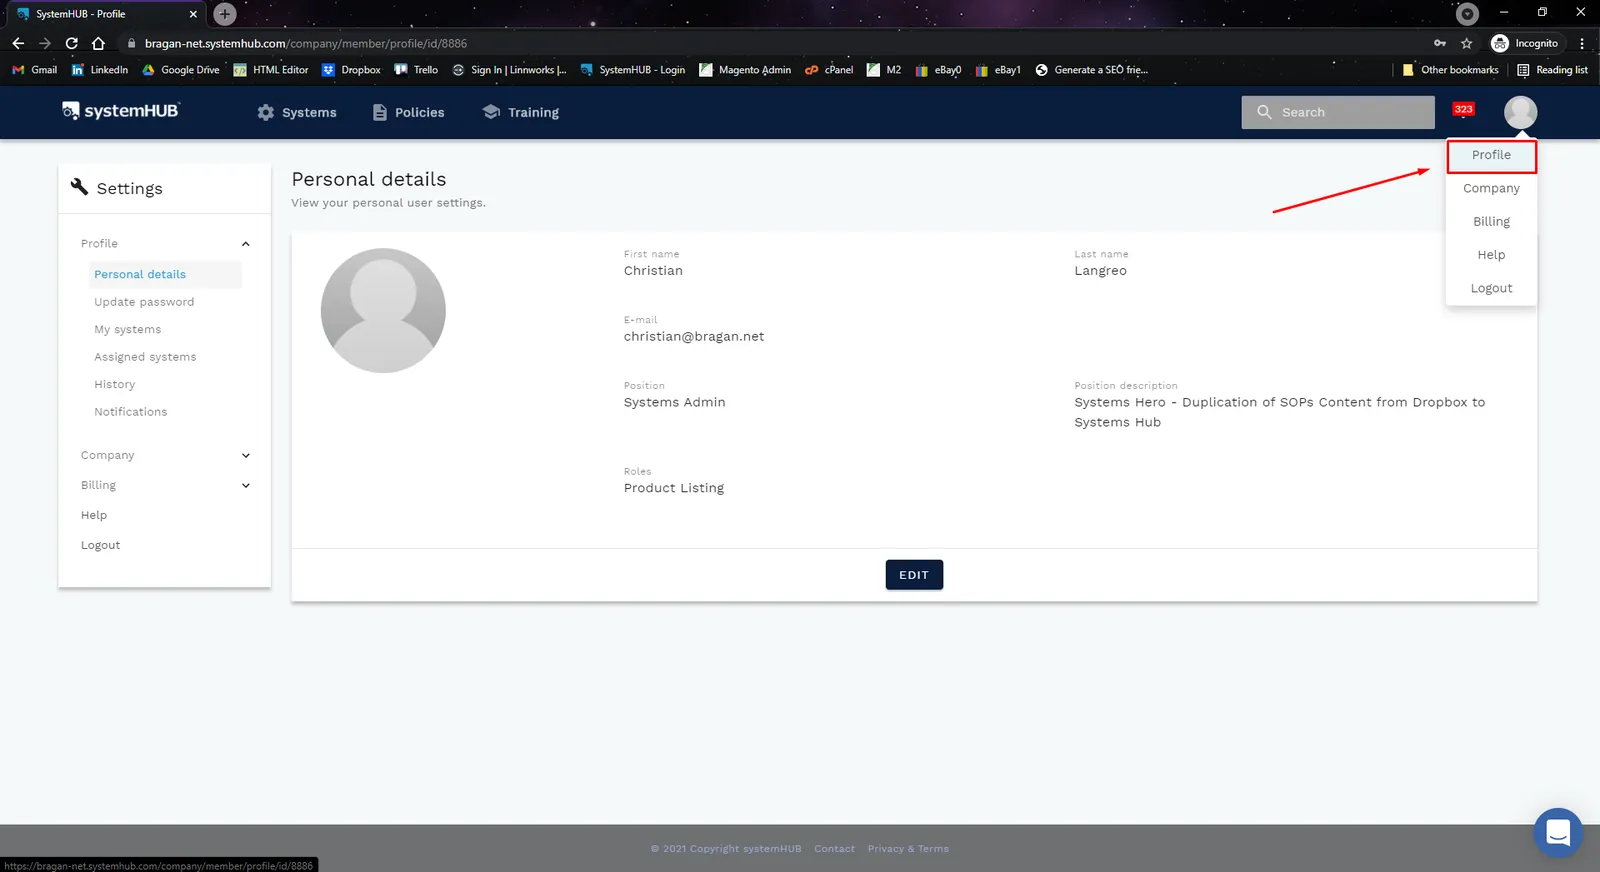
Go to Profile Icon located at the top-right corner, a dropdown menu will then appear, and then click Profile.
Step 3.
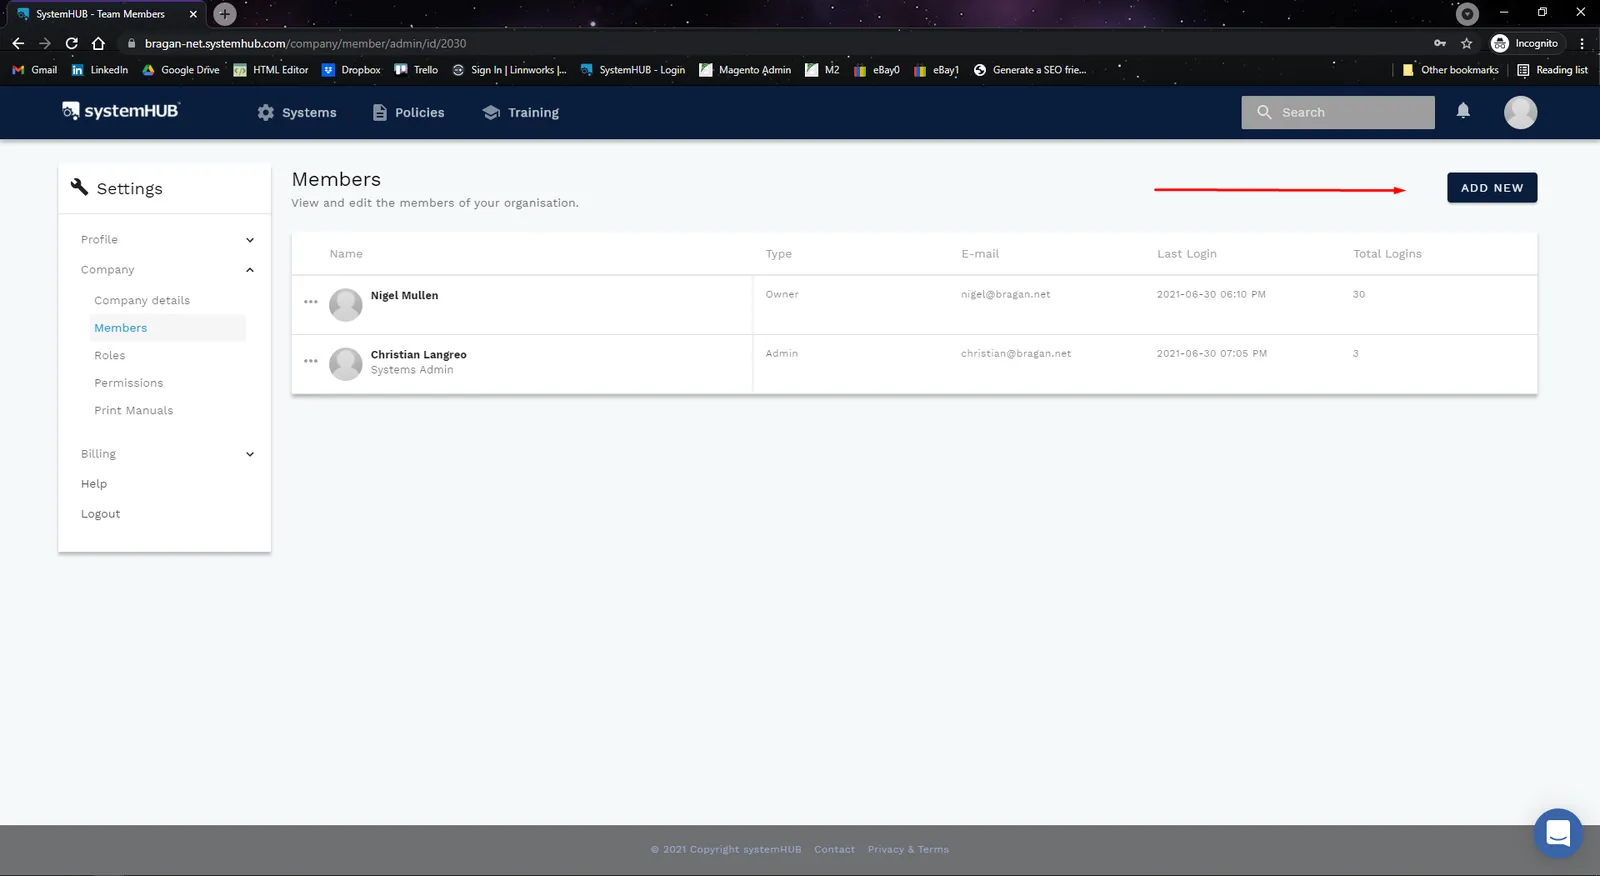
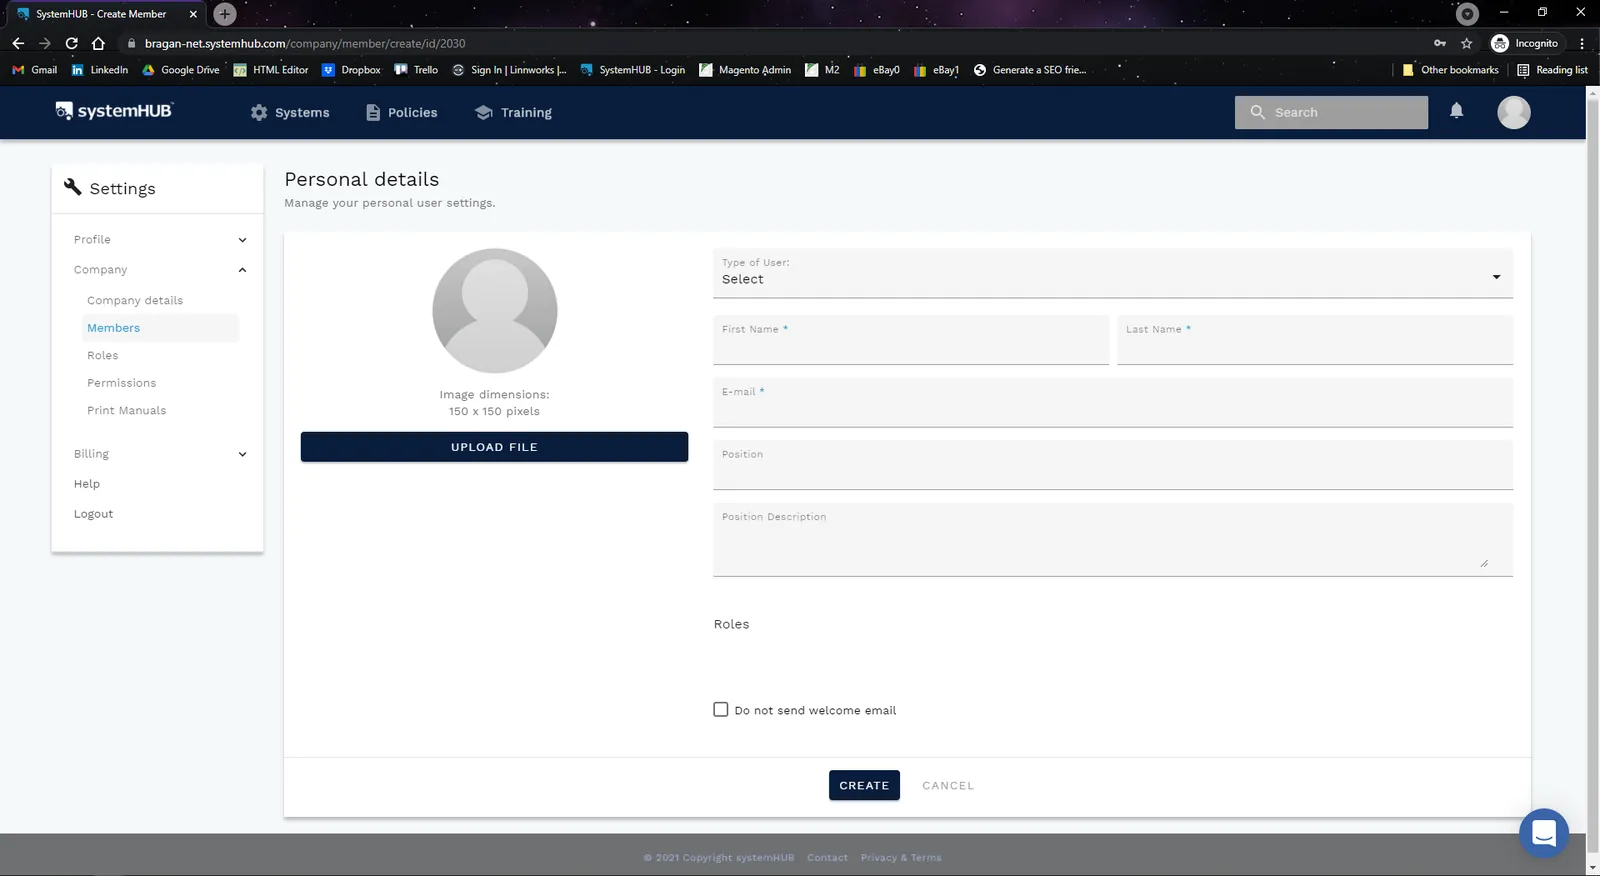
Click Add New as shown on FIG. 1.3
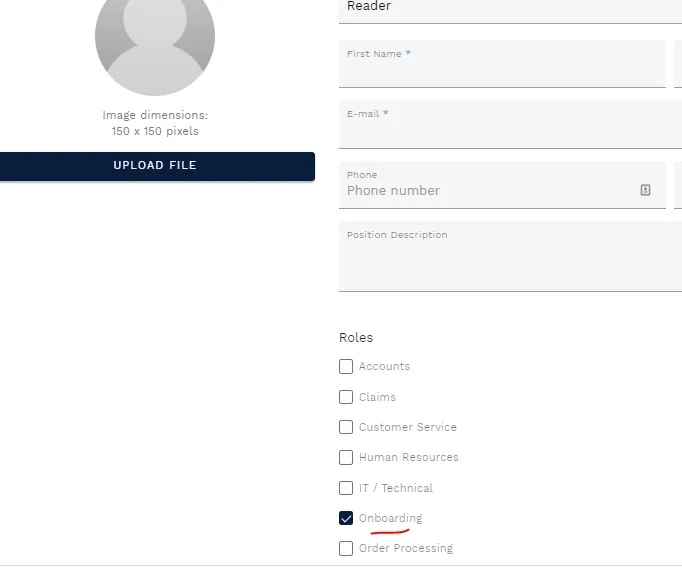
Step 4. Select Type of User, and enter relevant data as shown in FIG. 1.4. Tick the boxes on what role you want to assign to this member and then click Create.
Note: for new members Type of User should always be Reader otherwise advice by management. And then for the Role just tick Onboarding.
Assigning Roles to Members#

Step 1.
Log-in to SystemHUB. Go to Profile Icon located at the top-right corner, a dropdown menu will then appear, and then click Profile., see Fig. 1.5.
Step 2.
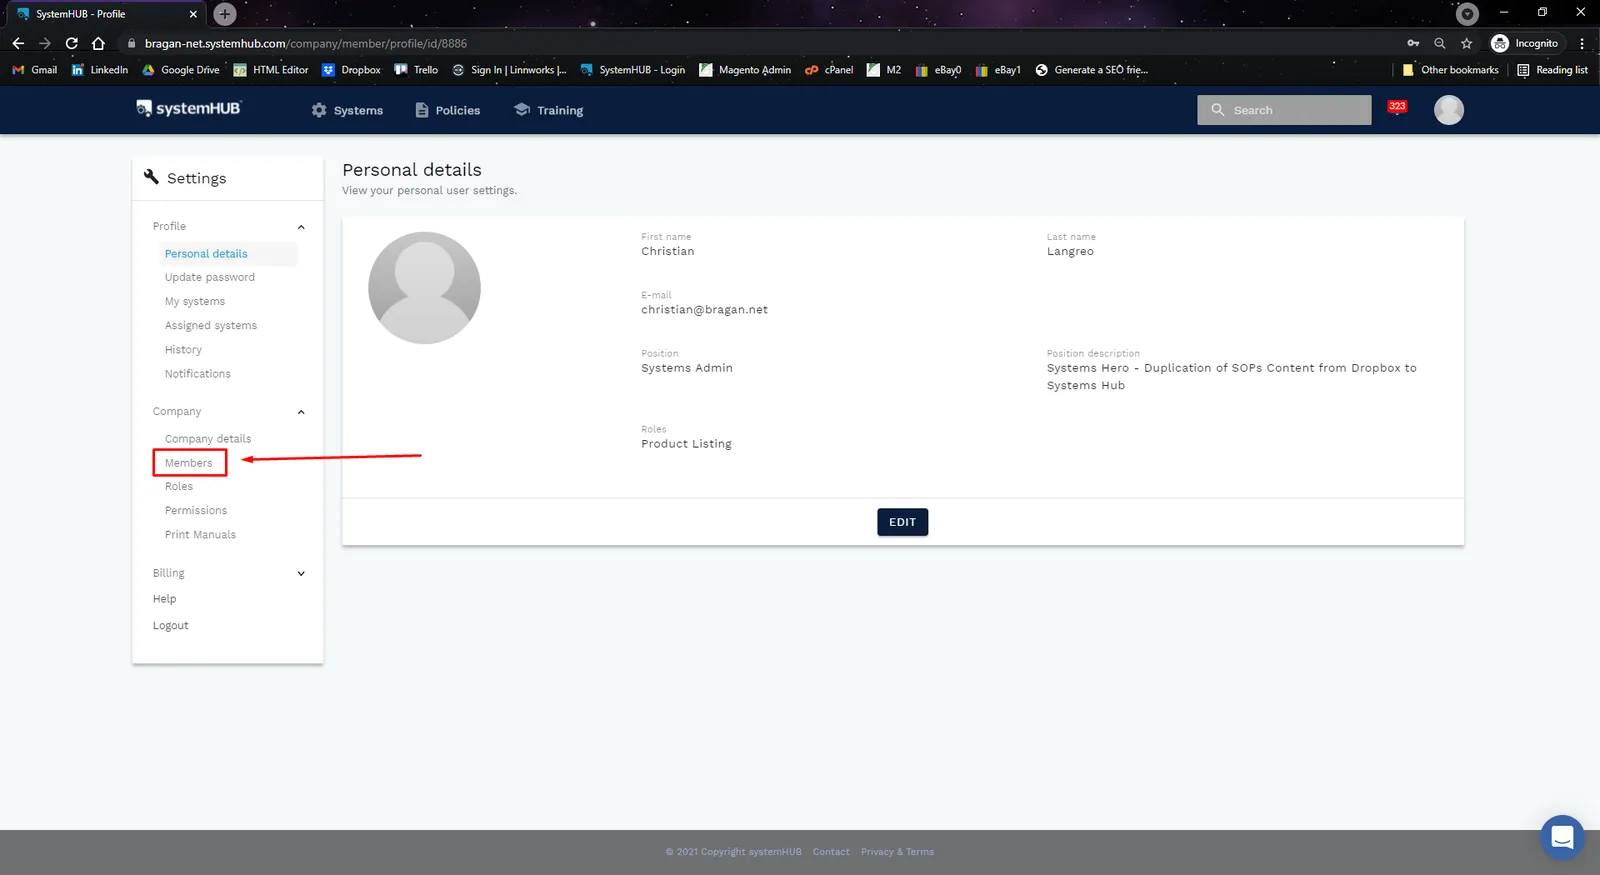
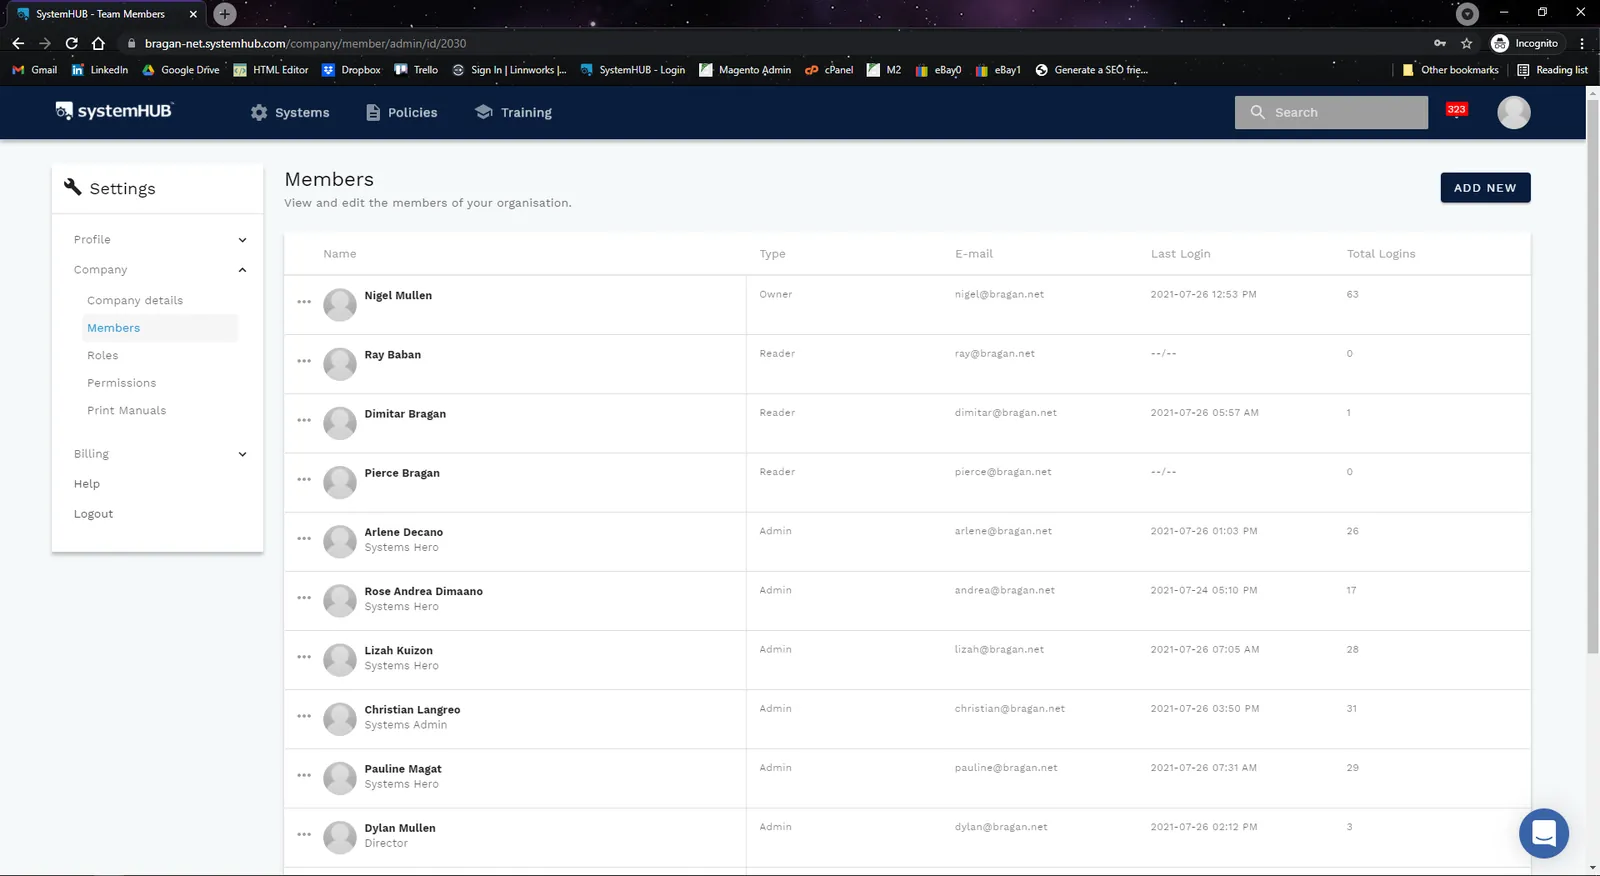
Located on the left side, under Company, click Members, see Fig. 1.6.
Step 3.
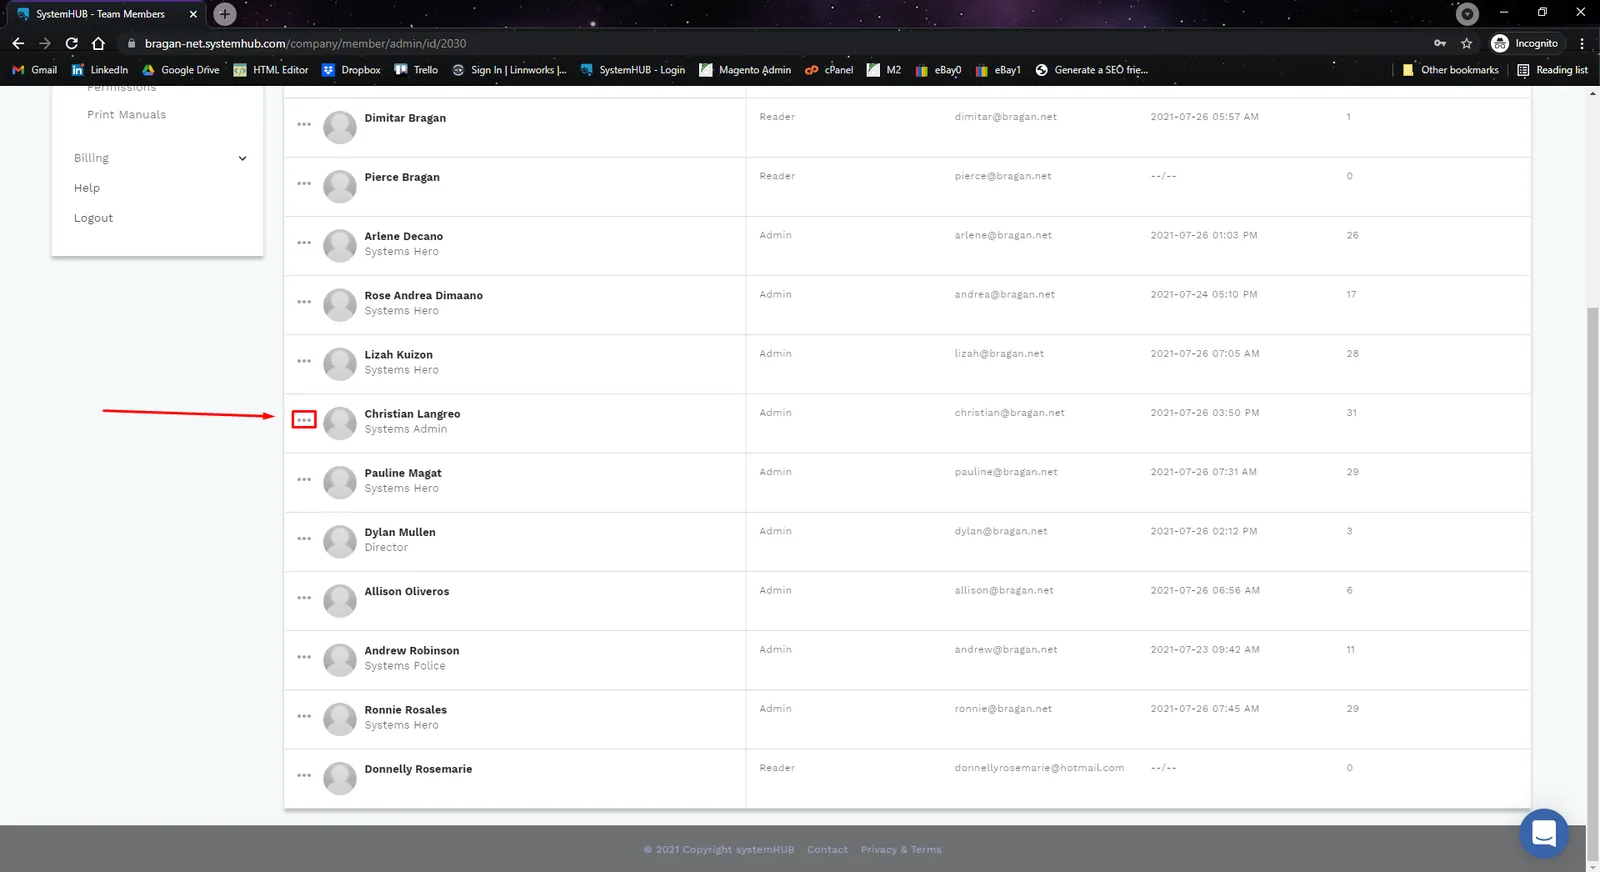
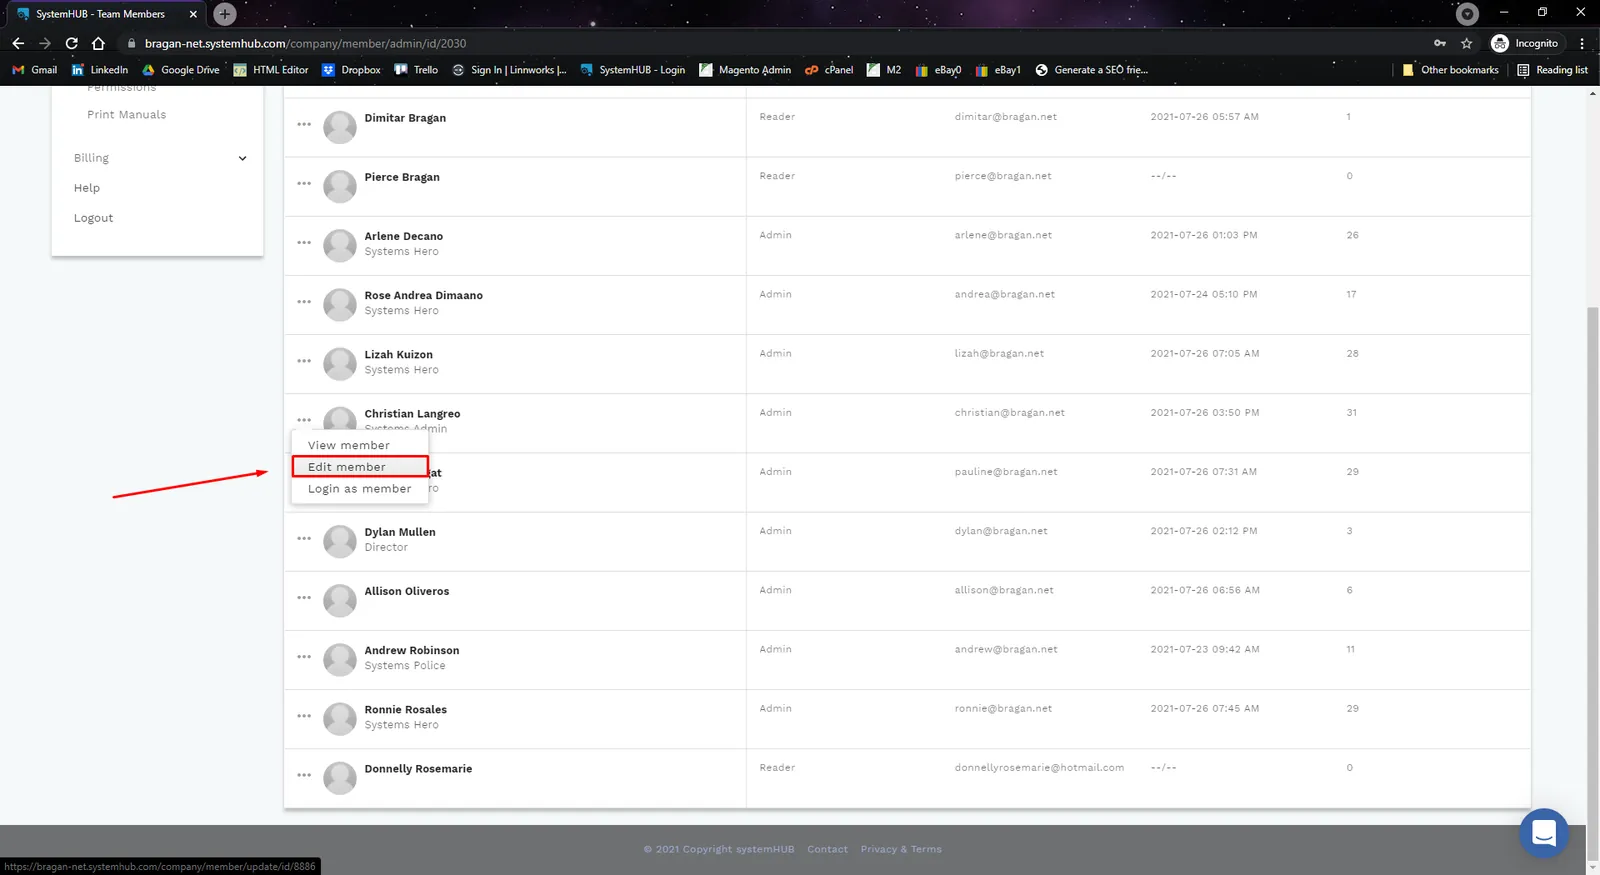
Go to the Members Page, see Fig. 1.7. Click on the 3 horizontal grey dots beside the member name, see Fig 1.8, and click Edit Member, see Fig. 1.9.
Step 4.
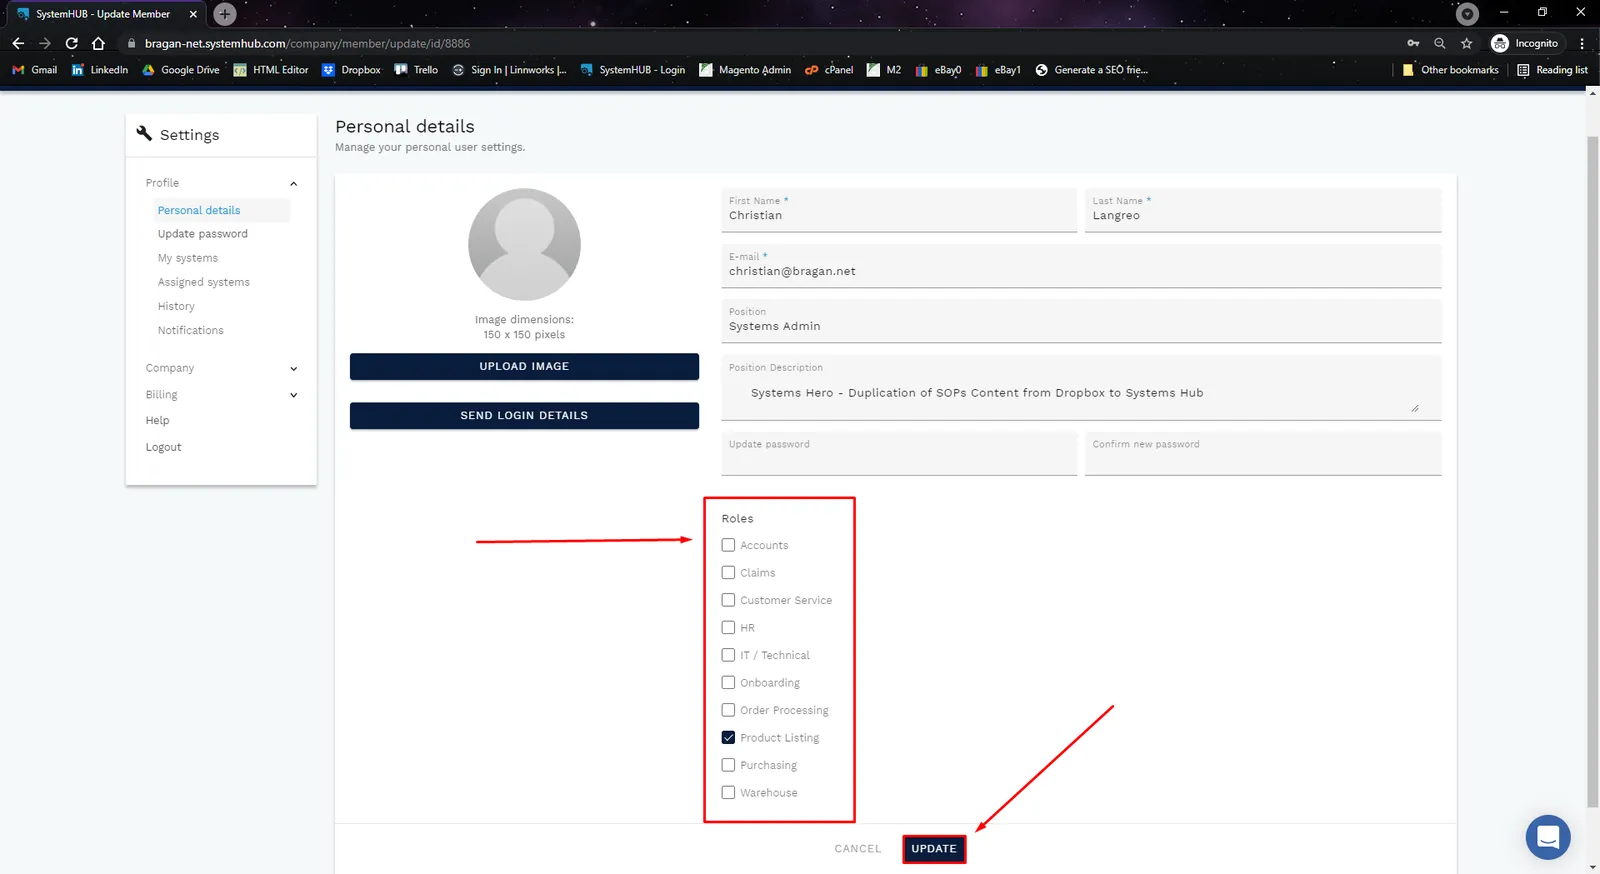
Assign the desired Department/Roles for the member by ticking the boxes under the Roles section then click Update. See Fig 1.10.
Assigning#
Members/Department/Role#
to a
System#
Step 1. Log-in to SystemHub and search then open the System/SOP you want to assign to a member.
Step 2. Click on Edit Button (pen icon) and under the Properties Section, you can:
- Assign First & Second Owner
- Assign Member - members who will be using this particular system.
- Assign Role - Choose the department where this system is applicable.
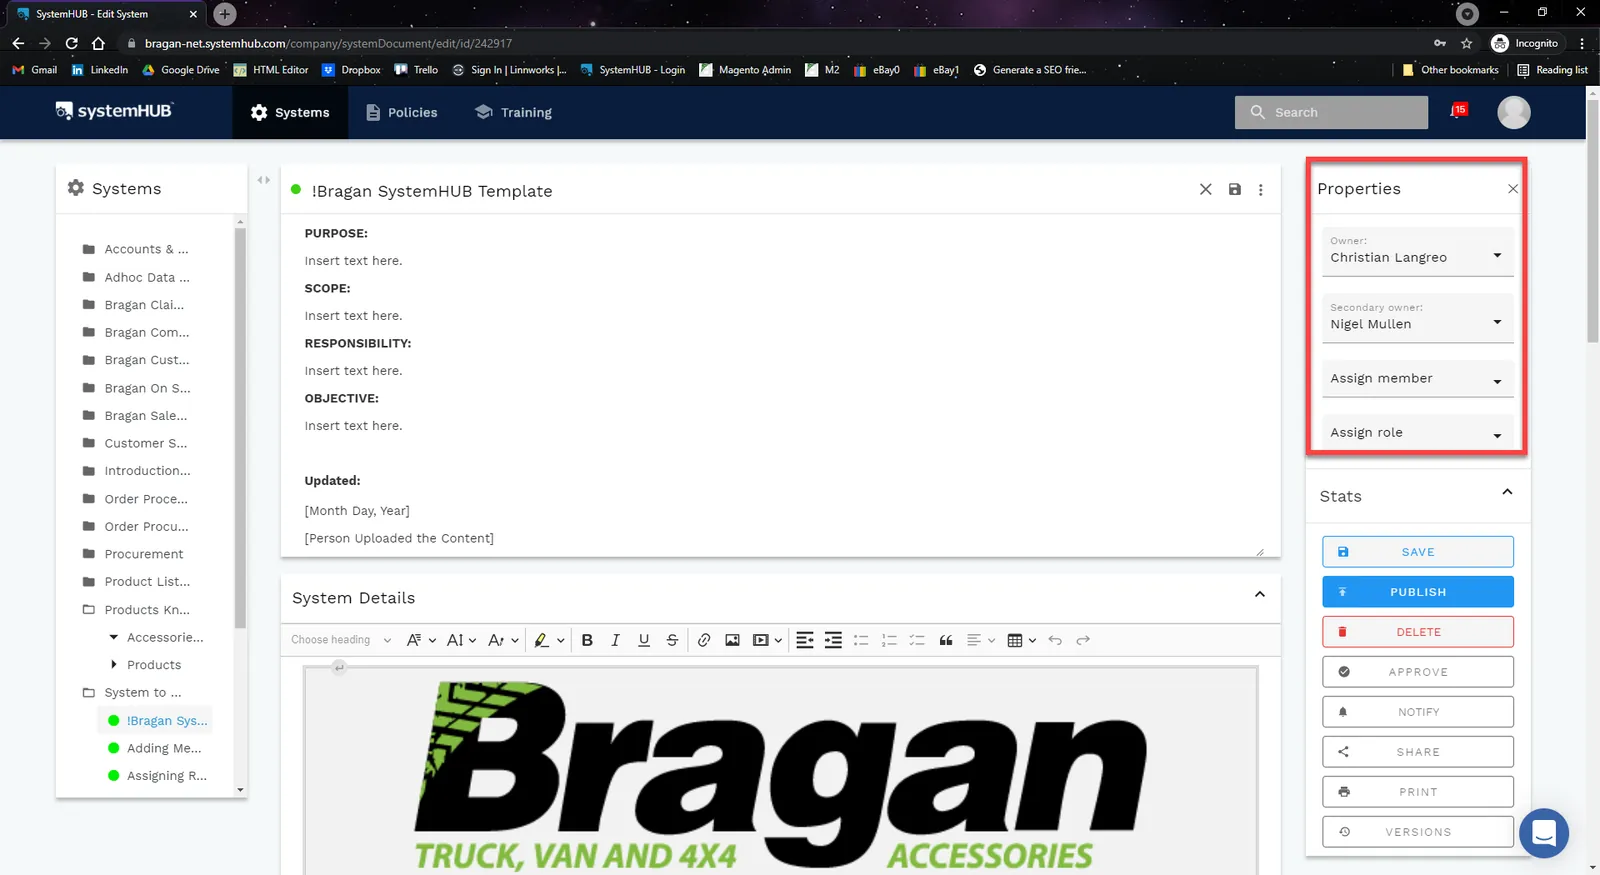
Step 3.
Edit Updated Section, put in the Date of when did you assign the member/role and who did the update. Then click Save.
Assigning a System to a Department/Role#
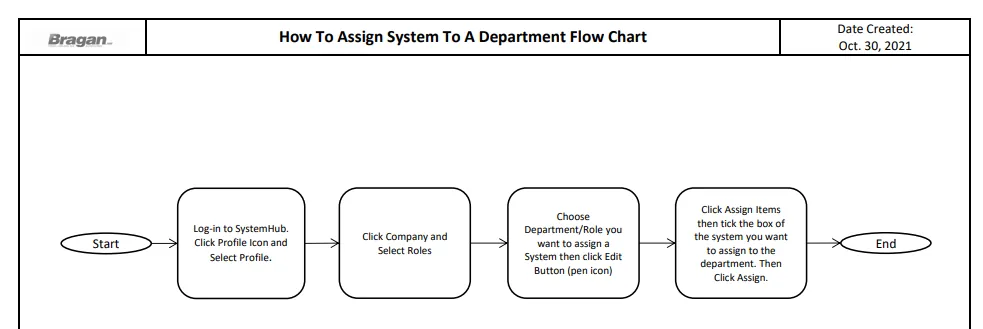
Step 1.
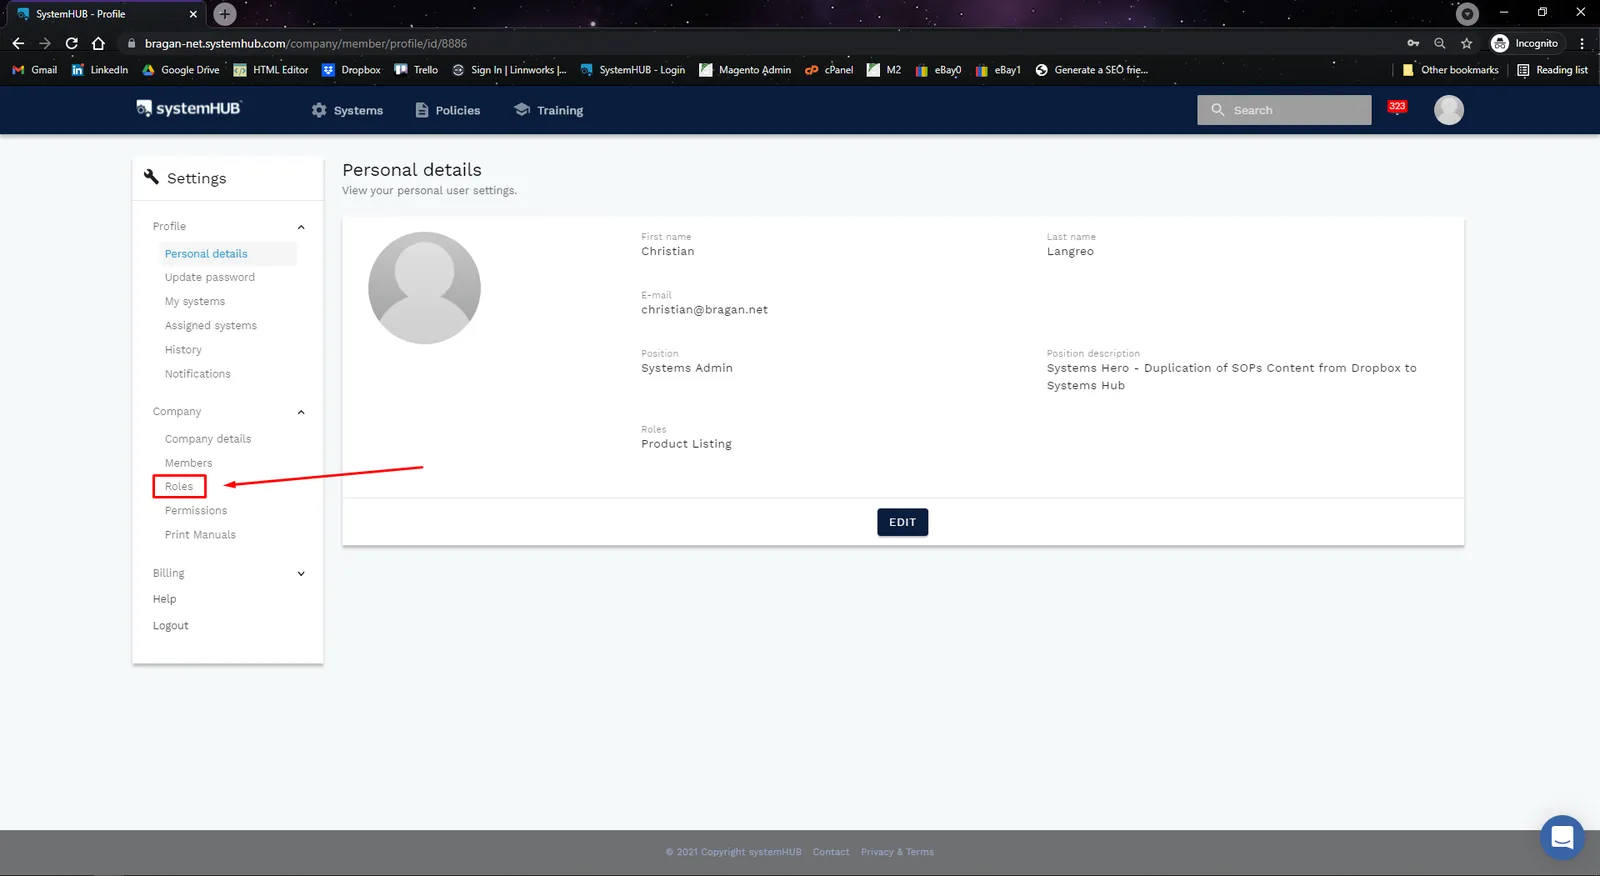
Log-in to SystemHUB. Go to Profile Icon located at the top-right corner, a dropdown menu will then appear, and then click Profile., see Fig. 1.12.
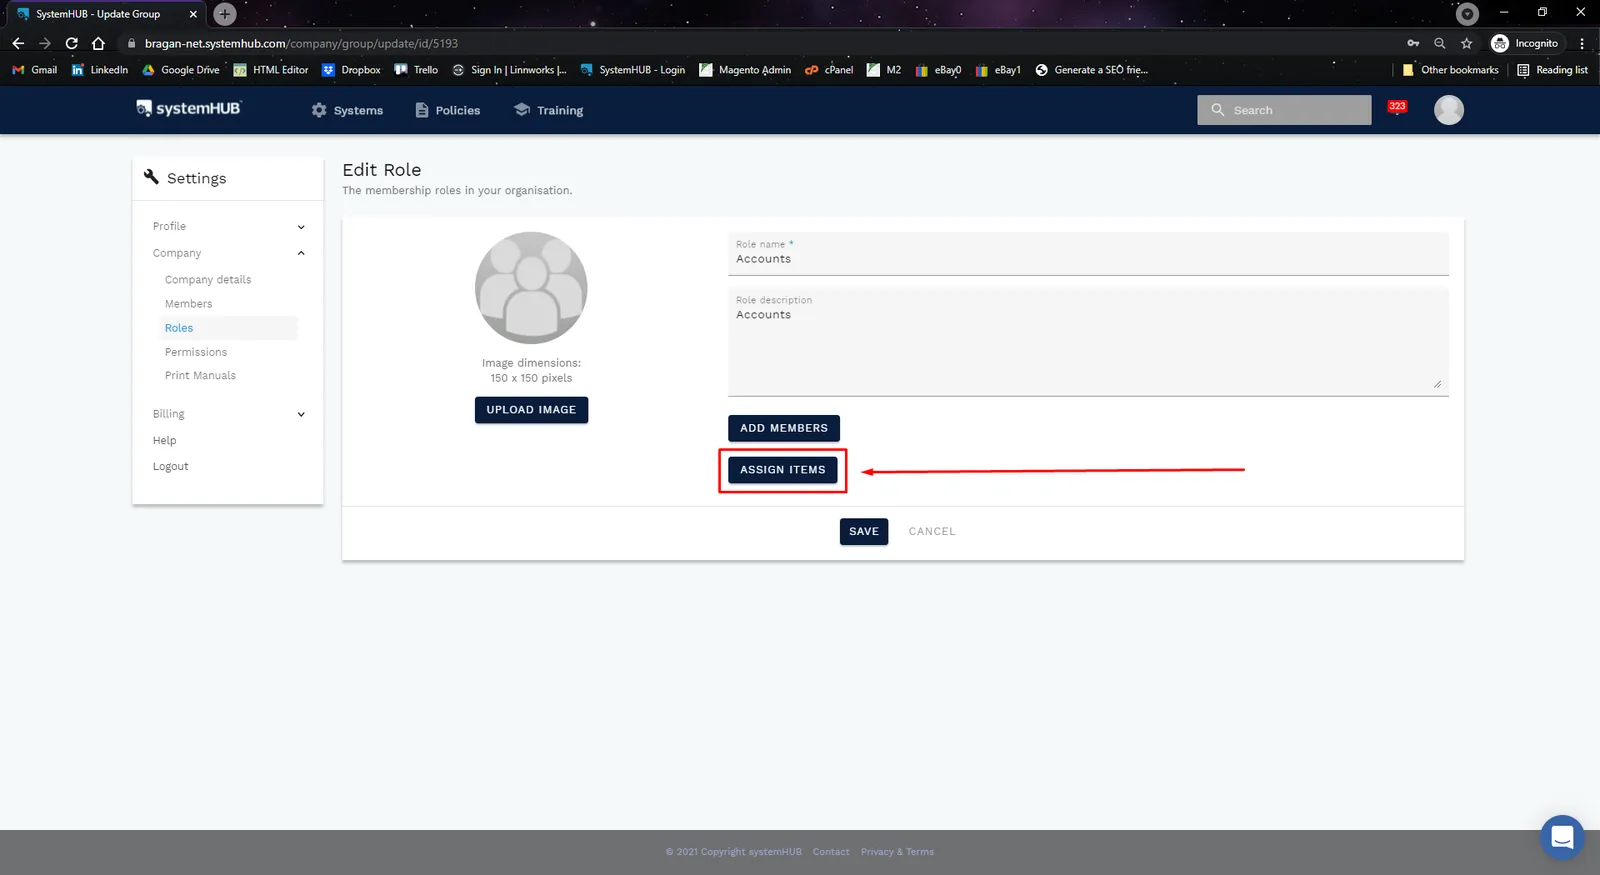
Step 2. Located on the left side, under Company, click Roles, see Fig. 1.13.
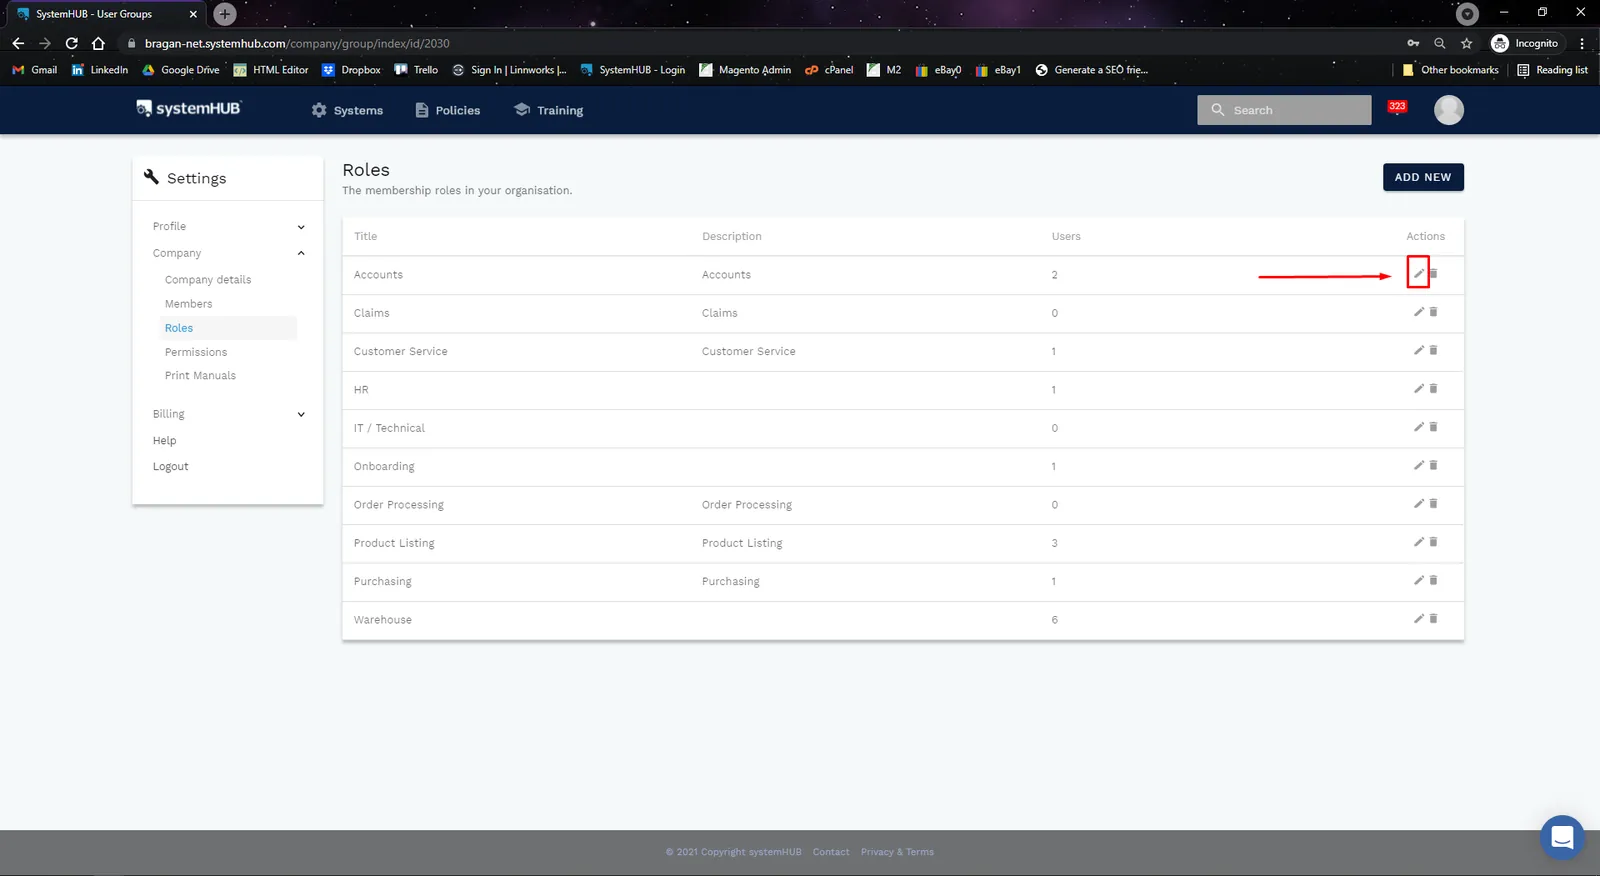
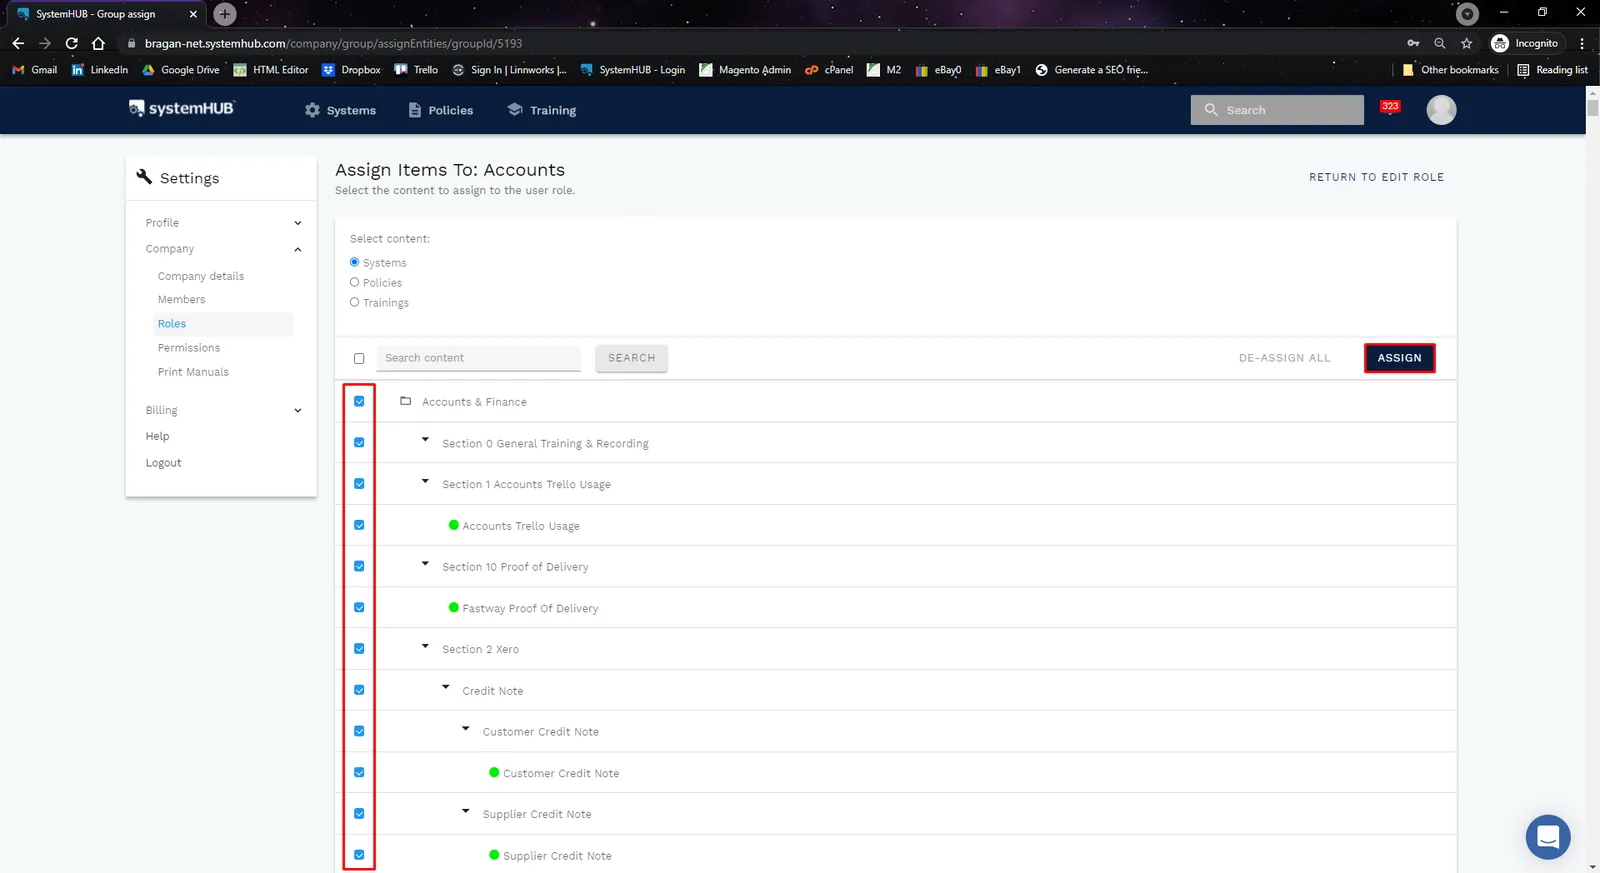
Step 3. Choose the Department you want to assign a system, then click Edit Button (pen icon) Fig 1.14. Then click Assign Items, see Fig 1.15.
Step 4.
Tick the box of the system you want to assign to this department. Then click Assign. See Fig 1.16.
Notes#
This section is important so Adhoc points and issues can be logged. Also, Q&A can be logged for suggestions for potential issues encountered. Also, log important notes needed for this system. Additional Notes:
When adding members make sure that all the details are correct and the right type of user and relevant data has been selected.
Potential Issues:
1 - ISSUE ENCOUNTERED: Stuck on Loading
RESOLUTION: Refresh Browser
2 - ISSUE ENCOUNTERED: Broken Links
RESOLUTION: Get the external link as this will allow other people to access the SOP without the need for login credentials and avoid broken links.
Attachments#
How_to_Add_Members_in_Sys… 16/12/2025
How_to_Assign_Role_to_Mem… 16/12/2025
How_to_Assign_System_to_a_… 16/12/2025