How to Create, Acknowledge, Format & Share a System
SystemHUB is Bragan’s Procedure Management Tool.
Overview#
Purpose: SystemHUB is Bragan’s Procedure Management Tool. The purpose of this document is to outline to new and existing staff how to Create Systems in SystemHUB.
Scope: This procedure applies to all Bragan personnel.
Responsibility: It is the responsibility of each employee to ensure the process set out in this procedure is followed.
Objective: The objective is to standardize the way on how to create a system in SystemHUB so all Bragan personnel have the knowledge to create a System efficiently and correctly and to avoid potential issues.
Process Flow#
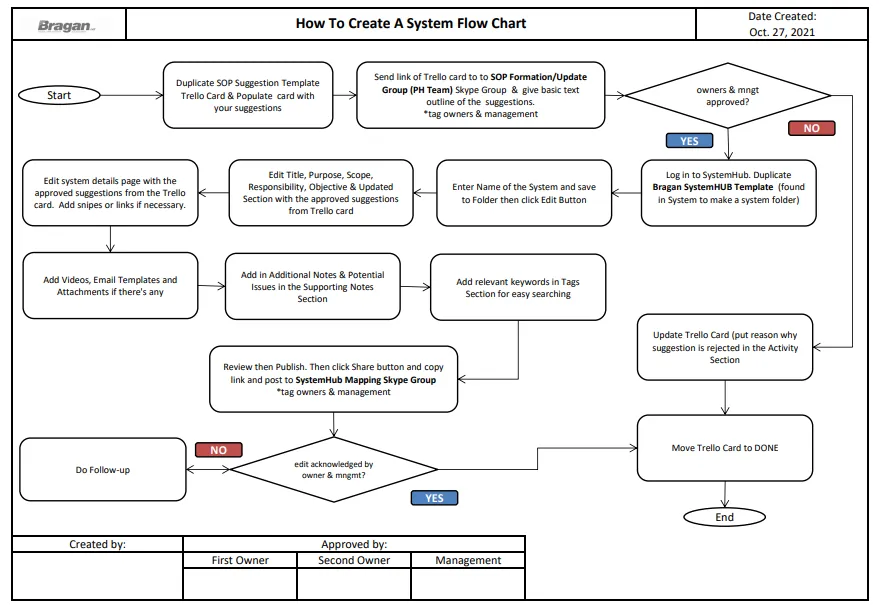
Flow Chart Format
Creating a System#
Step 1.
Duplicate the template card for SOP Suggestion in the "Bragan PH Team Task / SOP Board". Refer below for the template links. Read the Instruction for New System Requests.
SOP Suggestion Template for:
"For New System/Large System Edit
Trello Card should be Based on Subfolder as oppose to every individual system - for example System to make a System SOP over haul, the card should contain all aspects rather than a card for individual aspects.
This card should be populated with all relevant content - Requested picture Snipes to add to system, Issues, Reason for requested edit and below checklist strictly followed. This card is then posted to the SOP Formation Skype Group for edit confirmation, Both Owner and Second owner should be tagged and edits applied on same day of request.
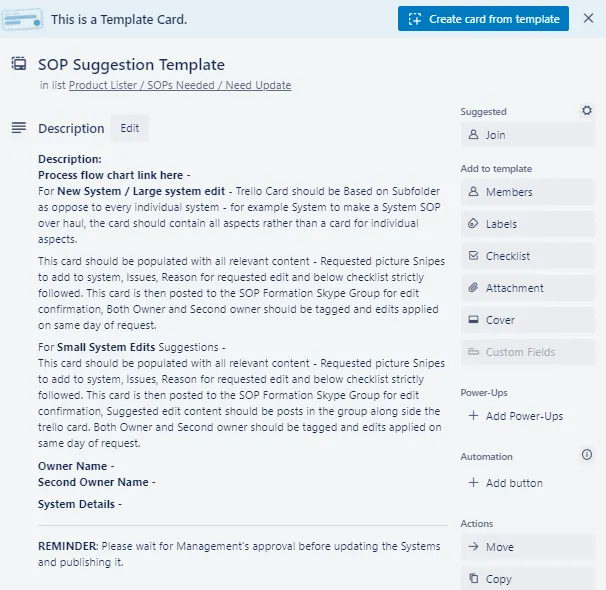
NOTE: Offer a Summary of the specific points and step-by-step process to be done in the system. Include snipes of what needs to be included in the system. The template card should be complete and contain all the information to be added.
Step 2.
Send suggested comments and Trello card link to the "SOP Formation/Update Group (PH Team)" Skype Group. Then tag the First Owner, the Second Owner and the management (James) and wait for their approval regarding the new system.
NOTE:
First Owner - The person with the most knowledge and the one who would be primarily doing the tasks in the SOPs.
Second Owner - Should have as much knowledge as the First Owner but would usually only need to do the tasks when the First Owner is unable to do them. Usually the one to check if all points are addressed for the new system. Quality checking.
If suggestion is disapproved, update the Trello Card by writing in the Activity Section the reason why it was disapproved and move the card in the DONE List found in "Bragan PH Team Task / SOP Board".
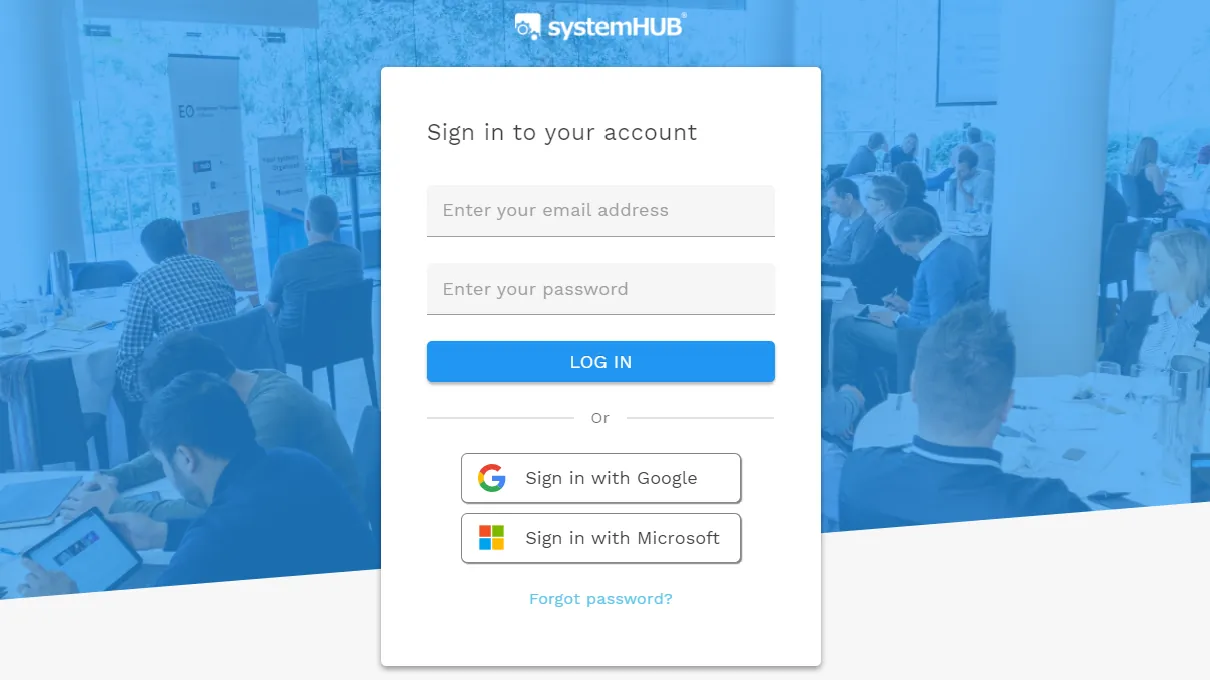
Step 3.
Once approved by the owners and the management, go to SystemHUB and log in using credentials provided by management.
Step 4.
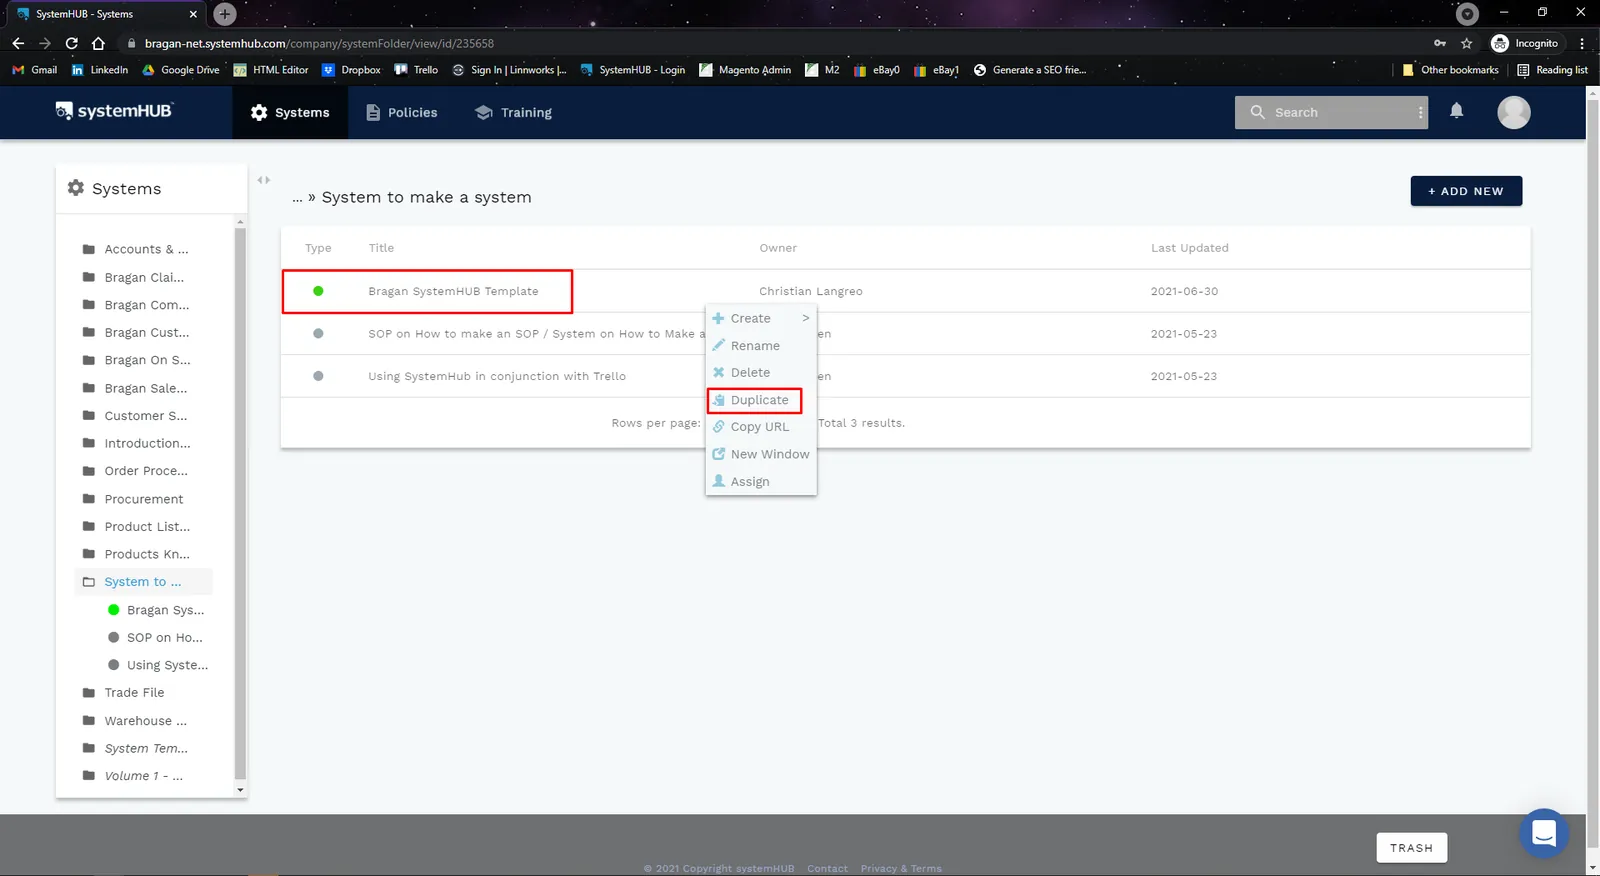
Click on Systems, and then open Systems to Make a System folder.
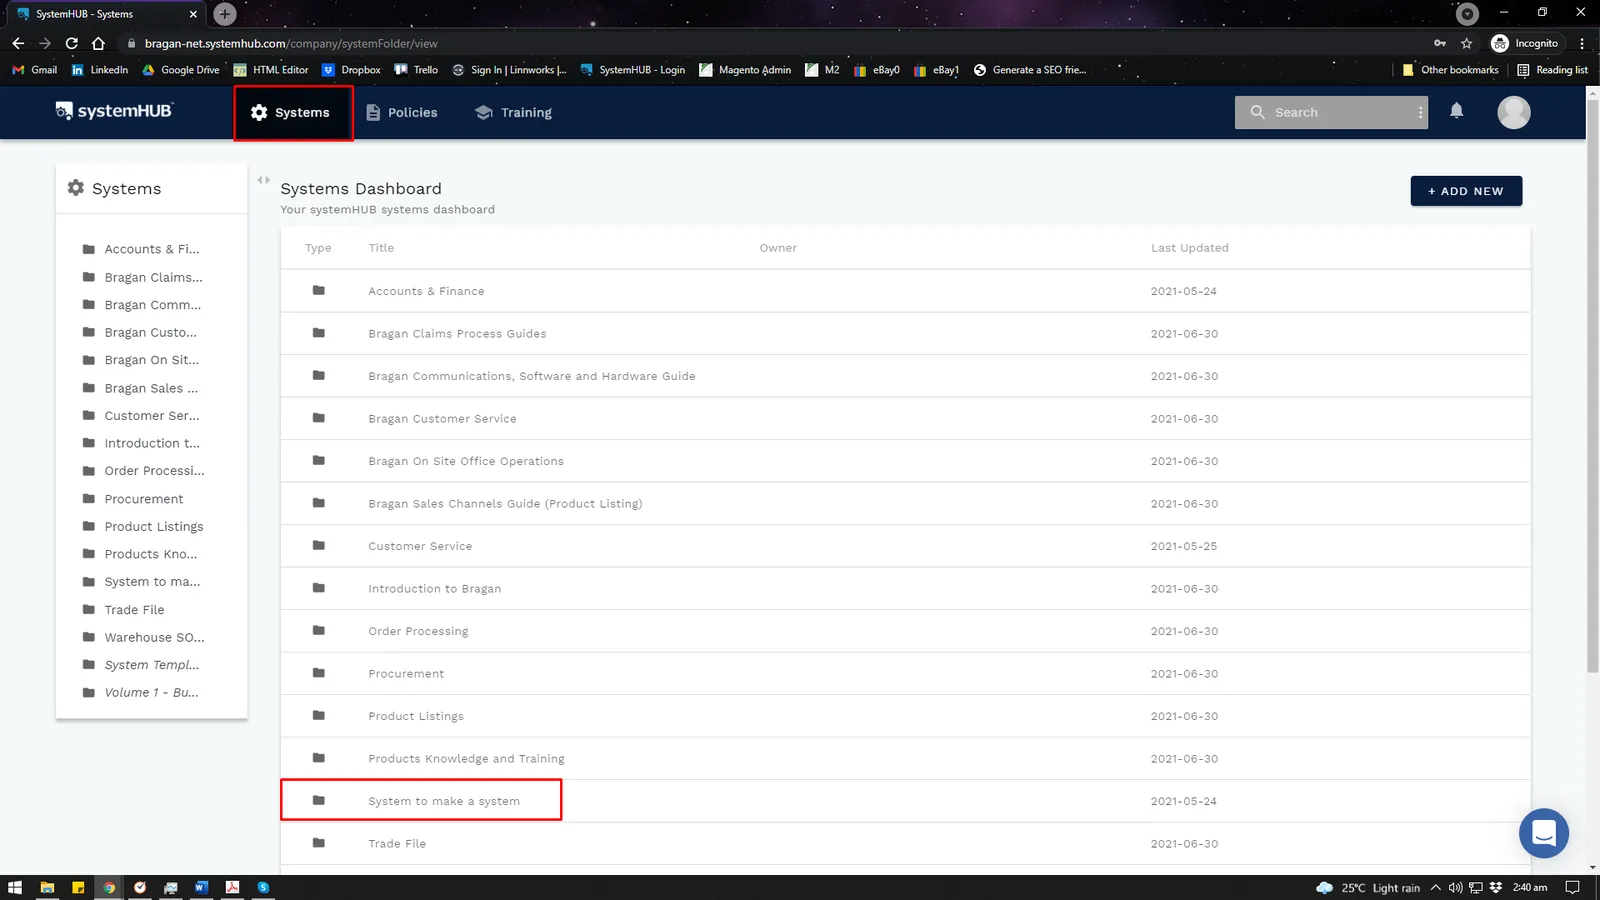
Right-click Bragan SystemHUB Template and click Duplicate. Note: Do not create new template.
Step 5.
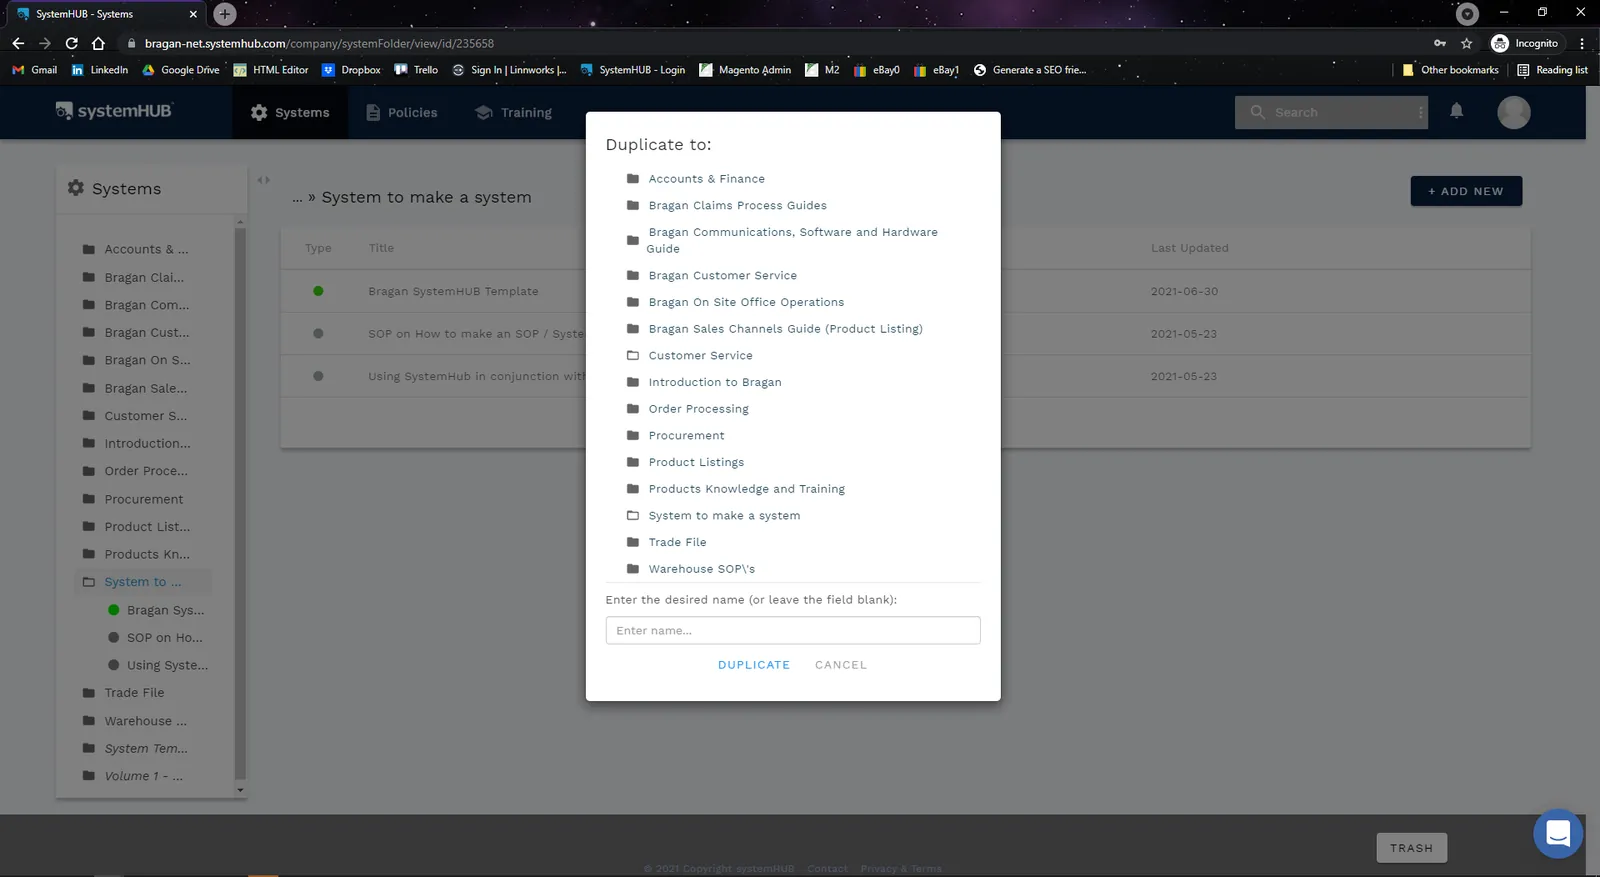
Enter the name of the System and select the appropriate location or folder to save the system.
Step 6.
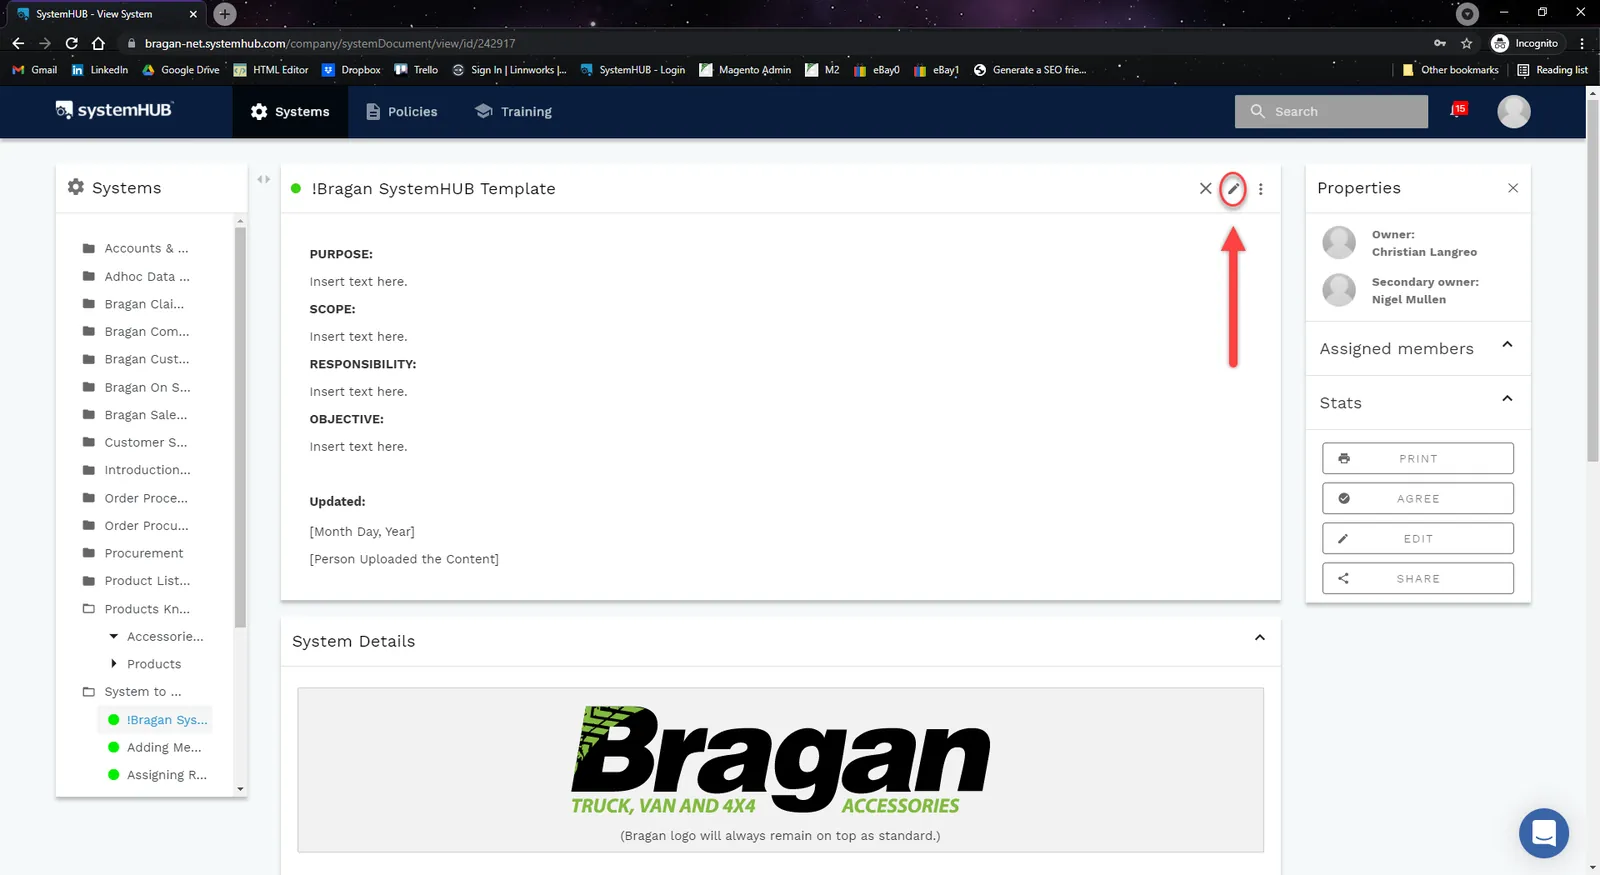
Click on the Edit Button (pen icon) to start editing the template. Make sure to add only the approved suggestions in the Trello card.
Note: Template Sections
This is where the content of a System is inserted, whether it be creating a new one or updating an existing one. The content is divided into sections and each section has its purpose on which kind of content can be inserted on it.
(Assuming that you're on the duplicated System, the Picture's below are for reference only)
Step 7.
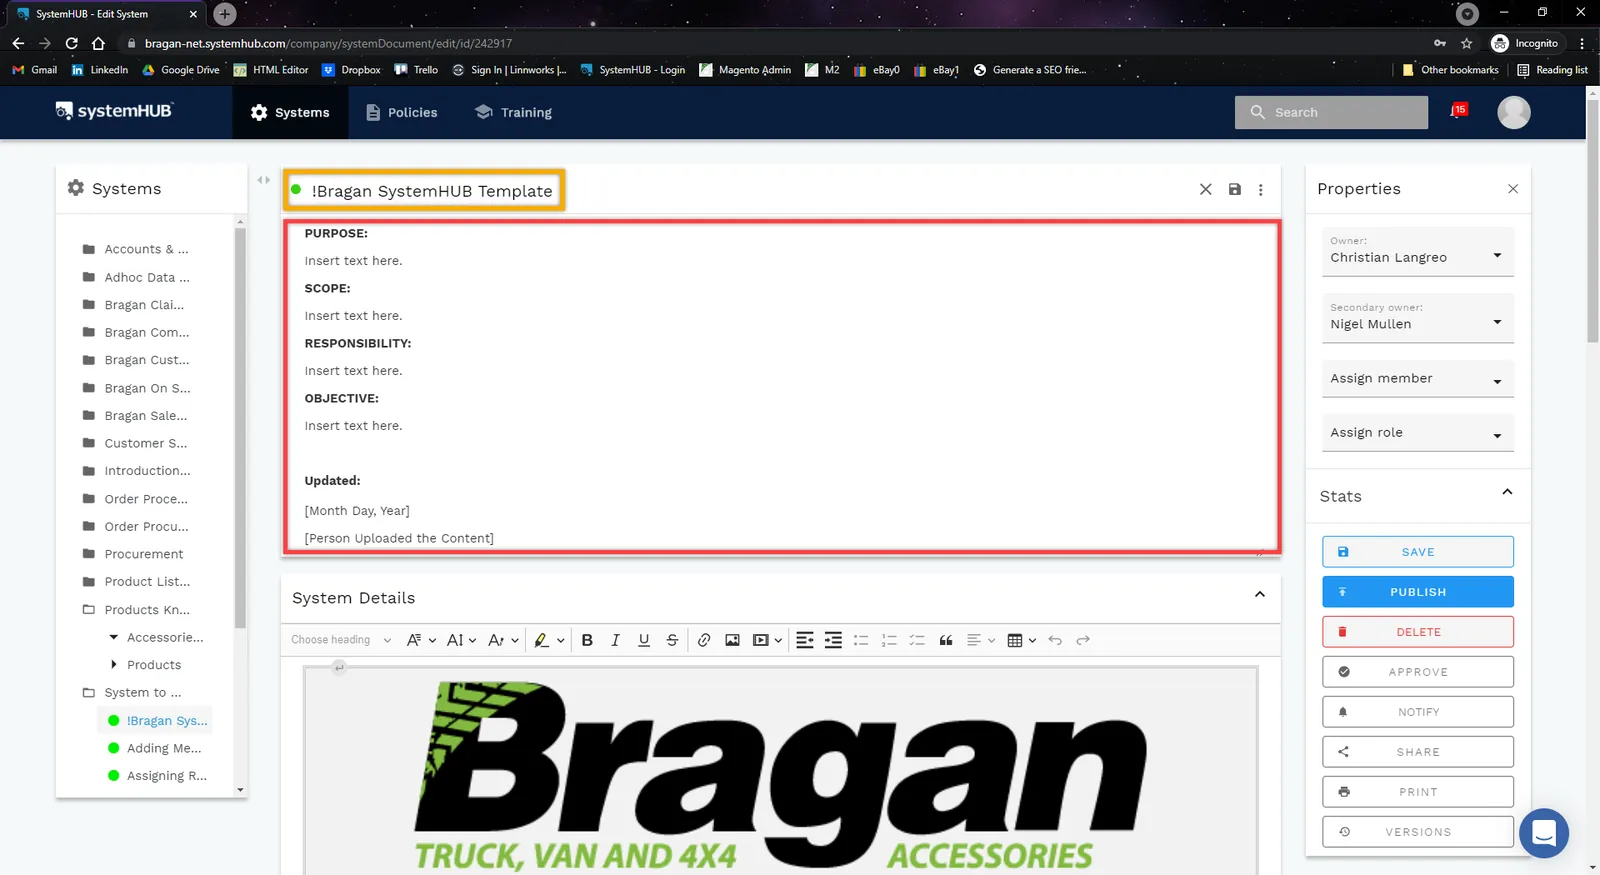
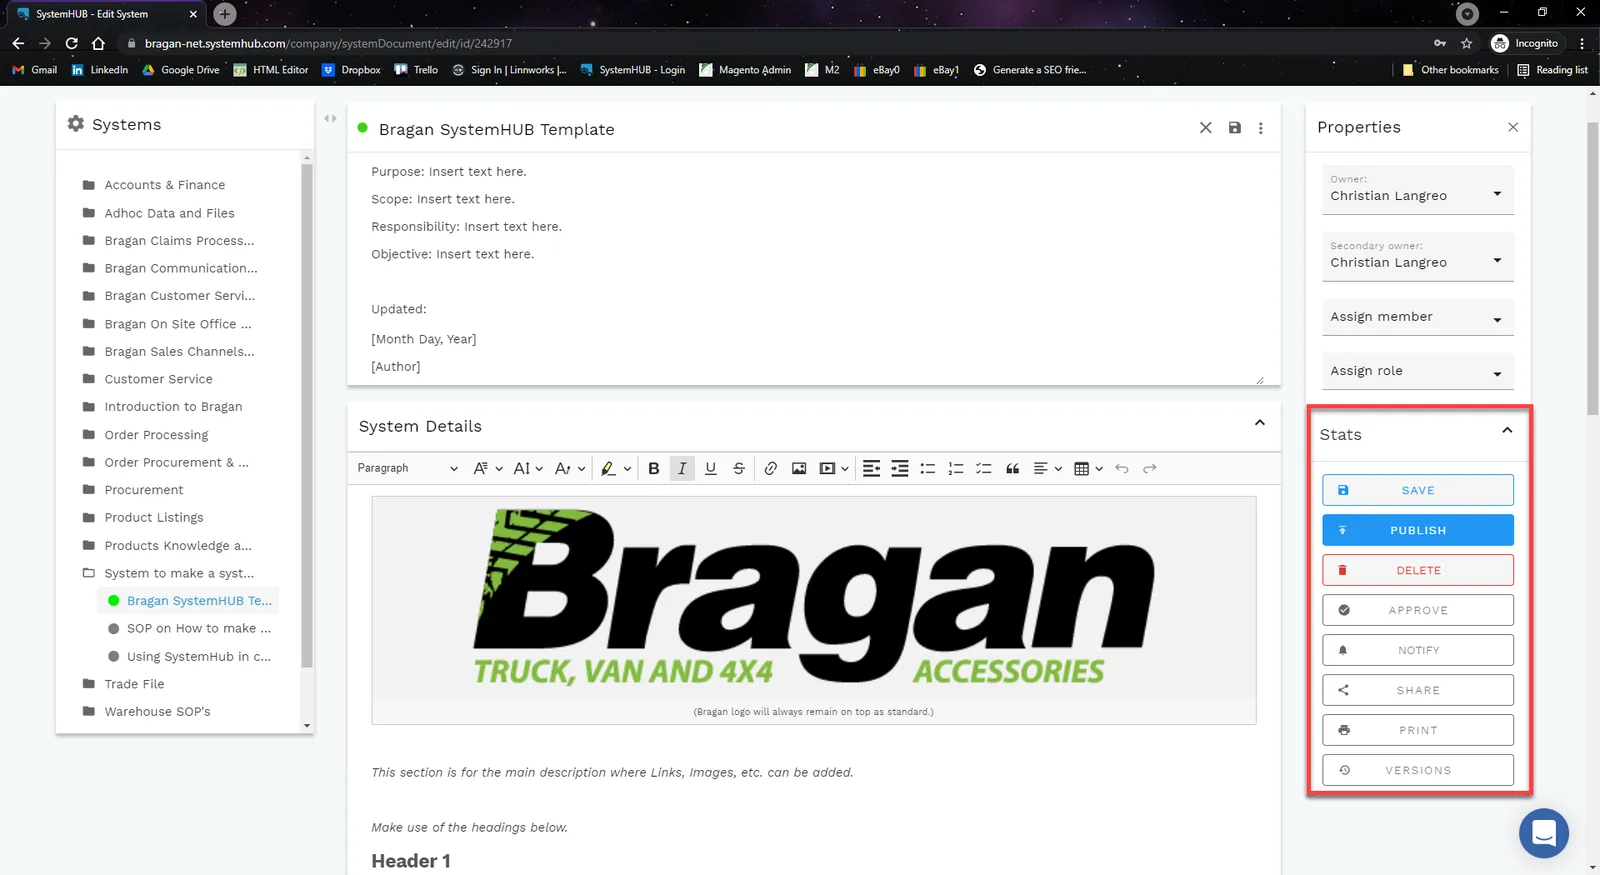
Type in now the Title of the System (Yellow box & should be the same name you input in Step 5), then fill in Purpose, Scope, Responsibility, Objective and Updated Sections (Red box).
Step 8.
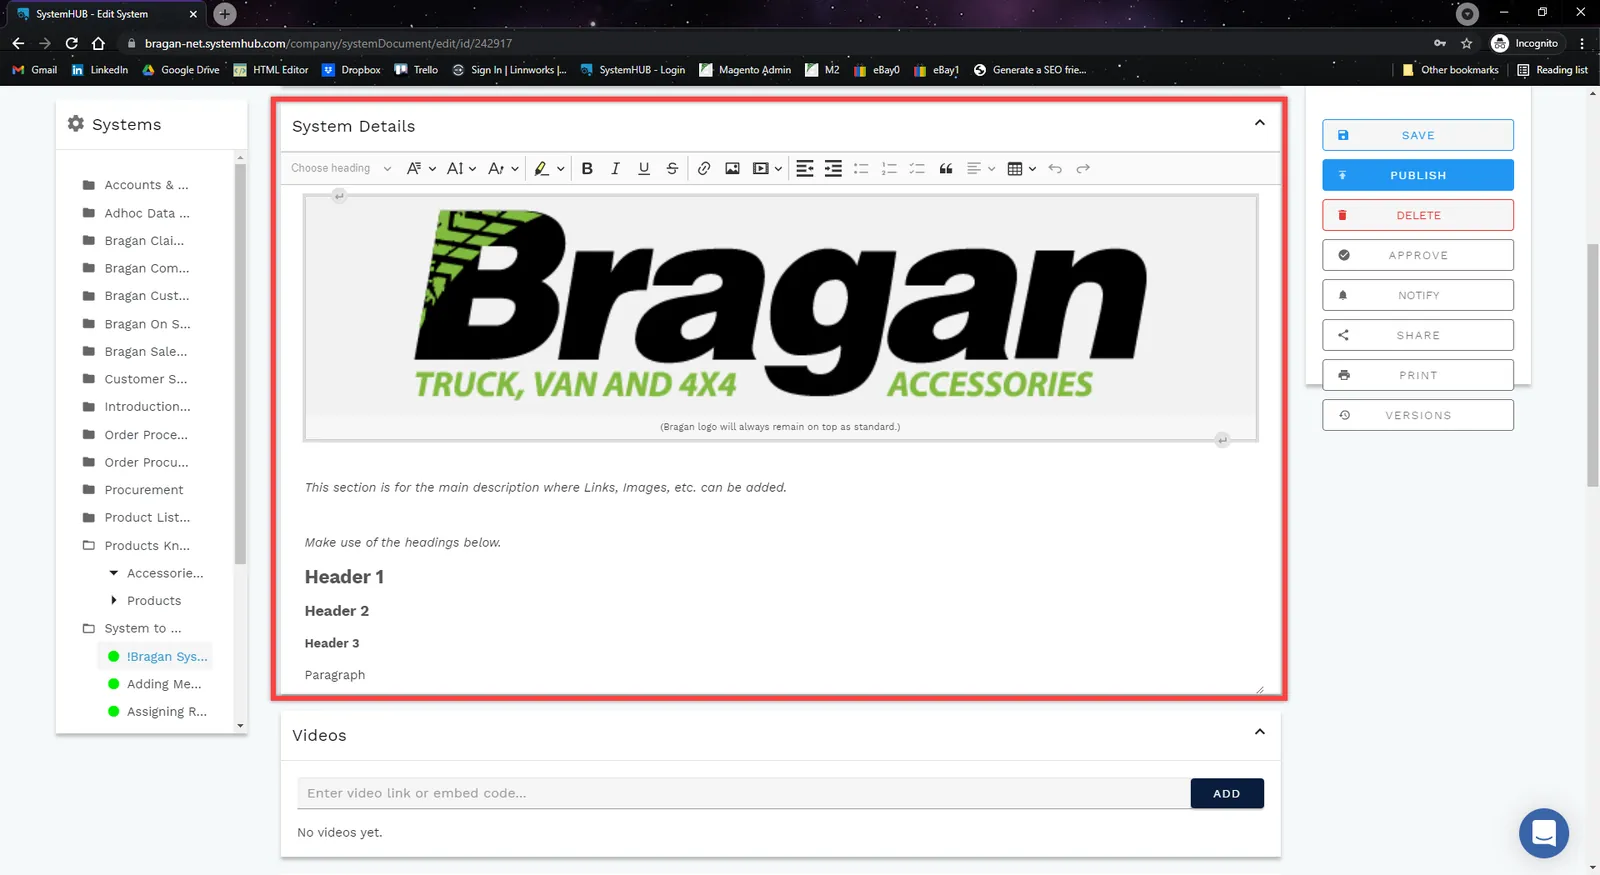
Go now to the next page which is the System Details. In this page, type in the step by step process of the SOPs along with related links, images, etc.
Note: Bragan Logo should always be on top. Make use of headers and do not forget to remove the reminder note on the Logo’s caption after duplicating the template.
Step 9.
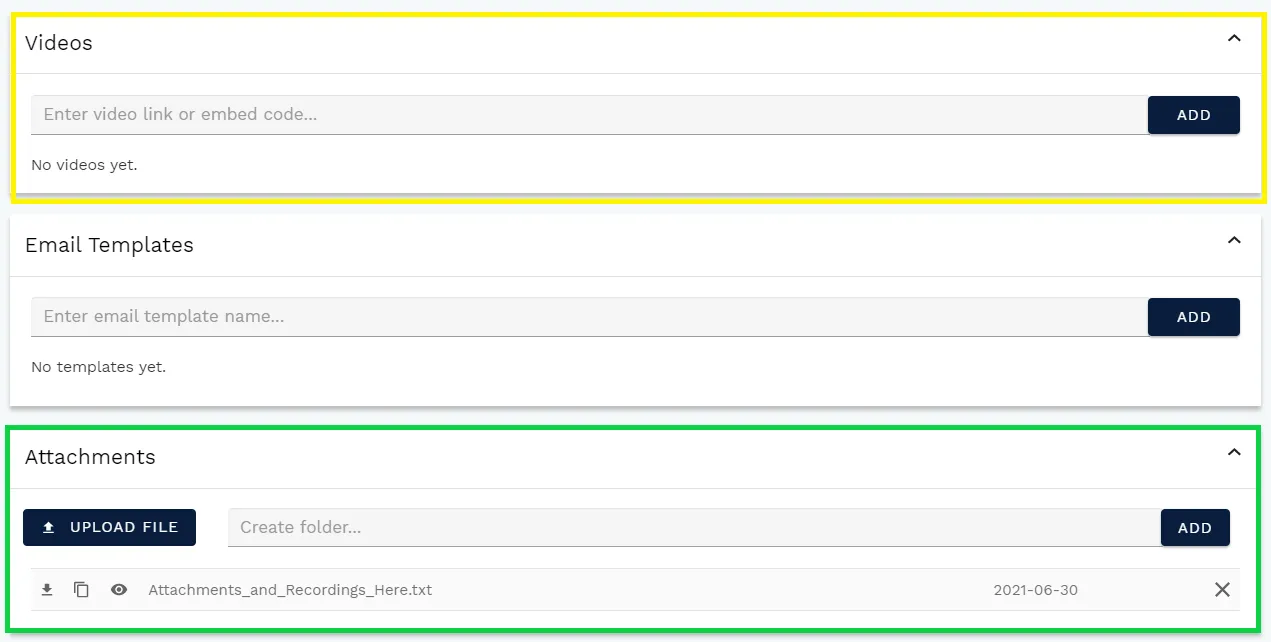
In the Video Section (Yellow box), add in videos related to the system you are creating (ex. Actual screen share on the step by step process). Just insert the video link.
Add also email templates, if necessary, in the Email Template Section.
In the Attachment Section (Green box), upload relevant attachments of the SOP for better understanding e.g., Flow Charts, Recordings etc.
Flow Chart#
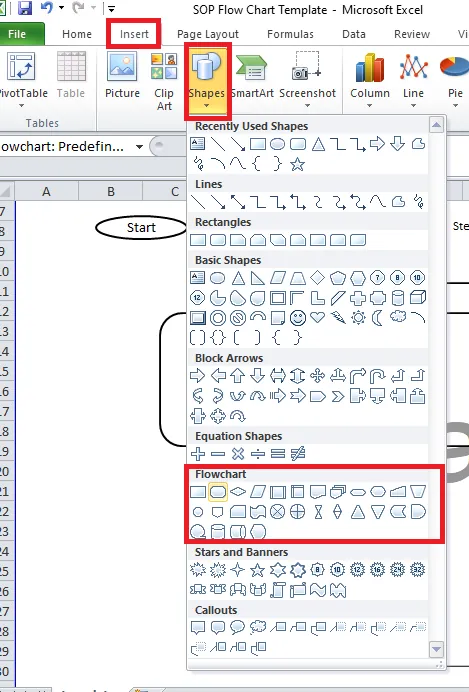
In creating a flow chart it should only have one start and one end (one continuous loop). Please make sure to use the correct shapes in creating the flow chart. You can use Microsoft Excel for this, just click Insert > Shapes > Flowchart.
- This should always be put at the start of the process flow.
- This should always be put at the end of the process flow.

- Use this symbol for every process/step in the flow chart

- Use this if there is a decision involve in the process.

- Use this if you want to reference other SOP related to the flow chart you are creating
- Use arrows to connect each steps
Note:
Every system that involves a step by step process needs to have a flowchart. This flowchart should be added as an attachment and not as a Dropbox link, this way the flowchart is saved within SystemHUB.
It should also be added as part of the body of the system, preferably at the very start of the SOP so that the person reading it will have an overview of the process.
See attachment for the template for the flow chart.
File name should be: the Process Title then always add the word Flowchart. Example, for how to create a system, file name of the flow chart should be How to Create a System Flowchart.
Flow Chart Format
Step 10.
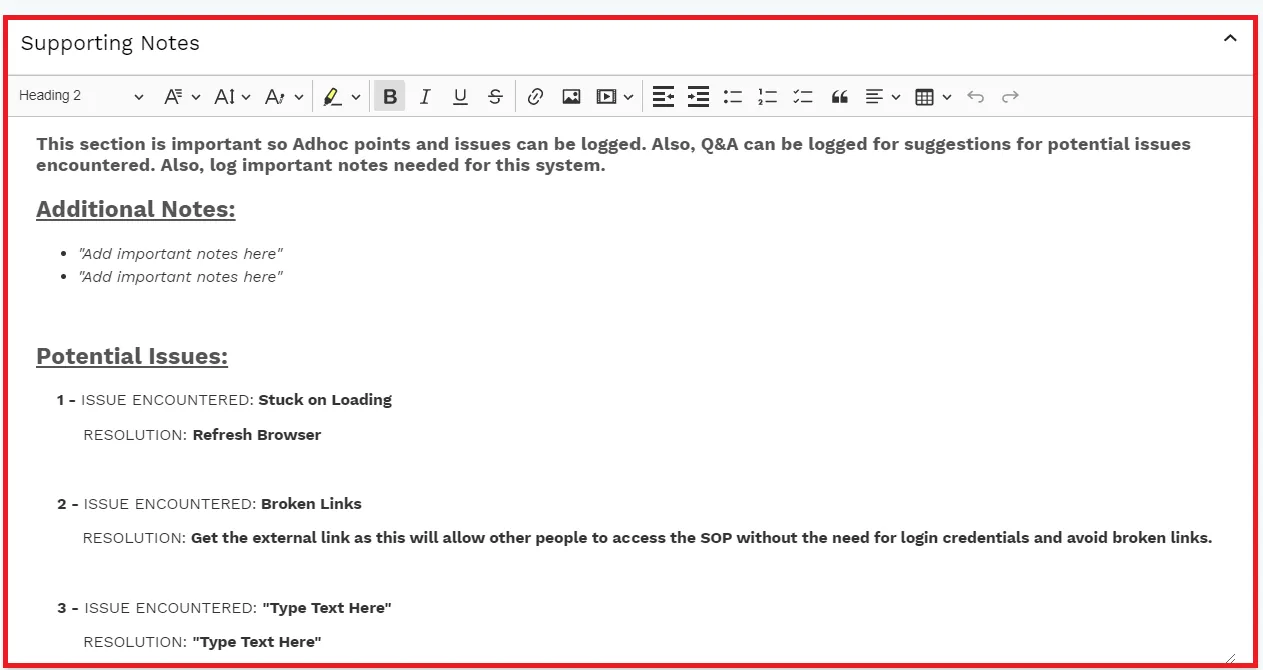
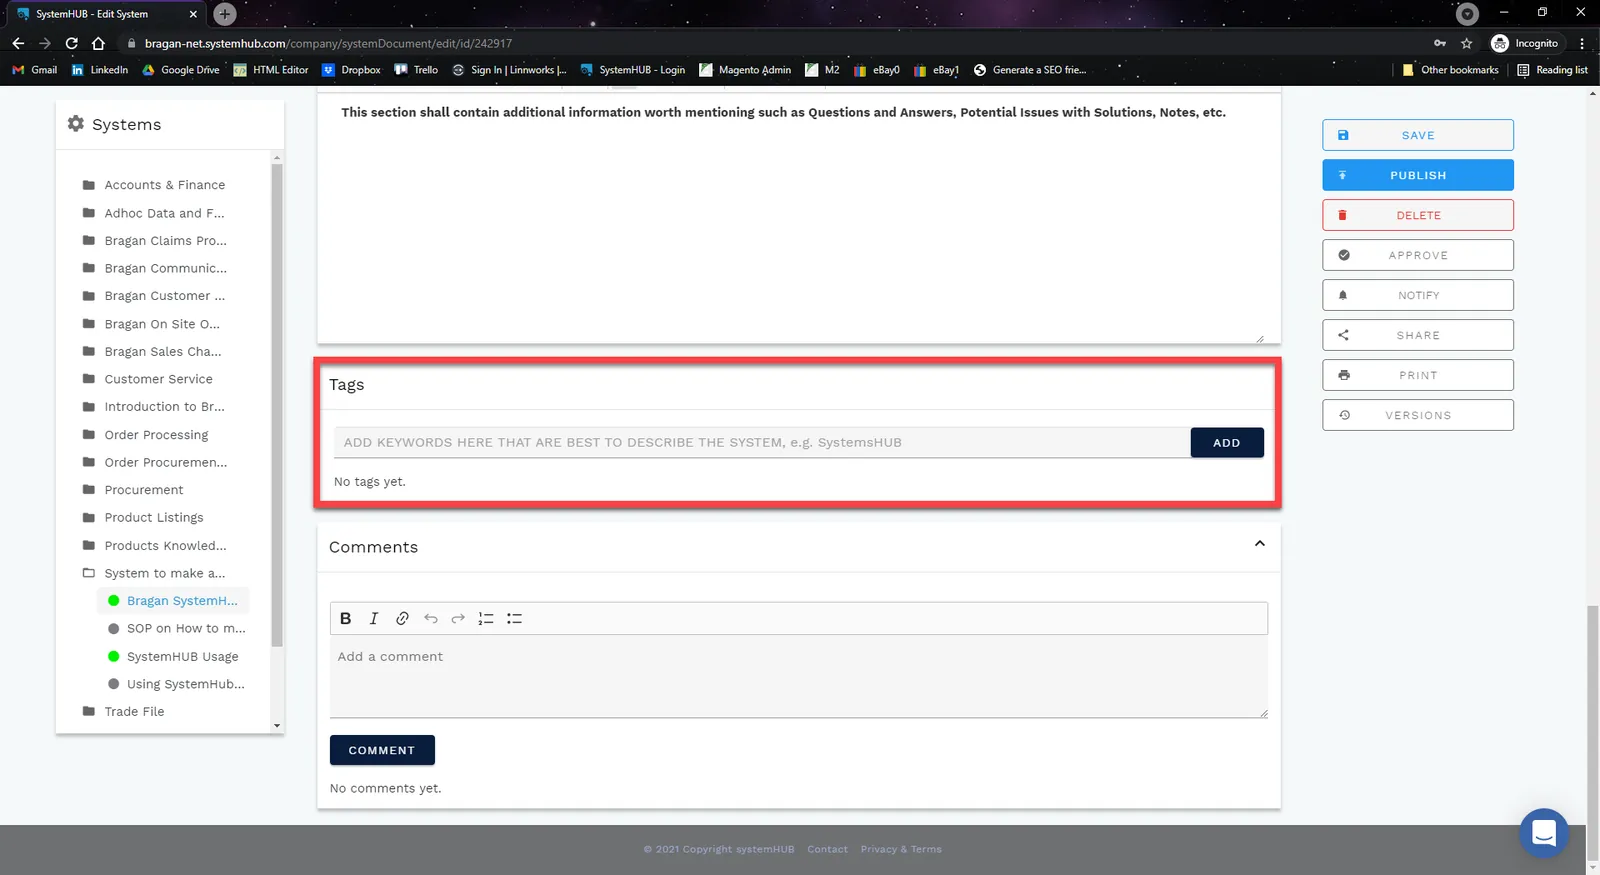
The Supporting Notes (Red box) is where additional information of each System for Q&A or suggested solutions to issues encountered. This is very important so Adhoc points and issues can be logged, notes, etc.
Add important details to point out or highlight in the Additional Note part.
Potential Issues part is like a Q&A part. In here you can add potential issues that can occur in doing this system and then add its resolution.
Note: Make sure to follow this template so that agents may easily view the important notes for the system, the potential issues encountered and the resolutions done to solve the issue.
Step 11. On the Tags Section, add keywords that are best to describe the System for easy searching purposes, e.g., create a system (for this SOP)
Step 12. Review everything to apply the changes, navigate to the right portion area under the Stats, and click Publish.
Step 13.
Once published, this new system needs to be acknowledged by owners and management. Please see Steps below for System Acknowledgment.
Note: We follow the system until we change the system
System Acknowledgement#
This can be utilized to check and see applicable members if they had acknowledged the System.
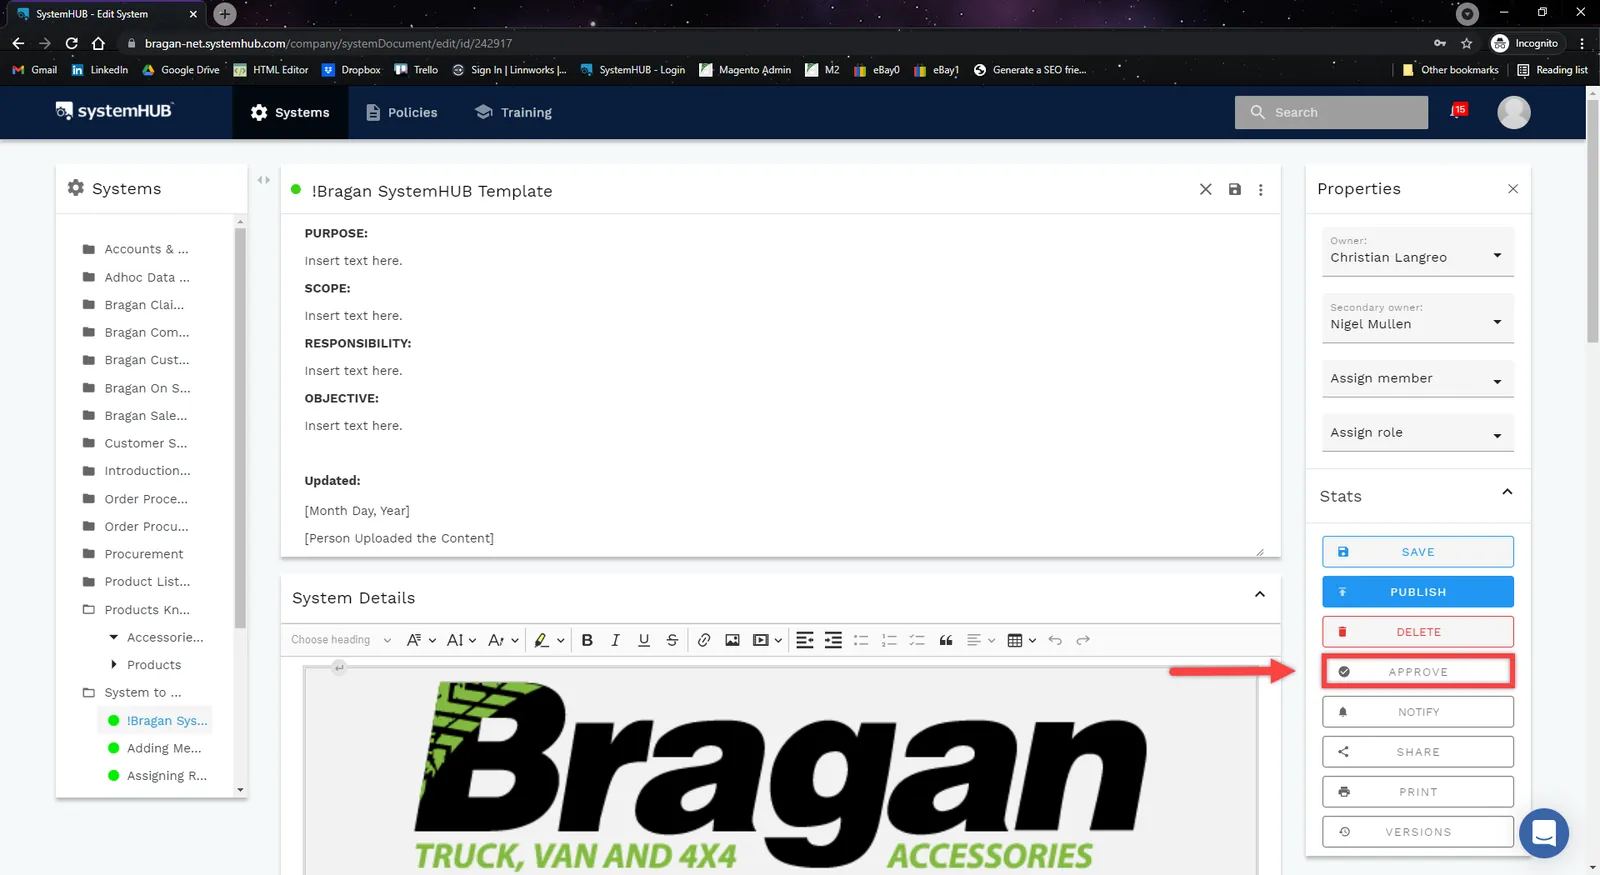
Step 1.
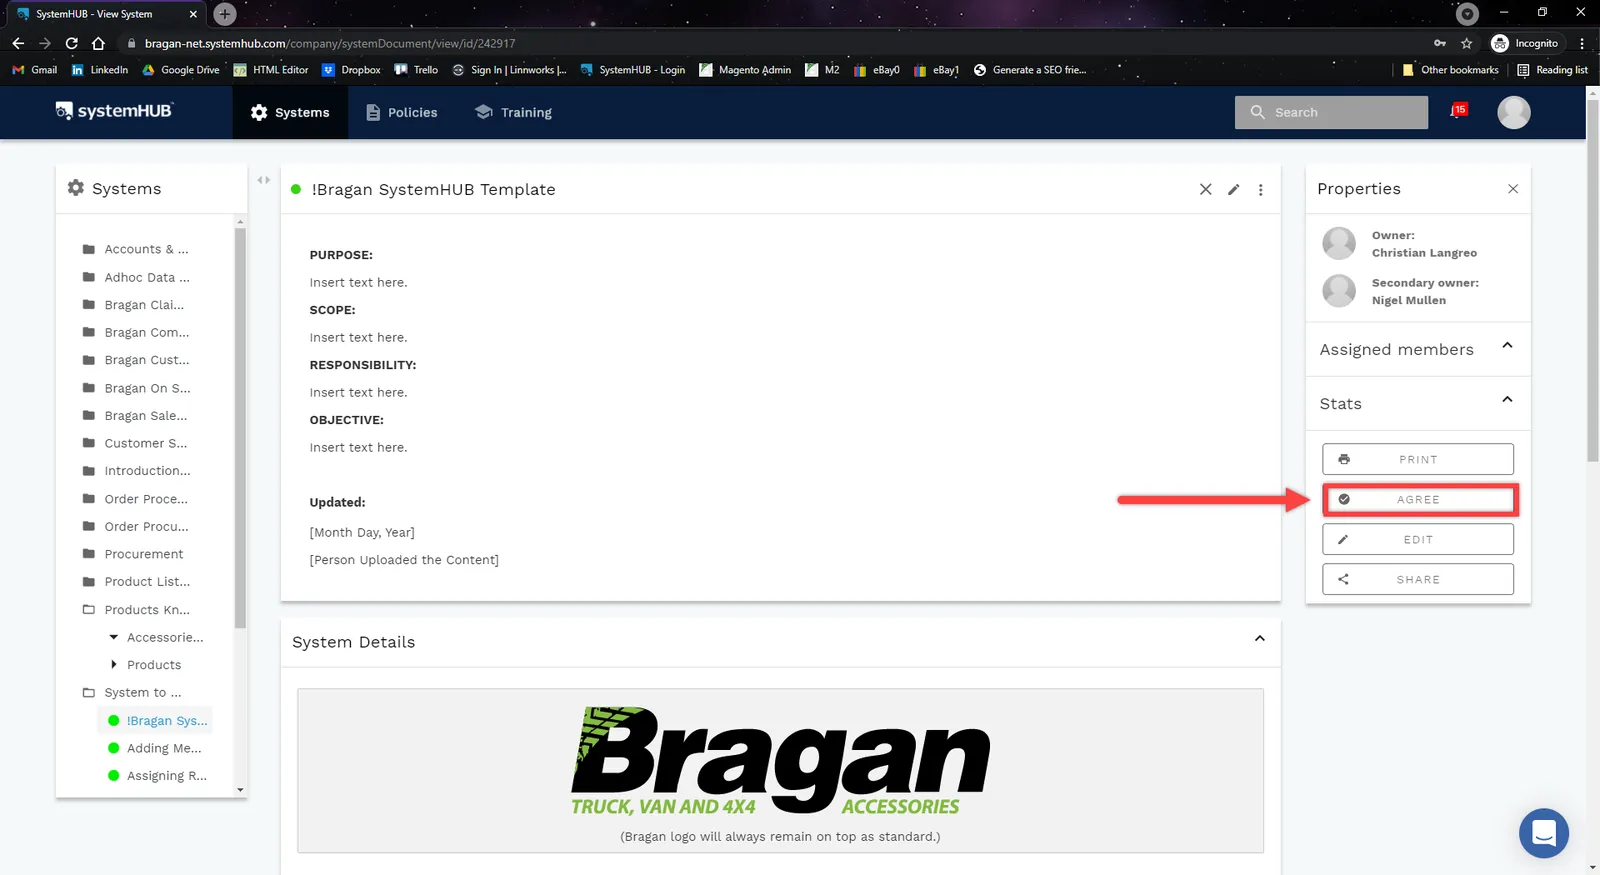
Click Approve under the Stats tab.
Step 2.
A window will popup, showing members applicable to the System and status in the form of Yes and No, indicating if they acknowledged the System or not.
You can add /remove members here. Make sure all are relevant to the created SOP and the goal is that all members should be YES in status.
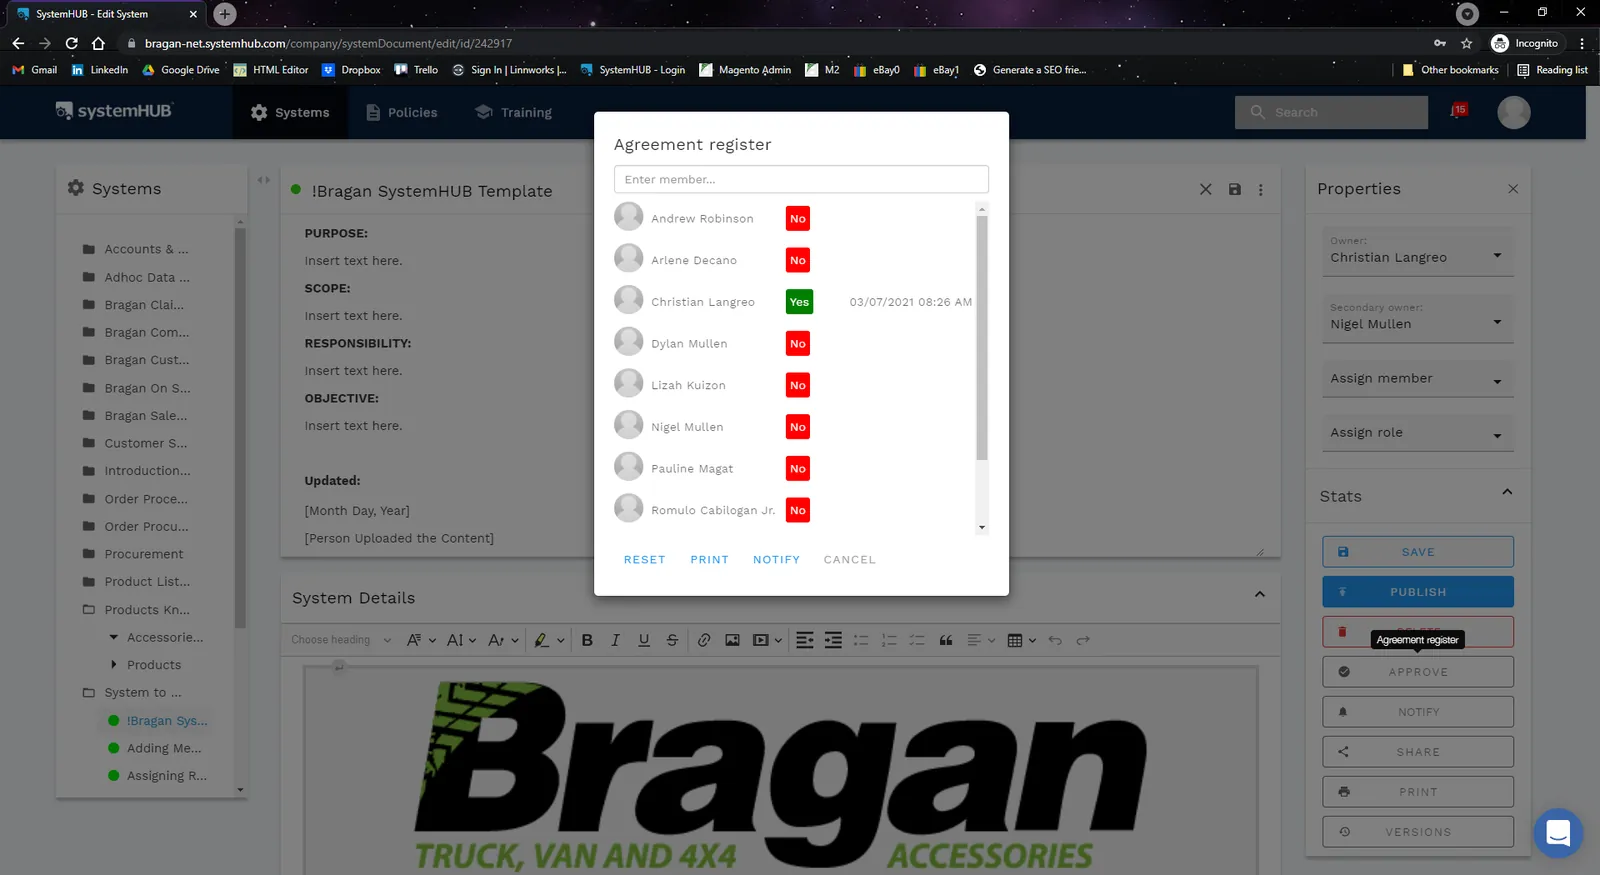
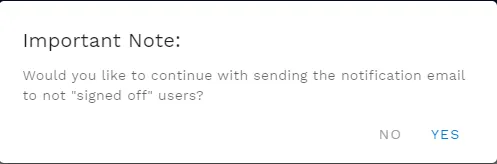
Step 3. You can send notification for the members to prompt them to acknowledge the new system. Just click on Notify.
Step 4.
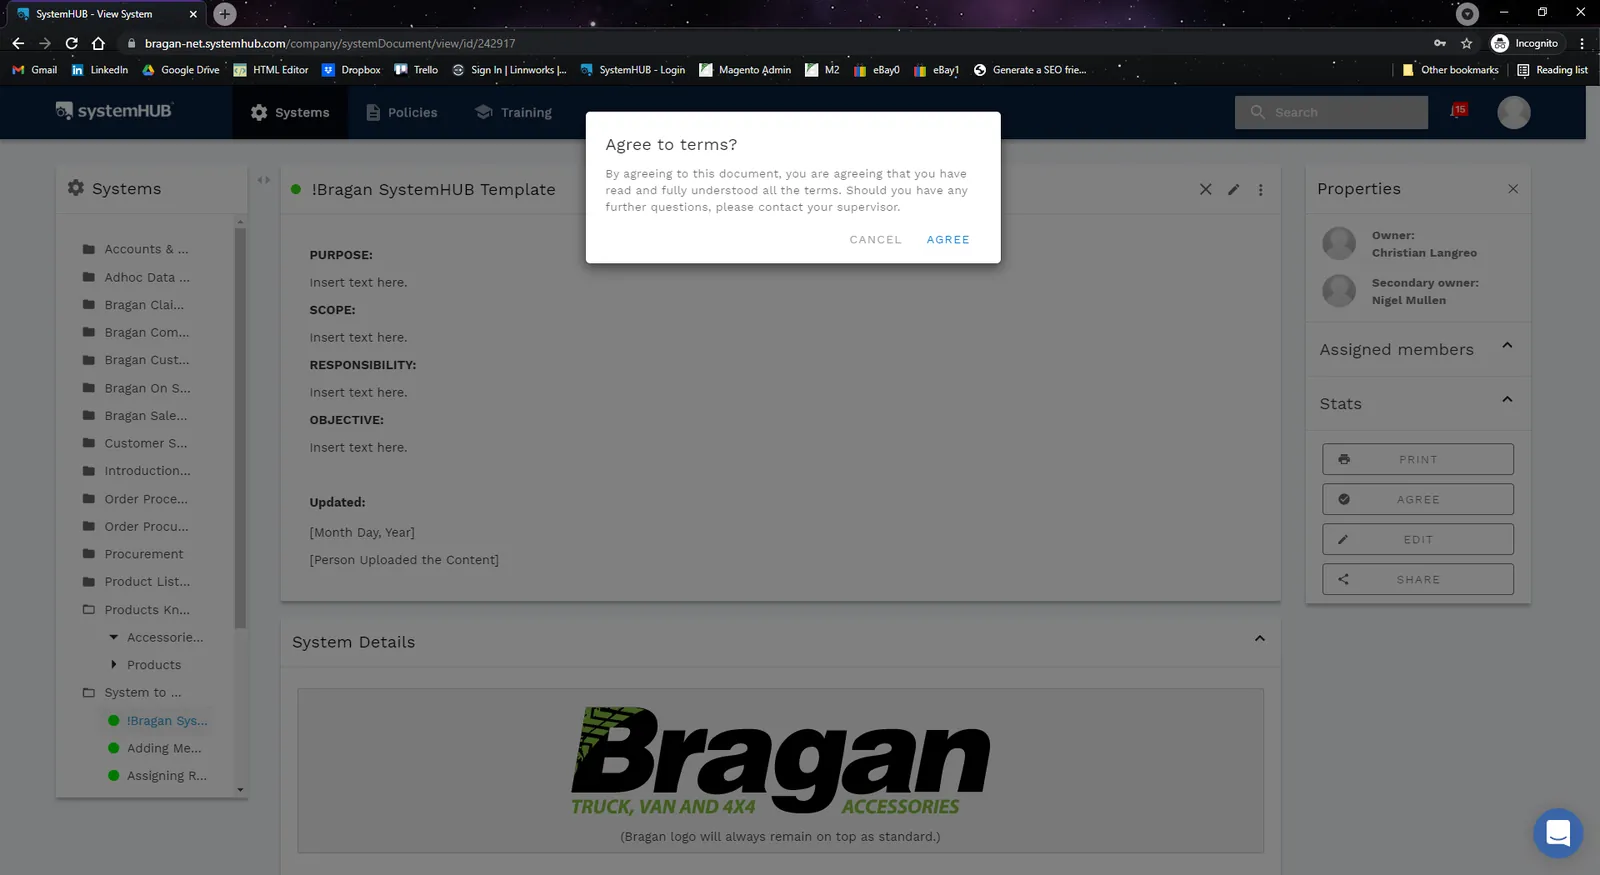
Relevant members will acknowledge the system by clicking Agree.
Note:
The new system created is not considered complete until it has been agreed as complete by the management, and first/second owners. Taking into account the suggestions by the group.
A System can also be acknowledge by sharing the link of the System in "SOP Formation/Update Group (PH Team)" Skype Group and tagging the Owners and Management. Please see steps below for Sharing a Link of a System.
Share or Link a System#
A system can be linked to Trello Cards that can be used as a reference for agents. Also, a system can be attached to a macro file when sending out emails. The best practice to share or link the system is to get the External URL of the system.
Step 1.
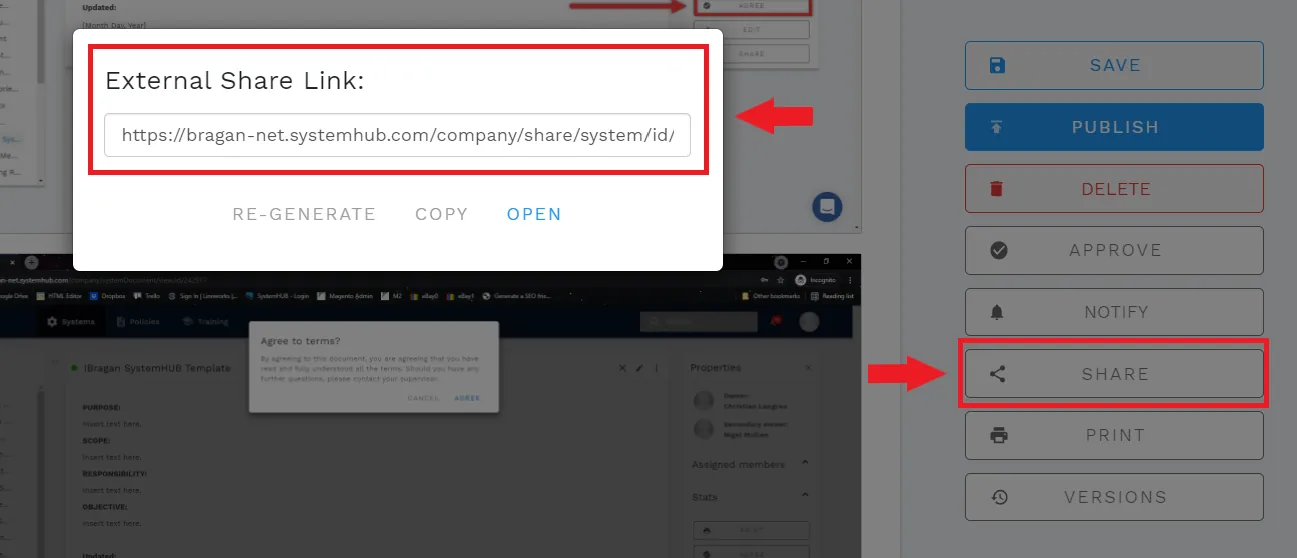
Get the External URL of the system by clicking Share.
Note: External link is the best practice since it allows for the system to be accessed without the need for login credentials and prevent potential error for broken links.
Step 2.
External Share Link pop-up window will appear, just copy the link provided.
This link can then be send to "SystemHub Mapping Skype Group" for system acknowledgement.
Can be used to link it to your Trello cards or can also be used to attach the system to a macro file when sending out emails.
Note: Once the system is acknowledge by owners and management, move the Trello Card in the DONE List found in "Bragan PH Team Task / SOP Board".
Notes#
This section is important so Adhoc points and issues can be logged. Also, Q&A can be logged for suggestions for potential issues encountered. Also, log important notes needed for this system.
Additional Notes:
The system should be very detailed and training-oriented.
It is important to add Snipe images to give a better example to help agents understand better.
It is important to provide a step-by-step process if applicable, to serve as a reference to all agents.
It is important to use the external link of the new system created especially when the system is needed to be linked to a Trello Card, Macro Files and if shared the system is accessible without the need for login credentials.
Make sure that the management, the first and second owners has agreed that it is complete before finishing the checklist for the Trello Card.
Always add a flow chart for systems with step by step process. Add it as an attachment and not as a Dropbox link.
Using Dropbox link is not encourage since this is not permanent (personally owned) and if the agent is not with the team anymore, this link will be broken in the system.
When you add a links, do not just paste the link, instead use hyperlink or the Link Button so that it will be neater.
"We follow the system until we change the system"
"there's so many things to remember - and to remember always to update system"
For easy process flow capture you can use the Tango Chrome Extension. Click on the link to download the extension and also see the video on how to use it.
Potential Issues:
1 - ISSUE ENCOUNTERED: Stuck on Loading
RESOLUTION: Refresh Browser
2 - ISSUE ENCOUNTERED: Broken Links
RESOLUTION: Get the external link as this will allow other people to access the SOP without the need for login credentials and avoid broken links.
3 - ISSUE ENCOUNTERED: Two Copies of the SOP are Found in SystemHub
RESOLUTION: This is OK. It's suppose to be like this - some systems are relevant to multiple folders / roles.
Attachments#
How_to_Create_a_System_Flo… 16/12/2025
SOP_Flow_Chart_Template.xlsx 16/12/2025