How To Create Zendesk Macro
Using macros, you can respond to customers faster while reducing the chance of
Overview#
Purpose: Using macros, you can respond to customers faster while reducing the chance of making a mistake. The purpose of this document is to show how to create and used Zendesk Macros efficiently.
Scope: This process applies to all Customer Service Members both Team PH and Team IRL.
Responsibility: It is the responsibility of each employee to ensure the process set out in this procedure is followed.
Objective: This process is made to ensure an organized creation of Macros.
Process#
What is a Macro?
A Macro is a prepared response or action that an agent can manually apply when they are creating or updating tickets. Macros contain actions that can update ticket properties. Macros are a Zendesk term for ‘saved replies.’ Using macros, you can respond to customers faster while reducing the chance of making a mistake.
Again, Macro has the best chance of having the correct worded reply and additional aspects that we may not think of in real-time. Macro is the first preference reply to any email received.
Macros can perform tasks:
Add comment text Update ticket fields Add or remove ticket tags Add CCs Change the assignee Set the ticket subject Add attachments to ticket comments
Enable Macros in Zendesk Account
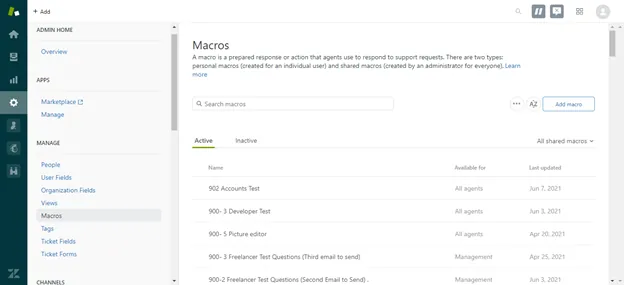
To access all our Macros, you’ll need to click the Admin (Wheel) button >> Manage >> Macros, and depending on whether you’re an admin/regular user, this is what you’ll see:
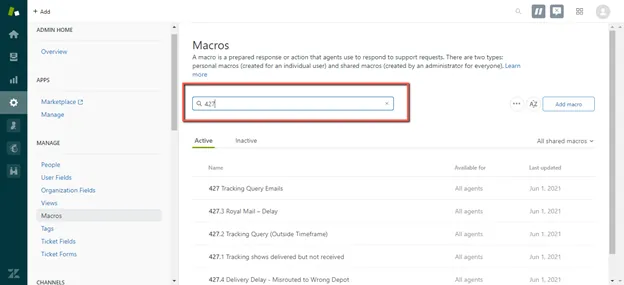
You can search for a specific macro using the search function.
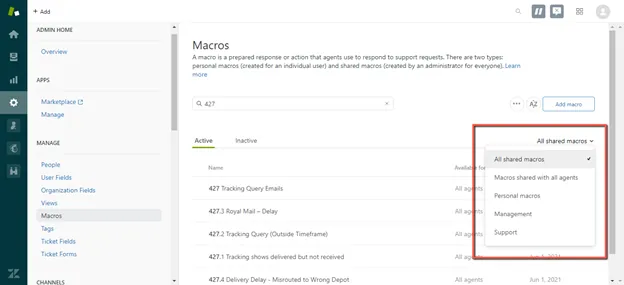
You can also sort through the Macros to only view Shared ones (everyone can view) or Personal (only you can view)
How to Create a Zendesk Macro
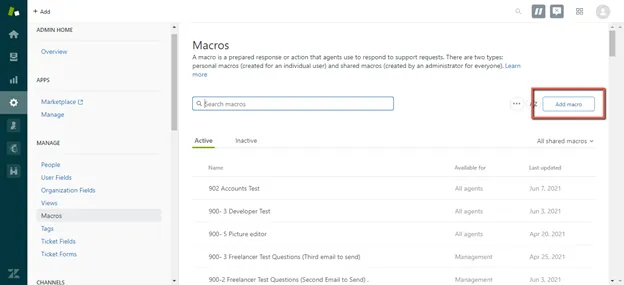
Now, to create a new macro - simply click on “Add Macro” or click on the existing ones to edit them.
Here’s what you’ll see when you opened up a Brand new Macro.
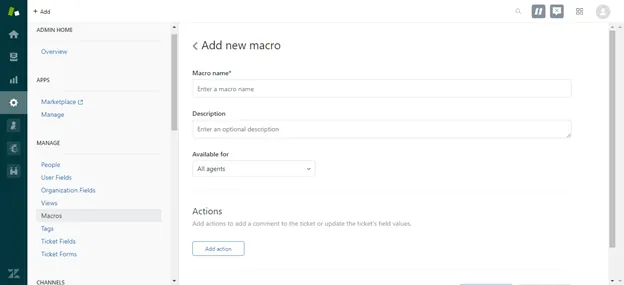
Components: Name/Title: “002 Location Inquiry”. Macro Number Metrics will be discussed below.
Note: Macro Title has to be concise and distinctive to avoid confusion and for the agent to easily identify which is the correct macro to use.
Description: what it contains and for what case, ie: the title is “002 Location Inquiry” and the description is “For customer that inquires about our location”. Note that this is optional.
Available for: All Agents, Agents in Group (ie: We have a group for Sales and the macro only applies to their workload) or Personal Only. See fig below.

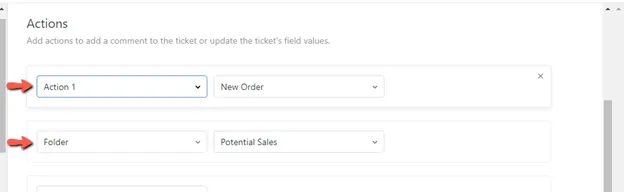
Actions: The most important part! Here, we can add our text and some automation related to the query. For example:
We want to create a Macro for “location Inquiry” replies; the one we send for customers asking for our Warehouse location or if we do have a store for pick-ups or to check the product. Normally, under the action, we assign the appropriate Folder and Action. See fig below.
The Macro should contain: Comment/Description: the support text. It’ll look something like this then click “Save”.
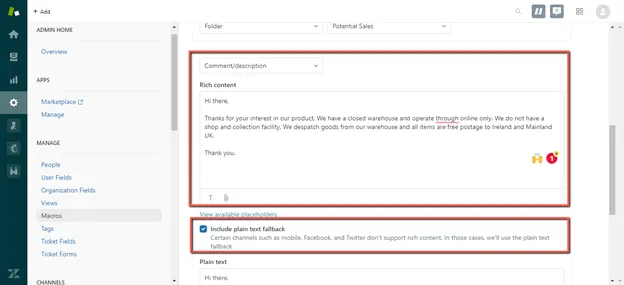
Other Action functions: Set Priority (Urgent or Low for example) Assignee, Add or remove tags automatically, add a CC. This is optional depending on the case.
ALL THE SAVED MACROS WILL BE READY FOR YOUR CHOOSING, AND YOU CAN ALSO SEARCH FOR A SPECIFIC ONE IN THE SEARCH BAR.
Once you clicked it, the macro will be applied instantly and you can edit the text to match the customer’s needs.
Zendesk Macro Number Metrics
In creating Zendesk Macros, please see the number of metrics below for you to follow.
| Macro Numbers | Category |
|---|---|
| 000 - 100 | New Sales Related Inquiries |
| 101 - 200 | Additional Items Inquiries |
| 200 – 299 | Trade Customer Related Inquiries |
| 300 - 399 | After-Sales / Customer Follow-Ups |
| 400 - 499 | Shipping Related Queries and Returns |
| 500 - 599 | Product Fitment Issues and Technical Information |
| 600 - 699 | Promotions Related Queries |
|---|---|
| 700 – 799 | Feedback Review |
| 800 – 899 | Procurement |
| 900 – 999 | Recruitment |
Notes#
This section is important so Adhoc points and issues can be logged. Also, Q&A can be logged for suggestions for potential issues encountered. Also, log important notes needed for this system. Additional Notes:
How to Use Macros Efficiently#
You can run multiple macros in one ticket update. This means that you don’t have to build a macro for every possible situation. Keep it simple. You can assign macros to all agents or to specific groups. If a macro should only be seen by a few of your agents, make sure to restrict the macro to those agents to reduce clutter. This will ensure that each agent is only seeing relevant information. You can search for macros. Just start typing the title of the macro when you are in the macro menu inside of a ticket, and it will filter your macros in the menu. Use macros to update multiple tickets at once. You can do this from your views screen by checking the boxes next to multiple tickets and hitting the black Edit tickets button in the top right corner. Once there, apply a macro and submit. In creating Macros, you can ask yourself the following: What are the most common issues that your end-users submit tickets for? What should your comment text say? Should your macro leave a public or private comment?
Which agents should have access to which macros? Macros should be used to present a piece of information. They shouldn't be used as the entire response. As such, when you’re writing a response, you should present pieces of information using a macro, but you should still tailor each response for every customer. Read through the macro carefully and remove any redundant or unnecessary information. Are certain that the information is relevant, current, and easy to understand as possible. Before using a macro, segue into it by adding context for the customer. For example, say, ‘here’s some details on how to troubleshoot connectivity,’ rather than dumping the troubleshooting instructions into a response. Use a personalized ending.
Potential Issues:
1 - ISSUE ENCOUNTERED: Stuck on Loading
RESOLUTION: Refresh Browser
2 - ISSUE ENCOUNTERED: Broken Links
RESOLUTION: Get the external link as this will allow other people to access the SOP without the need for login credentials and avoid broken links.
Attachments#
How_To_Create_Zendesk_Mac… 16/12/2025