Assigning Website Shipping Categories
All items listed on the website must be assigned a shipping category, otherwise, the
Overview#
Purpose: All items listed on the website must be assigned a shipping category, otherwise, the product will not be available for sale. The purpose of this document is to show the process of adding shipping categories in Magento Admin.
Scope: This procedure applies to all assigned Bragan personnel.
Responsibility: It is the responsibility of each employee to ensure the process set out in this procedure is followed.
Objective: The objective of this procedure is:
to guide employees on how to add a shipping category in Magento Admin.
(Some information will need to be updated)
Process#
1.) Check the Shipping Category file C:\Users\User\Dropbox\Ciara\Shipping Cats for the last completed item code number. .e.g. 01.08.17 end 7888 - 7888 is the last completed number.
2.) Log-in to Magento Admin/Magento Backend www.bragan.net TeamPH kindly asks the team on Skype for Logins.
3.) Go to Catalog > Manage Products.
There, you will see the item code numbers on the left-hand side
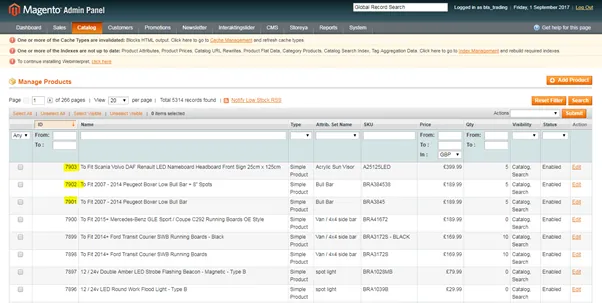
4.) Copy items that have not been assigned a shipping category, based on the last completed item.
5.) Paste these into an excel in the same format as the above file e.g. 01.09.2017 end 7903. This way you will know what the last completed item was and will know where to continue on the CMS.
6.) Select your SKU and search in the back office as above.
7.) Click Edit
8.) Click Shipping
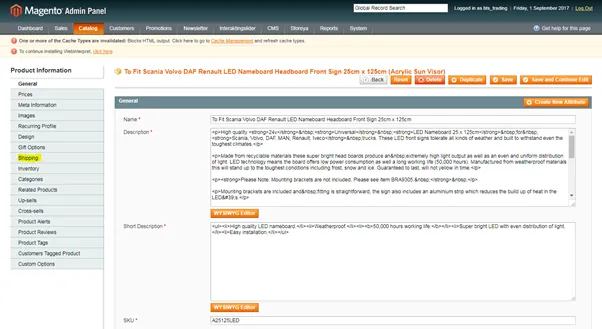
9.) Here there is no Shipping Group assigned, meaning this product will not be available for purchase on the website. To find this shipping group, select the SKU number and search for it in ‘Product Listing’ in Linnworks.
10.) Select and Edit the eBay Channel to find the shipping category assigned. This information will be under ‘Config Name’ and range from B1 – M in order of size of the product to ship.
11.) Copy this information over to the CMS and save the item.
11.) You can select all of these items and paste them into an excel file to keep track of what has been done up to a certain number or date.