Linnworks Rules Engine SOP
Rules engine is a set of conditions and actions that all orders run through before
Overview#
Purpose: Rules engine is a set of conditions and actions that all orders run through before they are added to open orders on Linnworks. The purpose of this document is to outline to new and existing staff how and why the current rules are set up the way they are, and how to create new rules if needed.
Scope: This procedure applies to both Team IRL and Team PH personnel. It is universal throughout the company; however, employees are strictly forbidden from accessing rules engine without clear permission from management.
Responsibility: It is the responsibility of each employee to ensure the process set out in this procedure is followed if permission has been granted from management.
Objective: The objective of this procedure is:
To understand how couriers are currently selected
To understand how the automatic double check email is currently sent out through rules engine
To understand how the address lines are split to manageable character counts through rules engine
To understand how macros are created and used through rules engine
7.3
- Accessing Rules Engine
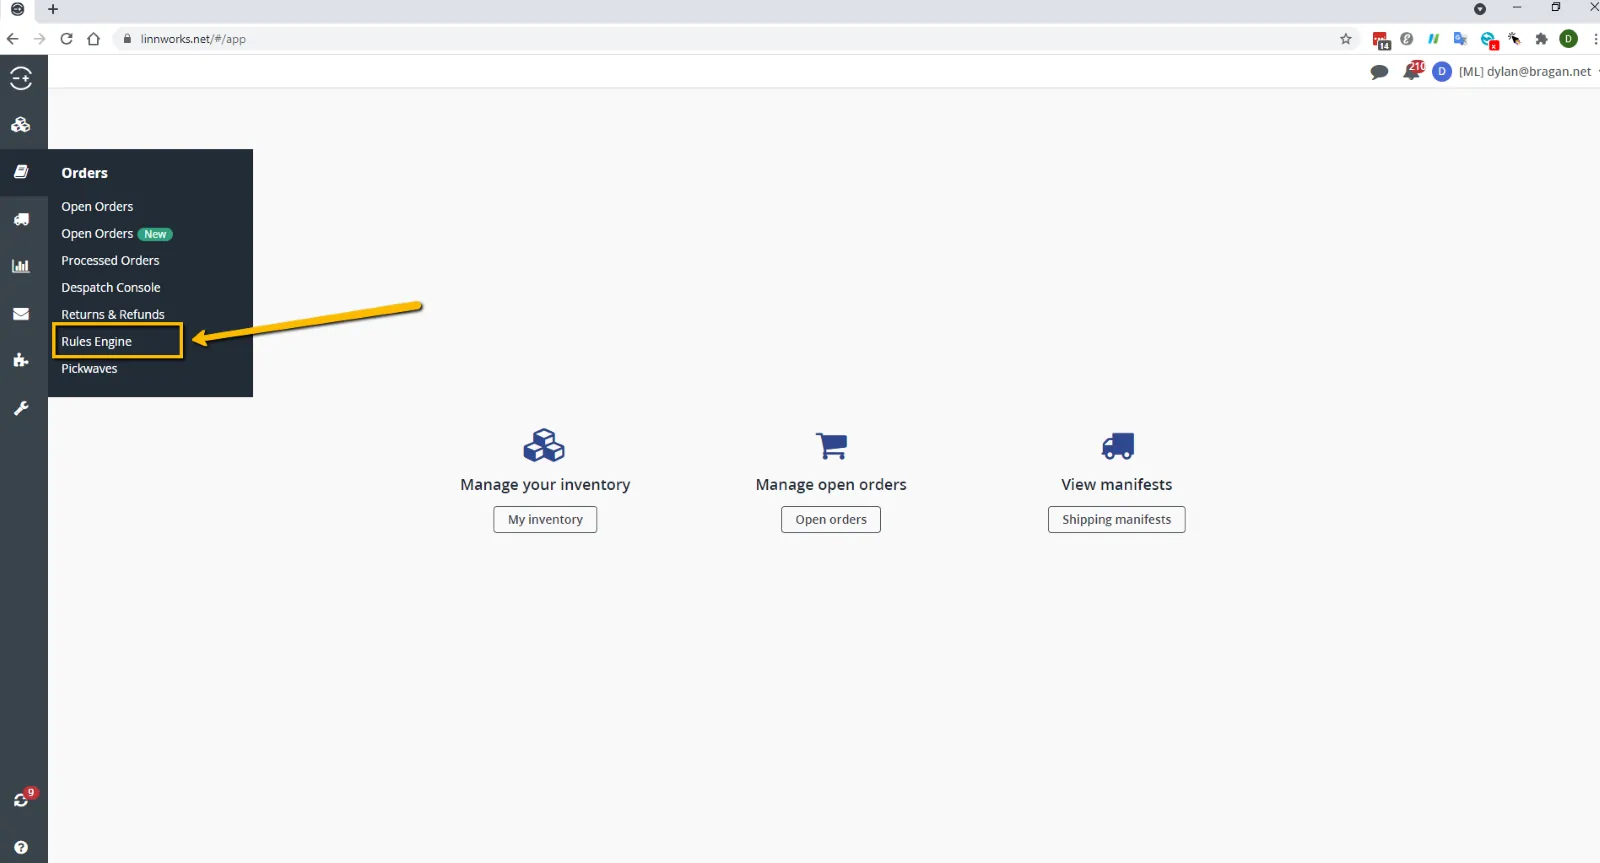
To access rules engine, you must have an admin account on Linnworks, user accounts will not be able to access the rules engine. It is accessible through the task bar on the left of the screen, under the ‘Orders’ tab, as shown if fig 1.
- Navigating Rules Engine
2.1 Priority Rules
Rules will be carried out in the order they are placed in, they will be carried out rule 1, then rule 2, then rule 3 etc. with rule 1 being at the top. The layout for this can be seen in fig 2.1.1.
In the example shown in fig 2.1.1, the rule named ‘NEW Courier Specific PG For IFS’ will happen first, as it is in position 1, followed by the rule ‘Split Address Line’, as it is in position 3, and finally the rule named ‘Order Check’, as it is in position 4. The reason it has skipped the rule in position 3, named ‘NEW Courier Specific PG For Hermes’ is because this rule is not enabled, this is also the reason that none of the other rules are carried out.
You can move the priority position, or order the rules are carried out in by clicking the up or down arrows as shown in fig 2.1.2 to move the rule in that direction.

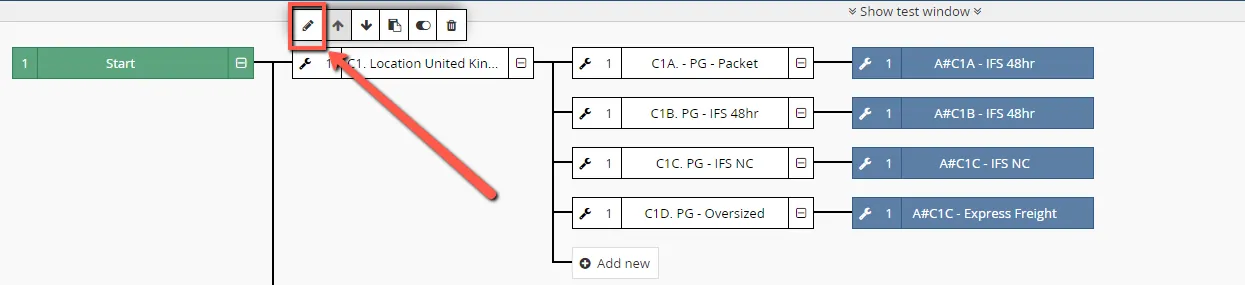
2.2 Editing Rules
To edit a rule, you simply click the pen icon that is shown in fig 2.2, this will open the rule breakdown and allow you to set conditions and actions.

2.3 Duplicating Rules
To copy a rule, select the rule that you would like to copy, and click on the icon shown in fig 2.3. This will duplicate all the conditions and actions in that rule.

2.4 Inspecting Rules
To inspect a rule, click on the magnifying glass icon shown in fig 2.4, this will allow you to view the conditions and actions inside the rule without having the ability to
edit anything and is a failsafe if you just want to view how a rule is working and not risk changing anything inside that rule.

2.5 Deleting Rules
To delete a rule, click the bin icon as shown in fig 2.5 and confirm you want to delete the rule. Once a rule is deleted it can not be salvaged, do not delete a rule unless 100% sure it will not be needed again, if needed, please confirm with management.

- Courier Selection Rule
The courier that is selected automatically through the rules engine, the rule that is used now is rule 1, named ‘NEW Courier Specific PG For IFS’. This is probably the most important rule that we have and is extremely important that it is set up and maintained correctly.
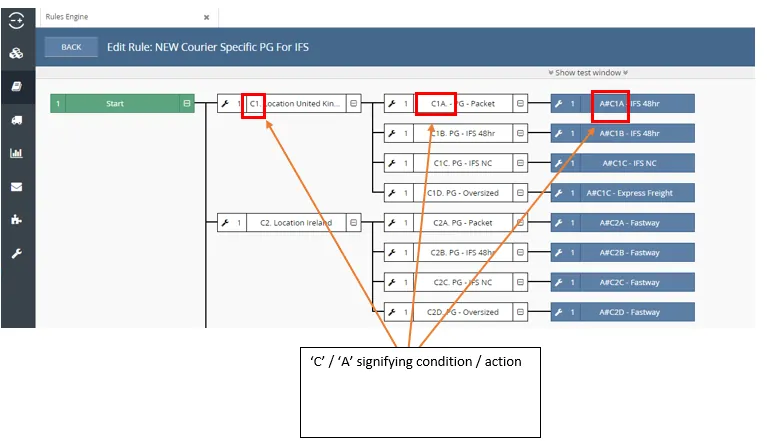
Each Condition is named with ‘C’ at the beginning, meaning that this is a condition, and similarly actions are named with ‘A’ at the beginning for action.
This can be seen in fig 3, which is an overview of the rule named ‘NEW Courier Specific PG For IFS’
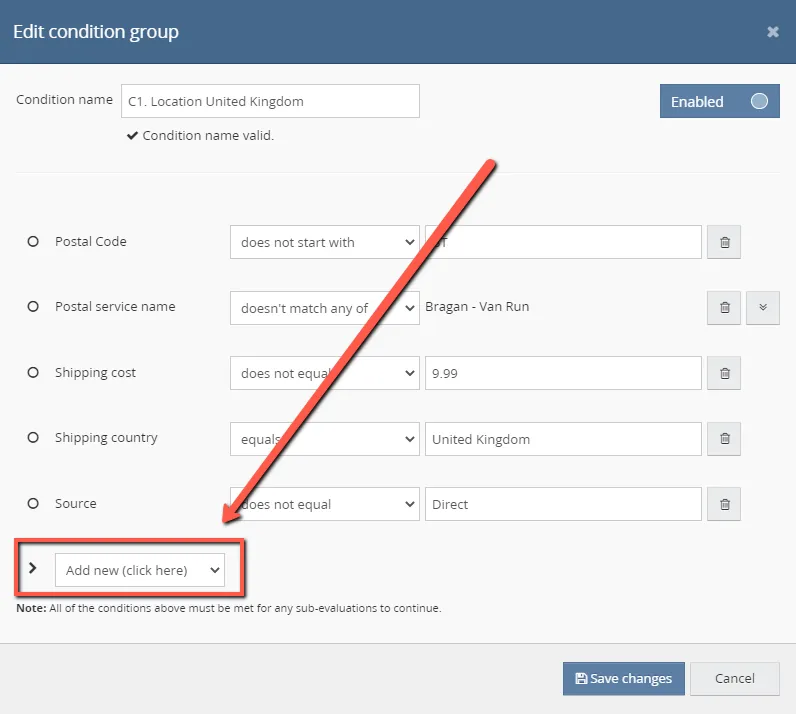
3.1 Conditions
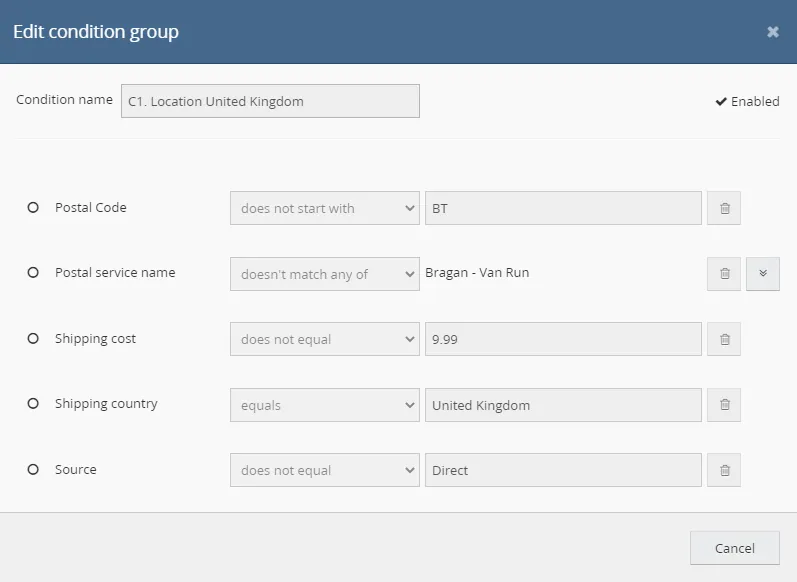
A condition is used to filter down the orders that you want the action to happen to. An order will start at the green start, and it will try to find a route where it meets all the required conditions. If you look and condition ‘C1. Location United Kingdom’ as shown in fig 3.1.1, you will se 5 conditions that the order has to match to be allowed to move on the next step.
If the order does not meet all these conditions, then it will move to the next set of conditions and see if it meets all of them and continue moving from C1, to C2, to C3 and so on until it finds one that it can continue with. If there are no routes that the order can follow where it is meeting all the conditions, then the system will assume that there is no action to be taken with this order and it will add it to open orders with no courier selected.
Once the order has met all the conditions it will flow on through the rule, if the next step is further conditions to meet, then the same thing must happen, the order will keep flowing though these rules until it meets one where it meets all the conditions. In our example with selecting the courier, there is another set of conditions as shown in fig 3.1.2.
Once the order has found a rule where it meets all the conditions, it again flows through the process. In this example, the next step is an action rather than a condition.
3.2 Actions
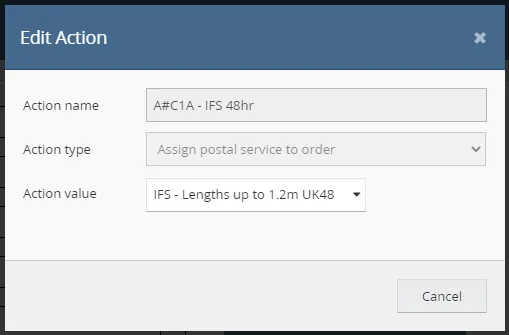
Once it has reached this stage, the system will do the action that you have set, in the example here, the action we have set is to assign a postal service to the order, as shown in fig 3.2.
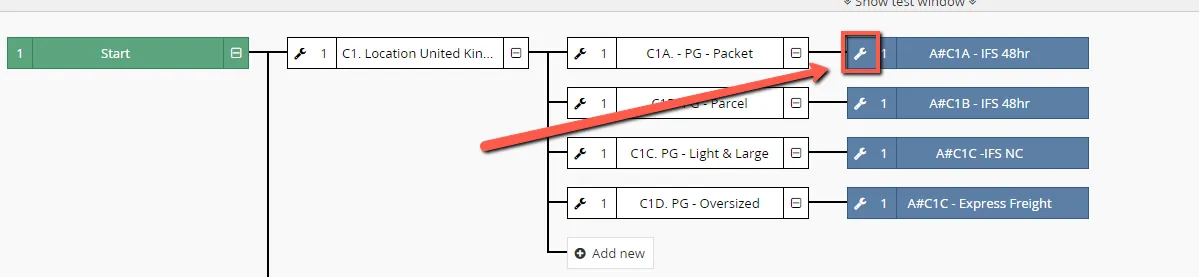
3.3 Order Flow
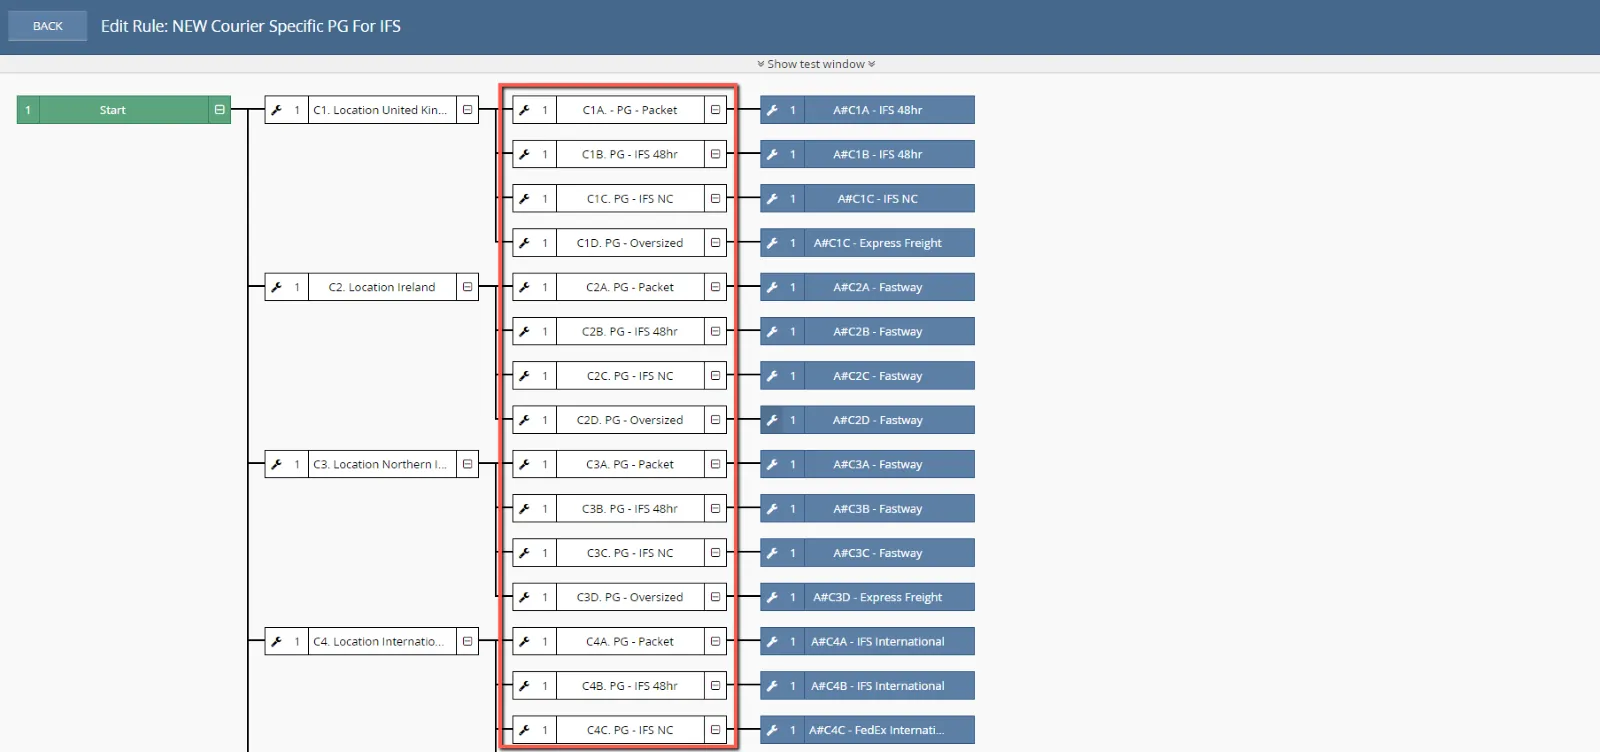
Once an order has matched all the conditions it will find its way to an action and the action set will be carried out to this order, as shown in fig 3.3. The order will look for the first rule to see if the order matches this set of conditions, in our examples case,
‘C1’, if it does not match the conditions, it will look at the next rule, ‘C2’, if it does not match these conditions it will move to ‘C3’ and so on. If the order matches the conditions in rule, it will then start at the beginning again in the next set of rules looking for one that matches all the conditions set. If the order matches the conditions in rule ‘C1’, it will first look to see if it matches the conditions in ‘C1A’, if it does not, then it will move down to ‘C1B’, and then to ‘C1C’ and so on.
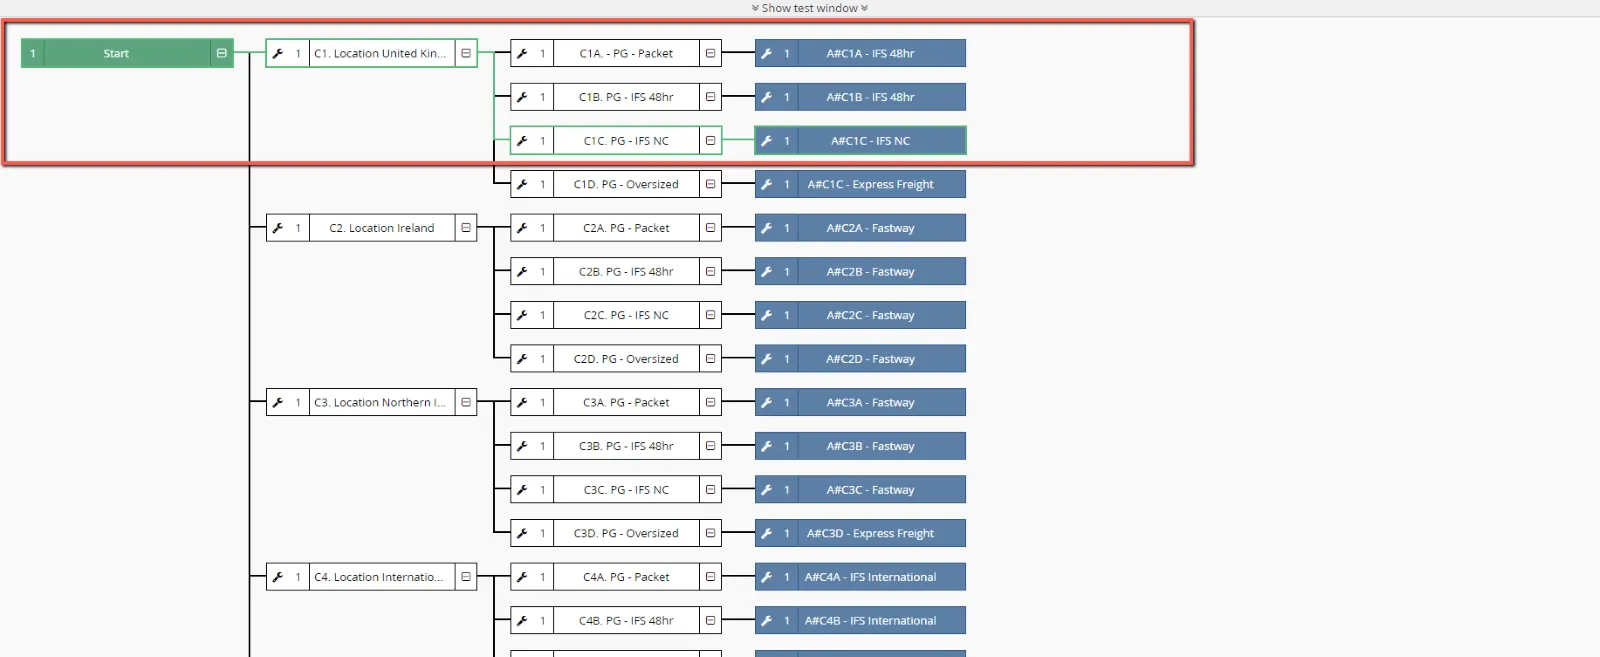
As you can see in fig 3.3 the order matched all the conditions in rule ‘C1’, it then went on to match all the conditions in rule ‘C1C’, which finally led it to the action on rule ‘A#C1C’, which assigned a specific postal service to this order. You can see this by following the green line in fig 3.3.
- Split Address Line Rule
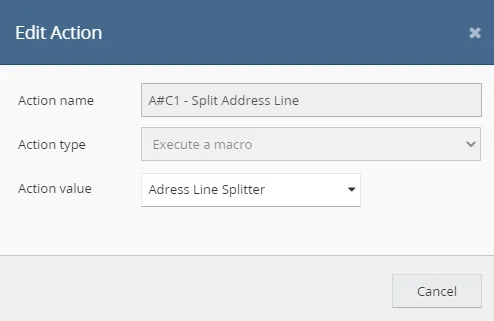
There are certain couriers that only allow a limited number of characters per address line. Unfortunately, there is no way on the sales channels to limit the number of characters a customer can put per line, so there are times where the customer puts too many characters in the line for the courier, which will lead to an error when attempting to print the shipping label. To fix this we have created the rule ‘Split Address Line’, in this rule, if the order has a character count that is above the number we have set, in our case 25 characters, then it will split the line, and move some characters to the next address line. This rule breakdown can be seen in fig 4.1. Although this rule is much simpler, it works the exact same way as the courier selection rule, there are conditions that the order needs to meet, and it will flow to an action, please refer to point 3 for further explanation on conditions and actions. In this example the action that is carried out is a macro, fig 4.2, please refer to section 6 for an explanation on macros.

- Order Check Email
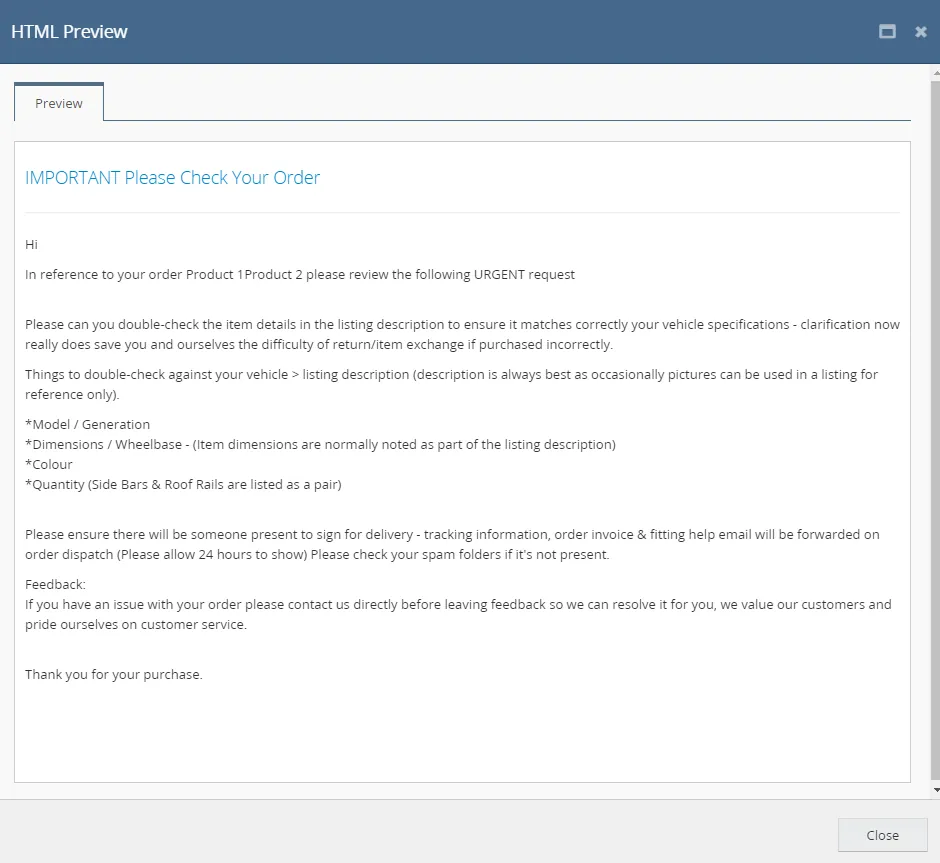
The final rule in rules engine that is currently active is called ‘Order Check’, this is to send out an automatic email, fig 5.2, to all orders for the customer to double check certain aspects of their order to make sure they have ordered the correct item. This is to try to cut down on the number of orders that are placed for the incorrect make / model. See fig 5.1 for rule breakdown. This rules action is also done through a macro, please refer to section 6 for explanation on macros.

- Macros
Macros are a set of actions that can be carried out at various stages of an orders process, and with various possible triggers. They tend to be actions that are not available in the rules engine as standard. There are three ways in which you can create / access macros. Through Linnworks themselves, a third-party developer, and the app store on Linnworks.
6.1 Linnworks Writing Macros
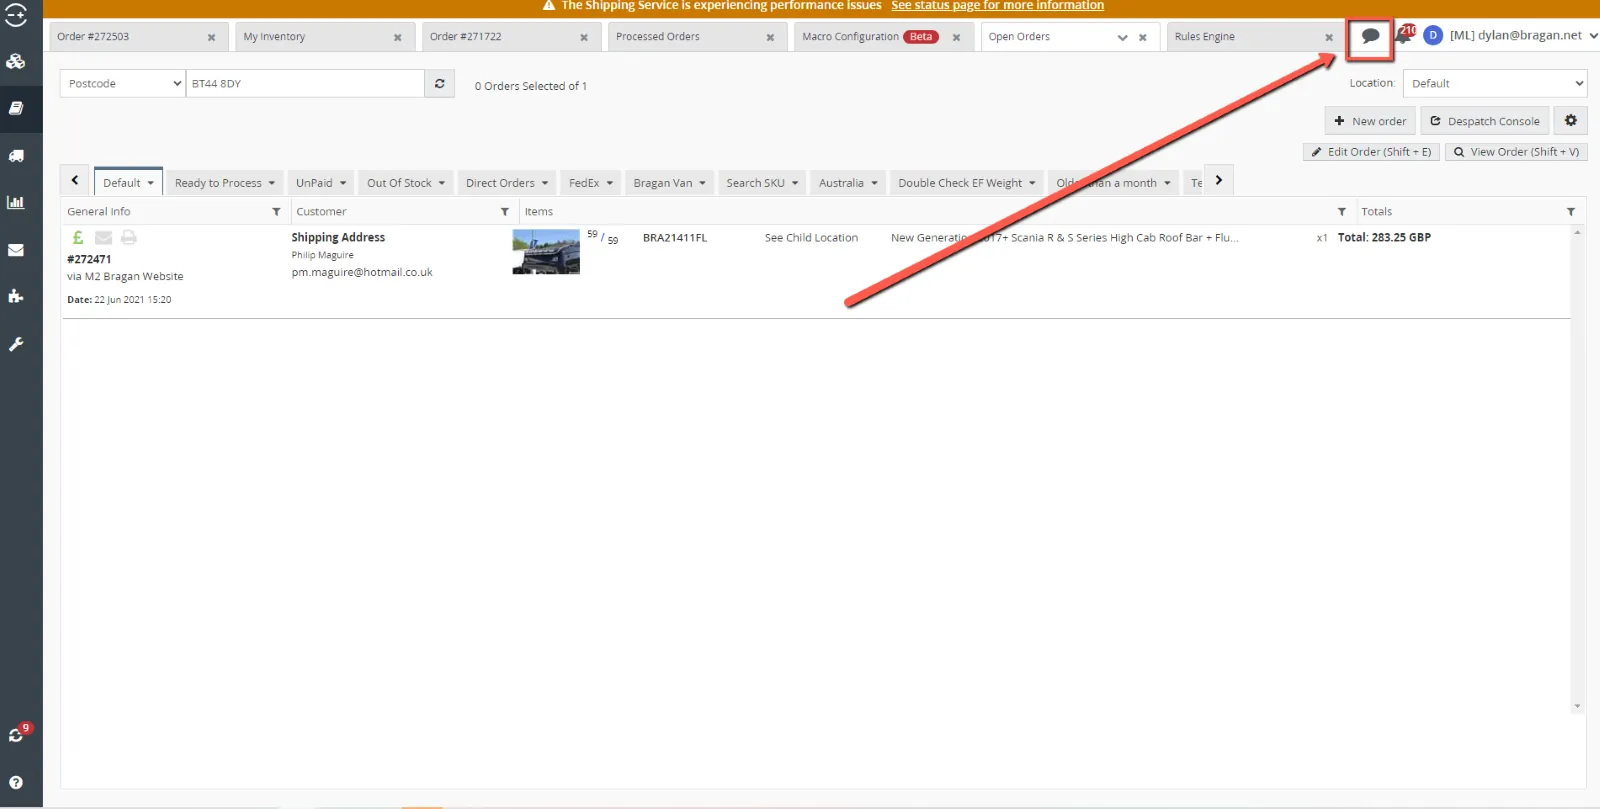
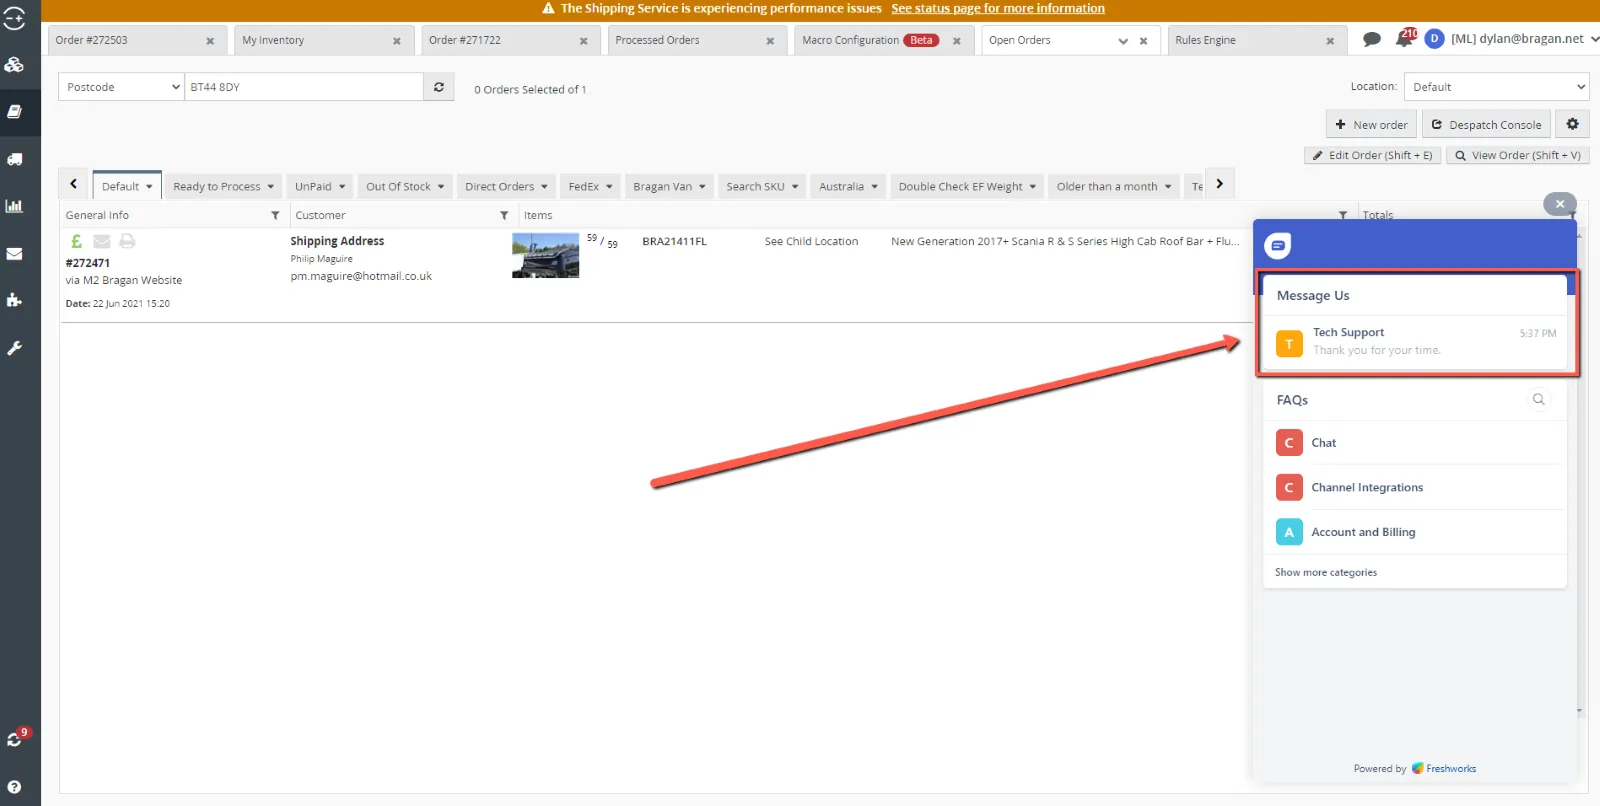
Linnworks development team will be able to create almost any macro that you are looking for, however this is a paid service. The Linnworks developers will charge for their work at a rate of £150 per hour. Because of this Linnworks will try to push this service on you when you encounter any issues, but due to the expense this service is the last resort and should only be requested by management. The easiest way to request this service is to open the chat functionality on Linnworks, fig 6.1.1, and message tech support, fig 6.1.2. Give them a brief run down of what you are looking to achieve, and they will open a tech support ticket on your behalf and will come back to you with an estimated price and timeframe for the creation of the macro.
6.2 Third Party Developer Writing Macros
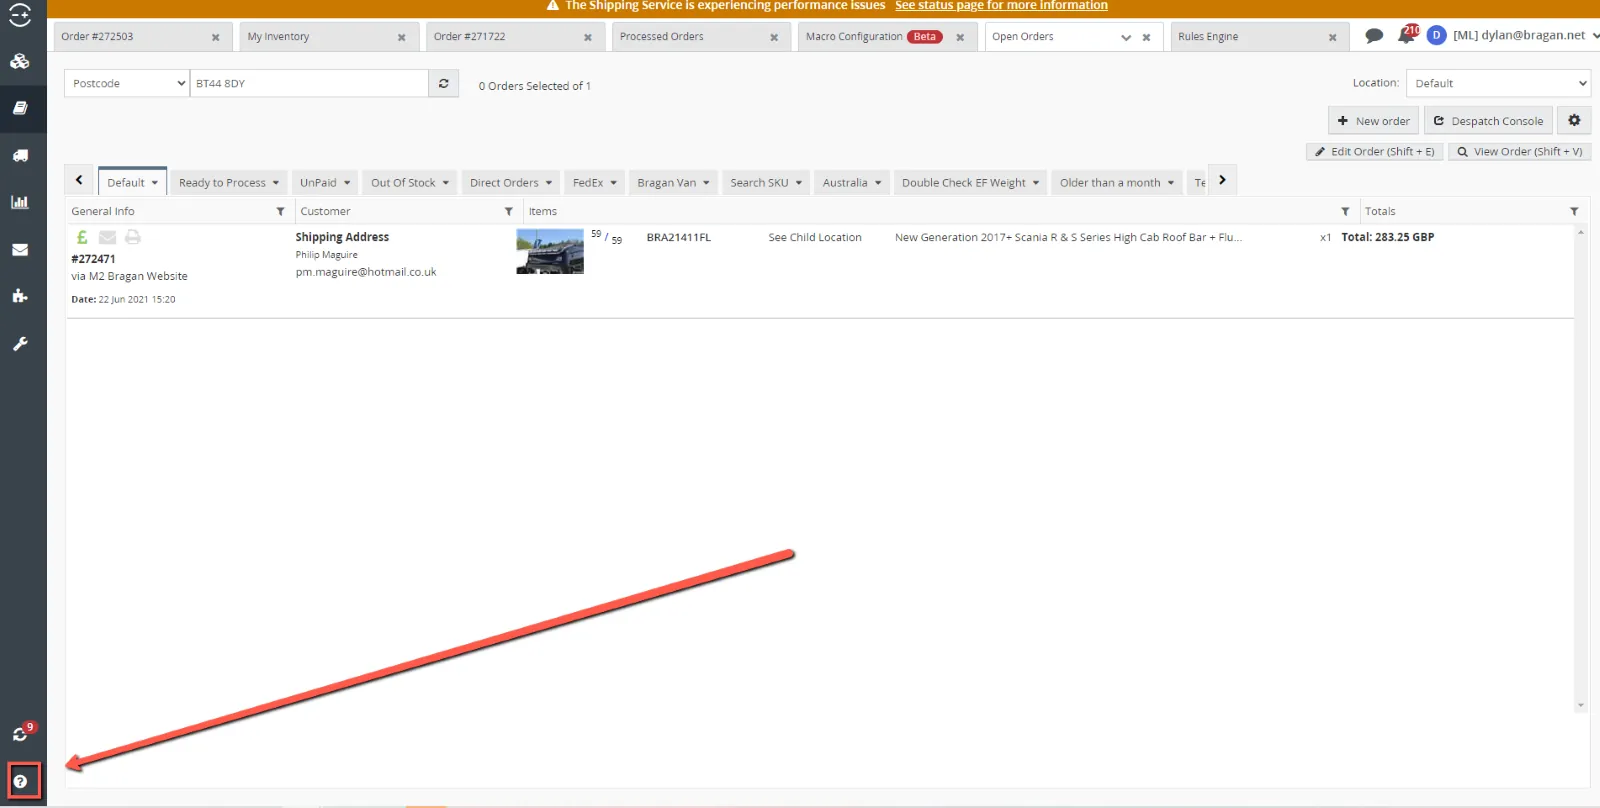
It is possible, and potentially a lot cheaper for a third-party developer, whether in house or otherwise, to write the required macro for you. To do this the developer would have to have access to the Linnworks database structure. There is a version available on Linnworks that can be accessed through support, fig 6.2, but this is not the most up to date version. The developer would have to request the database structure from Linnworks themselves. This again would be done through the chat functionality shown in section 6.1.
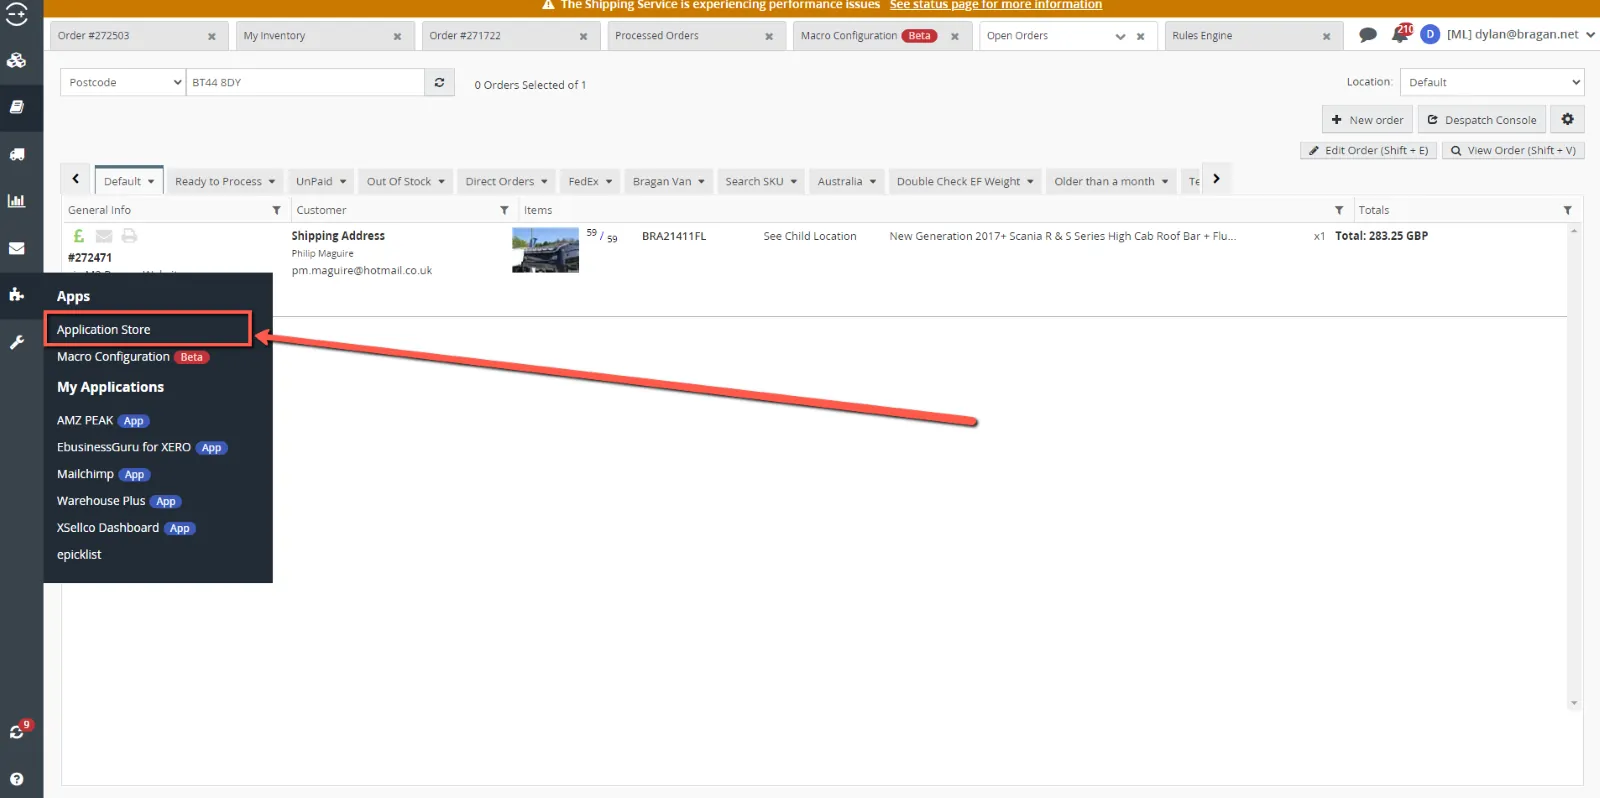
6.3 App Store Macros
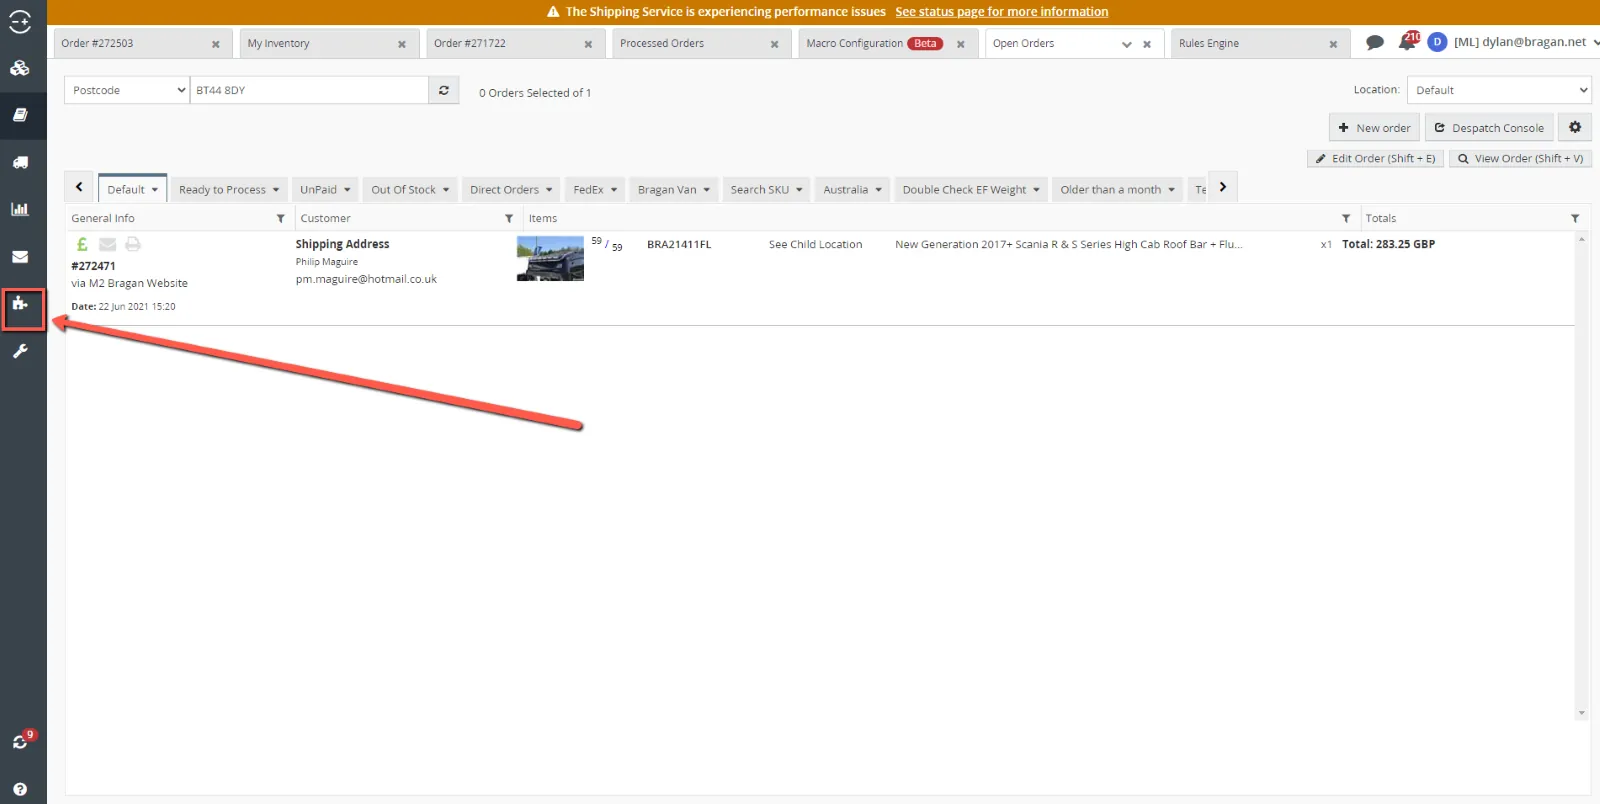
The final way in which you can get macros is through the app store. Although there are an extremely limited number of macros available here, they are already written and ready to be installed, and they are free. The app store is accessible through the puzzle icon in the task bar on the left, fig 6.3.1, and then clicking ‘Application Store’,
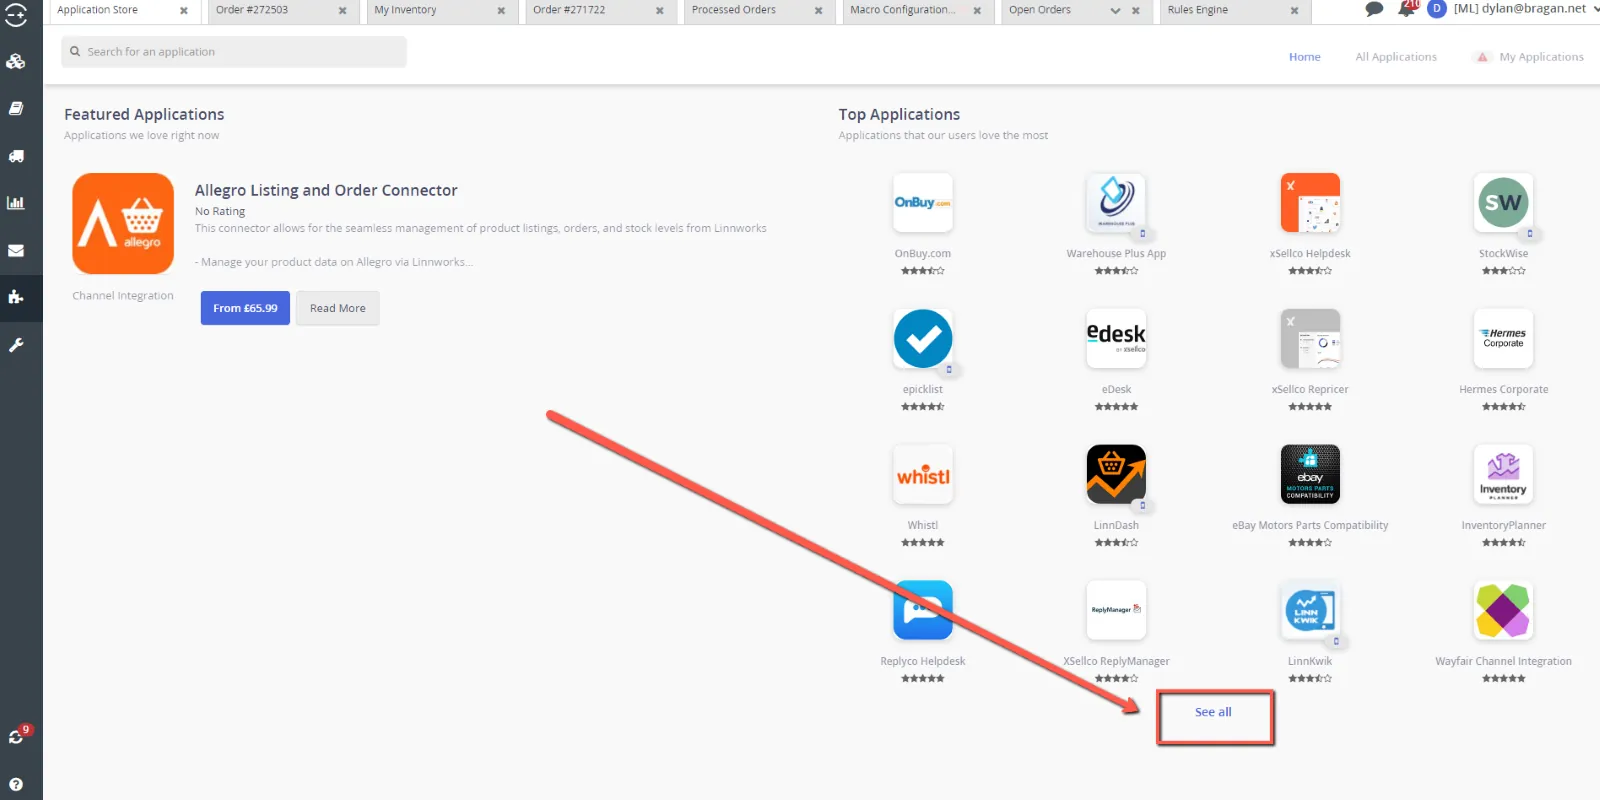
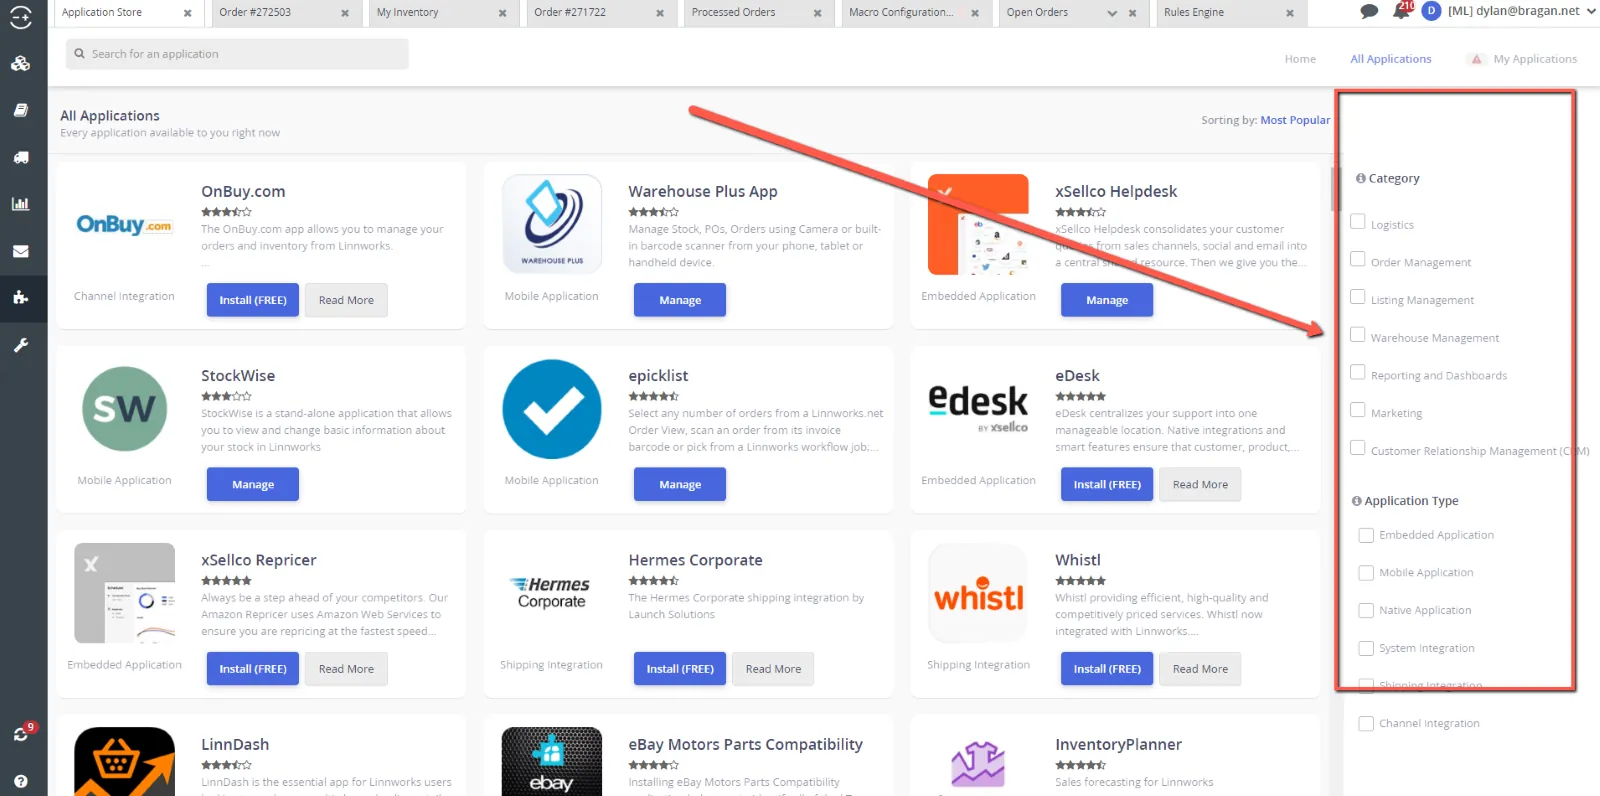
From here you can view all the available apps by clicking the ‘See all’ button at the bottom right of the screen, fig 6.3.3. This will give you a list of all available applications, fig 6.3.4, their price, fig 6.3.5, their star rating from previous customers,
number and more specifically what you are looking for through the filters on the right of the screen, fig 6.3.7.
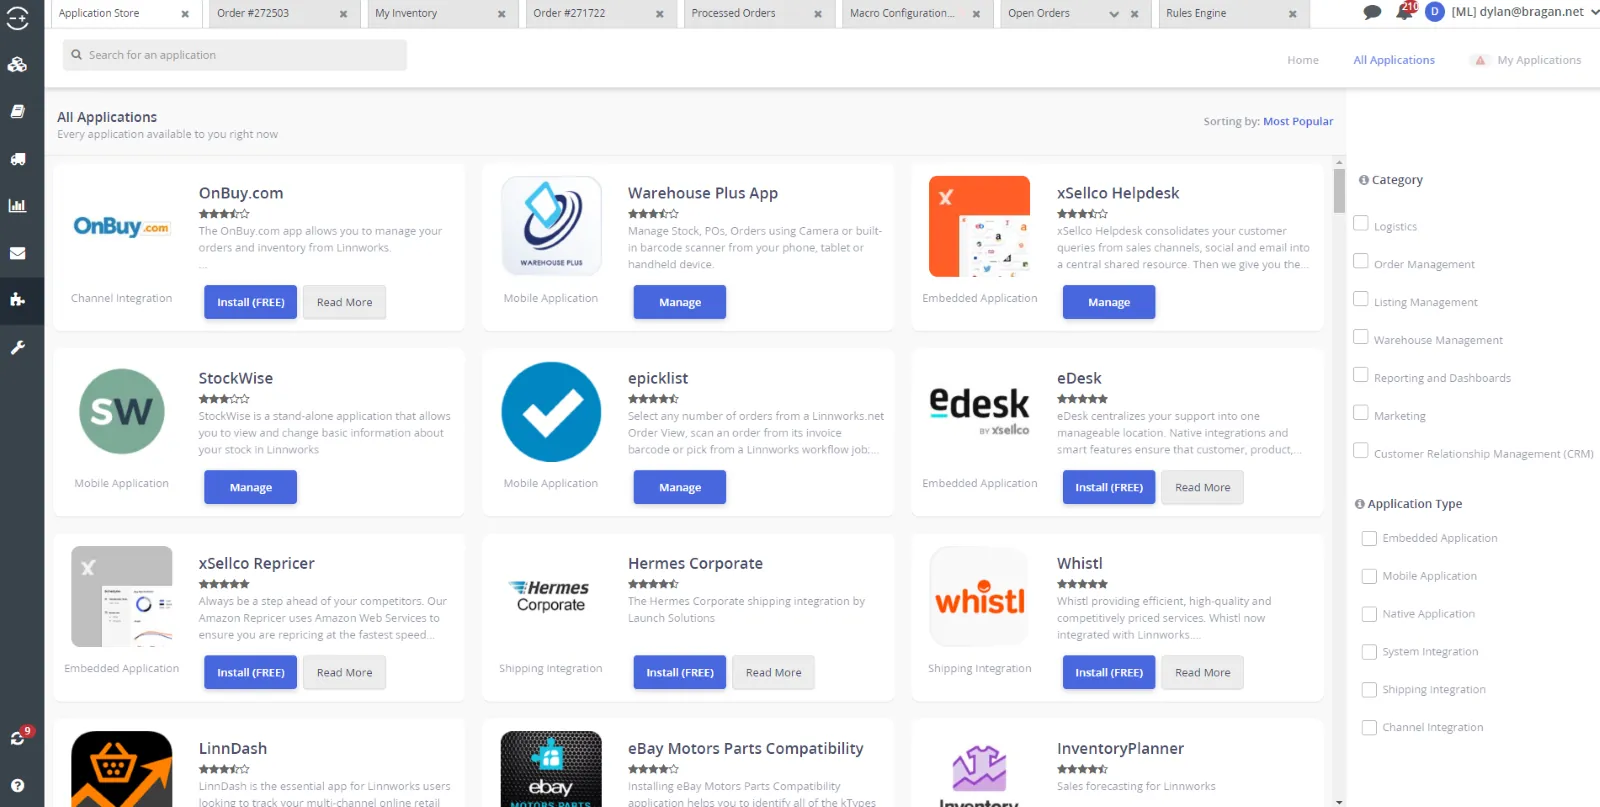
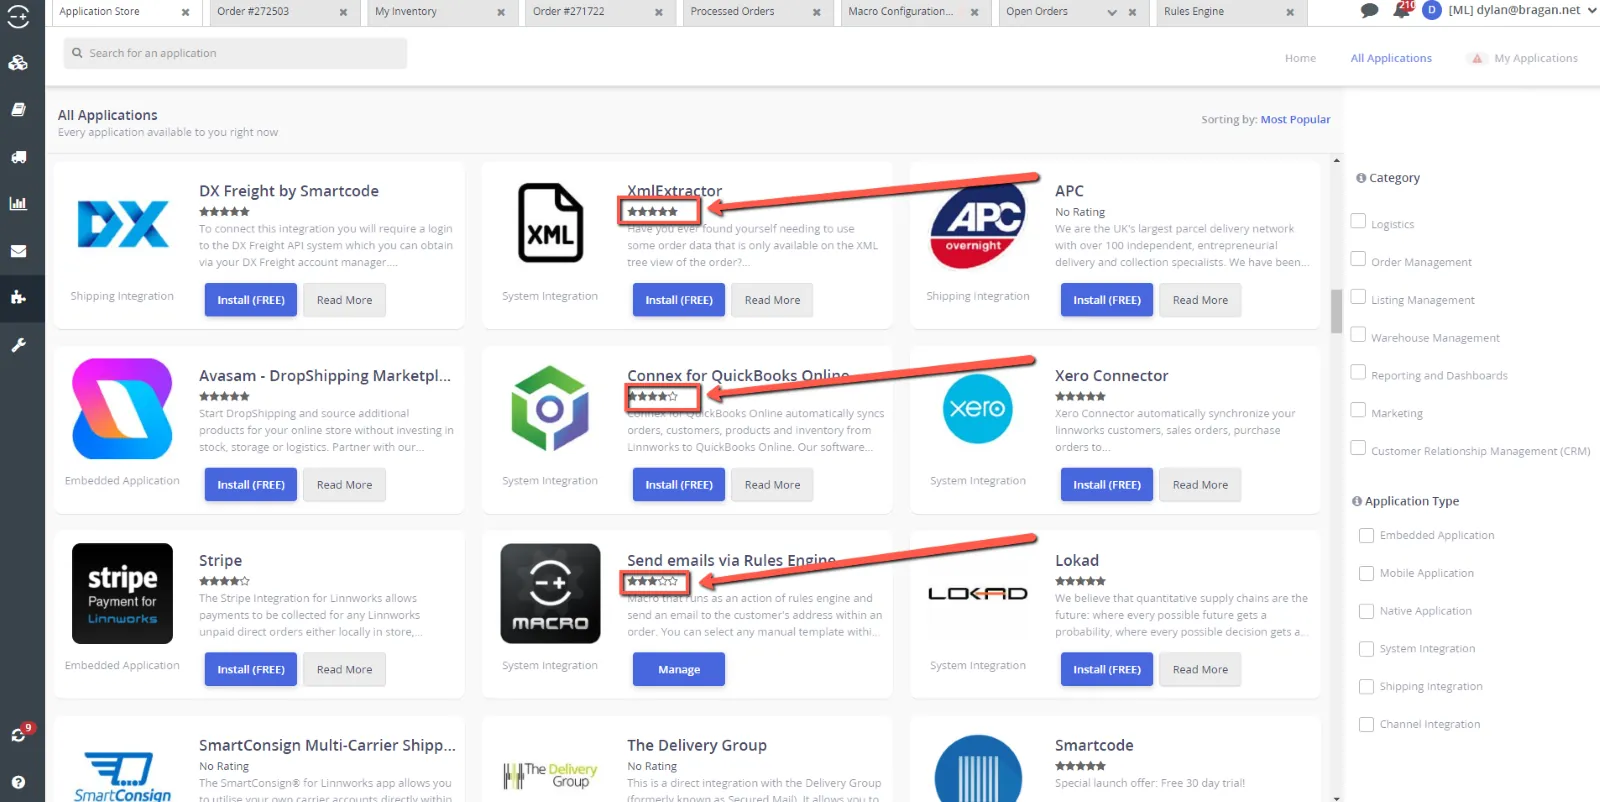
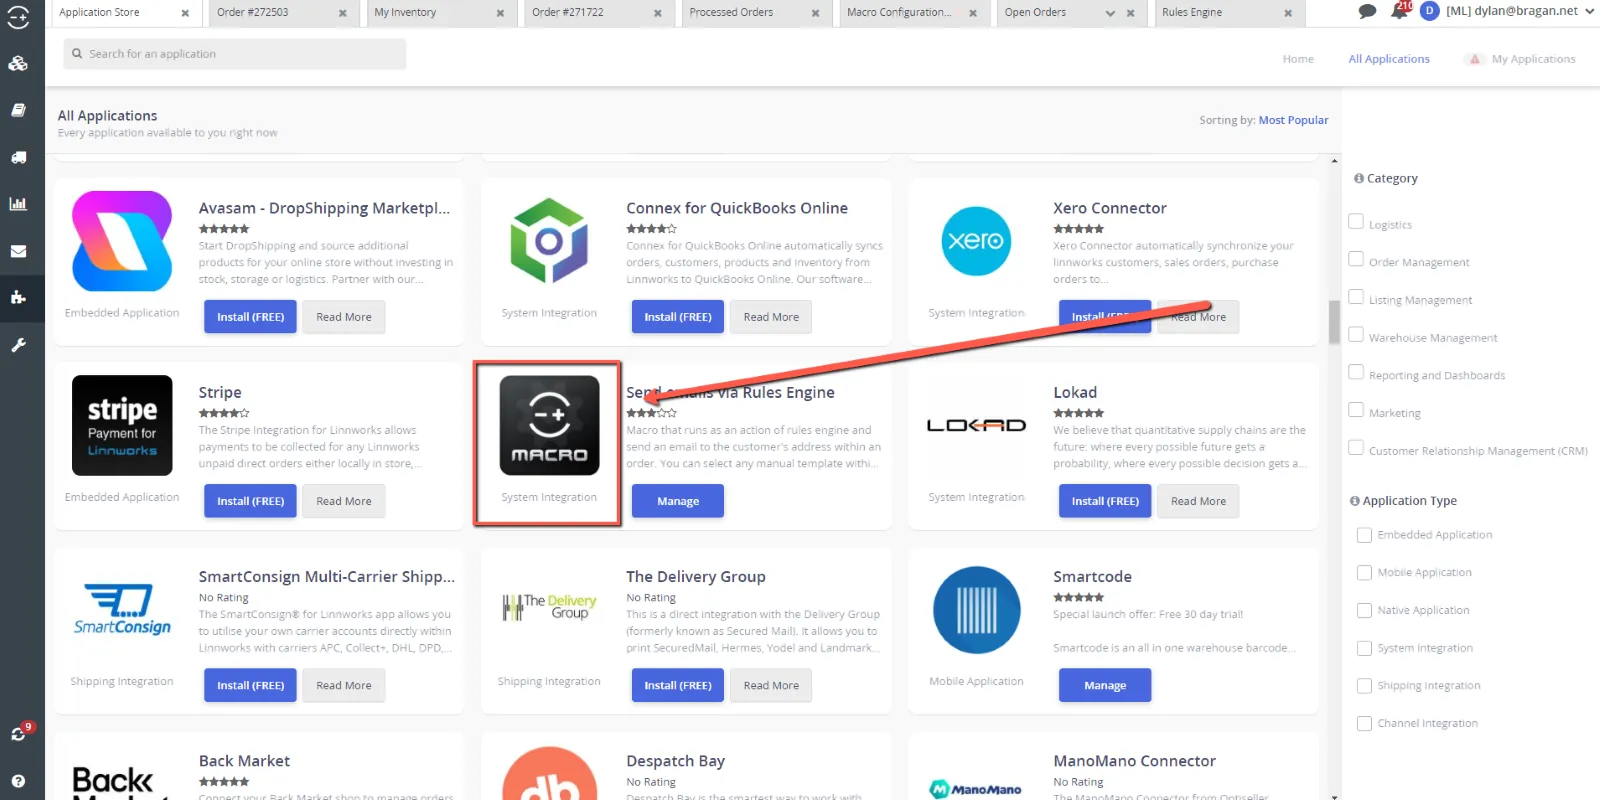
Inside the application store, the macros can be differentiated from other applications as they will all have the same symbol, fig 6.3.8, of the Linnworks LOGO, with ‘MACRO’ written underneath it.
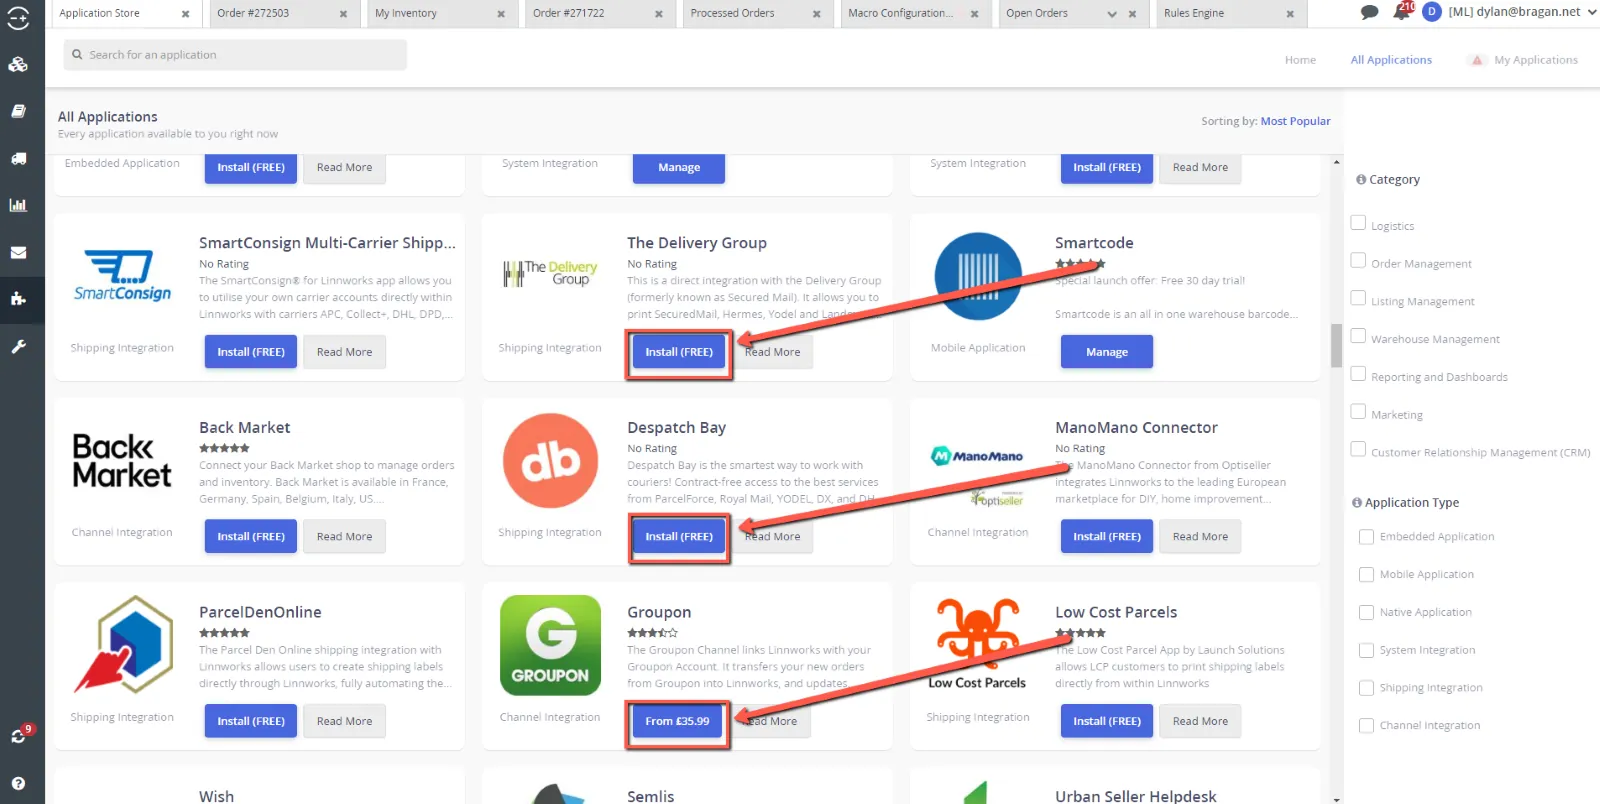
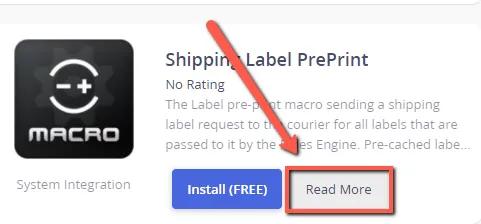
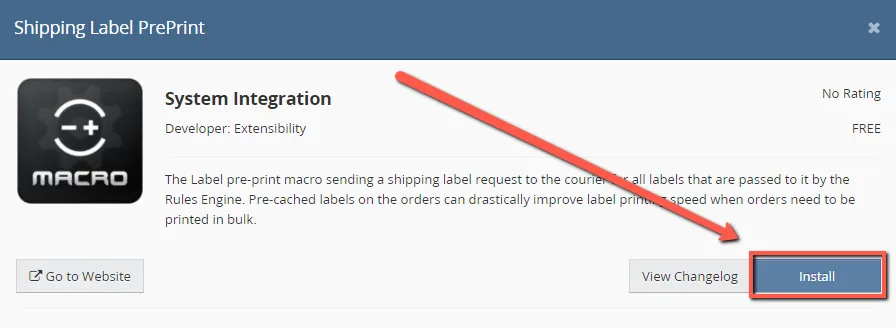
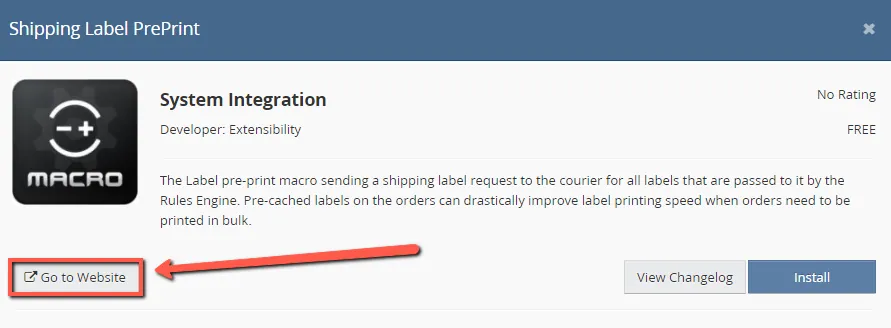
By clicking the ‘Read More’ button, fig 6.3.9, it will show you in more detail what this macro will do, from here you can install the macro, fig 6.3.10, or if you want to know more about it, and how to use it, you can click the ‘Go to Website’ button, fig 6.3.11 and this will go into much more detail what this macro will do and how exactly to use it.
6.4 Configurating Macros
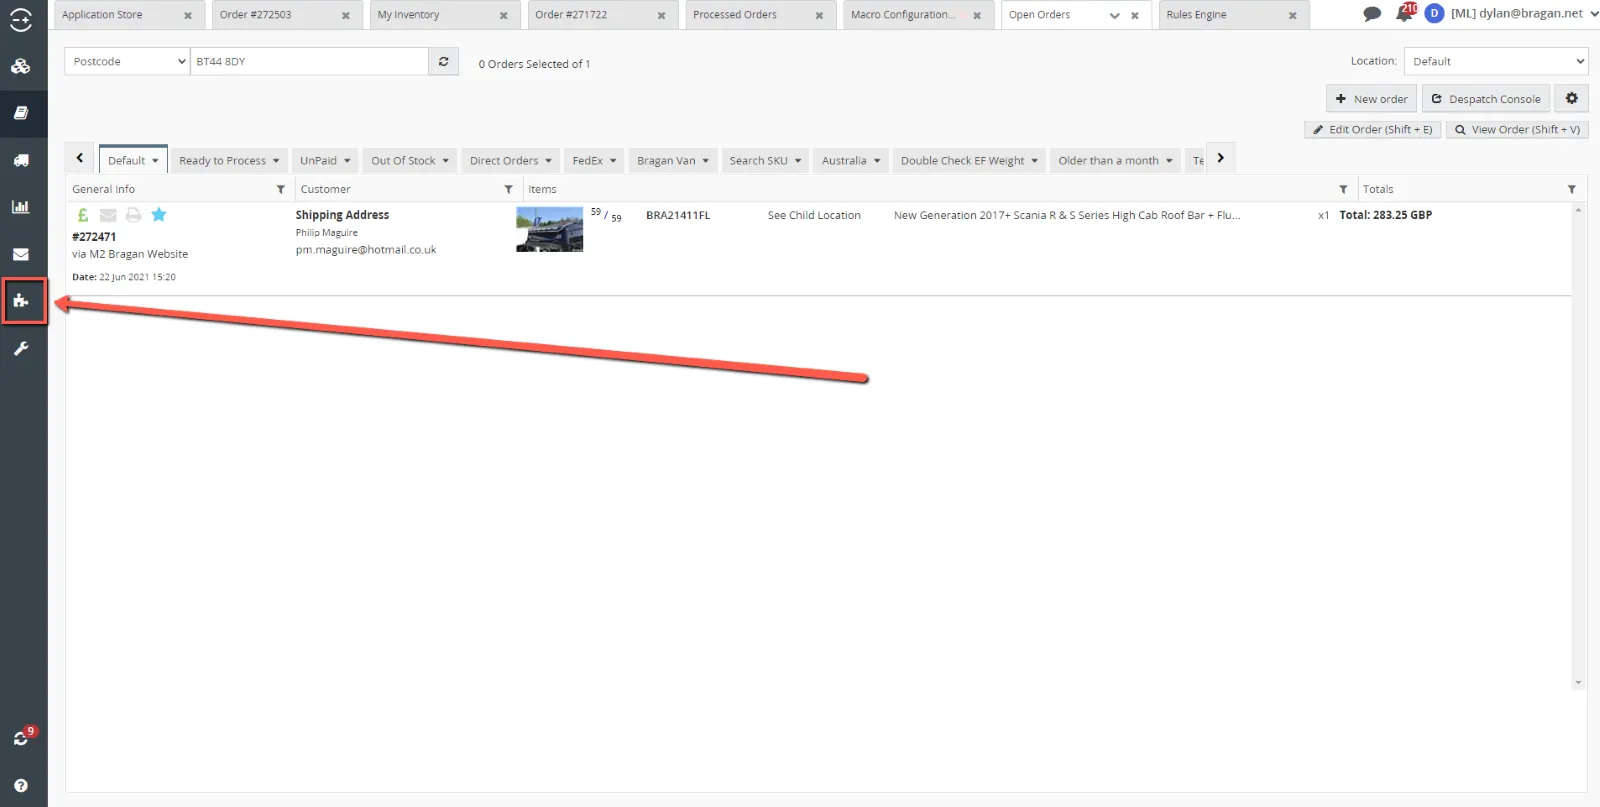
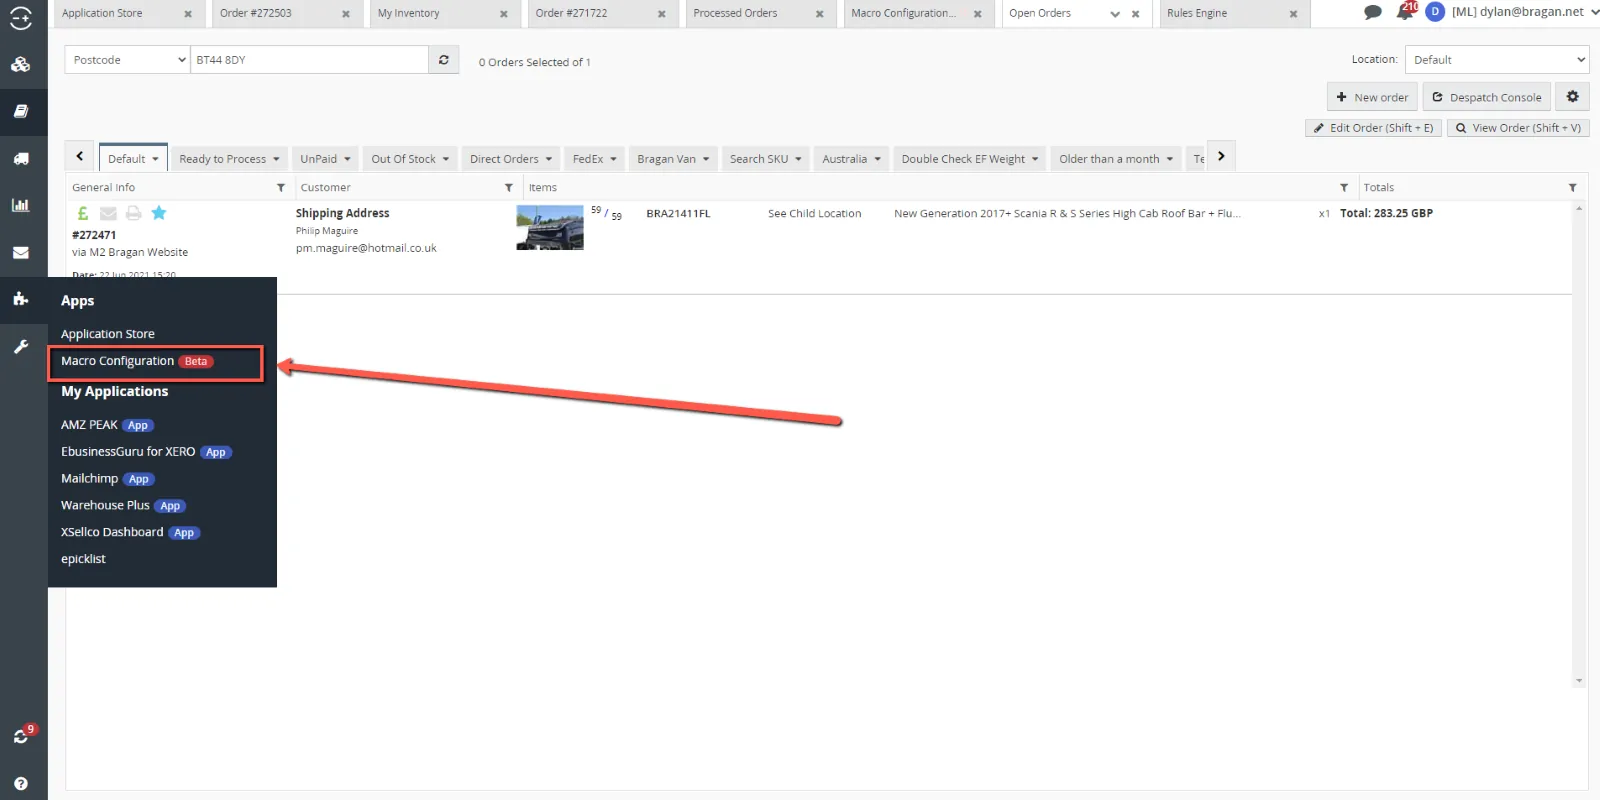
Once a macro has been made, it may need to be configurated so that it will run to the specifications that you need. This can be done through ‘Macro Configuration’. This is in the ‘Apps’, which is the puzzle icon on the task bar at the left, fig 6.4.1, and then by clicking ‘Macro Configuration’, fig 6.4.2.
Editing and deleting configuration can be done by selecting the configuration and clicking ‘Edit Configuration’ or ‘Delete Configuration’, fig 6.4.3, depending on what outcome you require.
- Important Notes
Please see below some extra notes and things to be aware of from some of the sections.
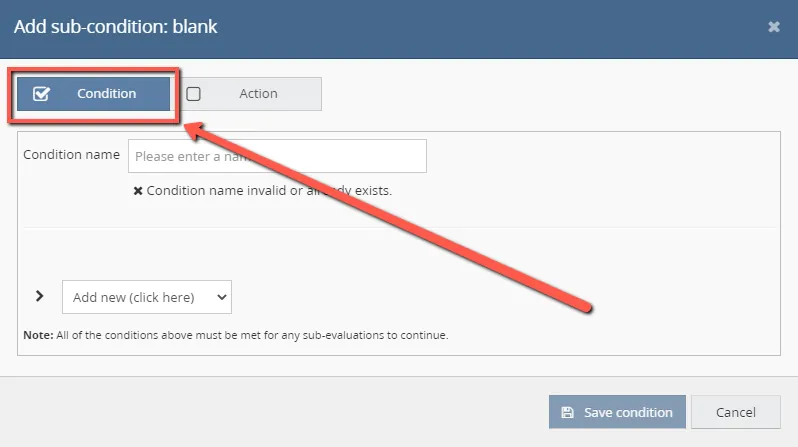
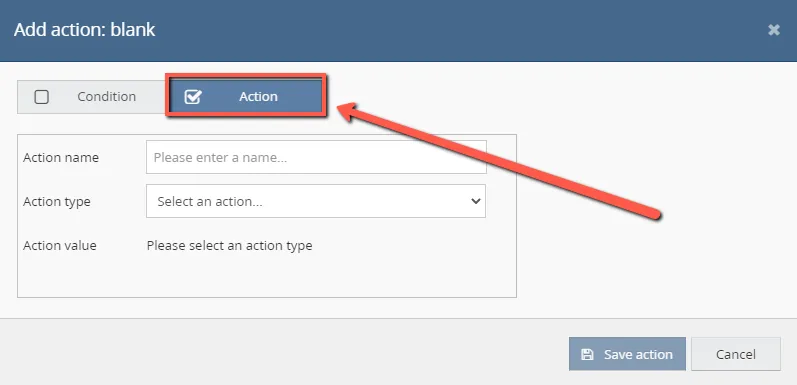
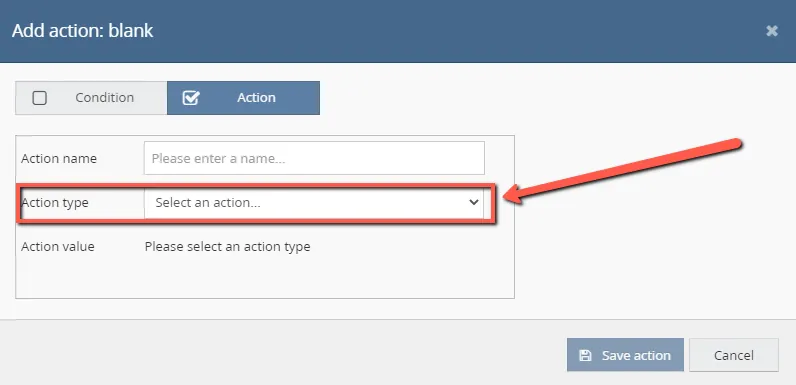
7.1 Adding a New Condition / Action
To add a new condition or action, in the rule where you want it to be added, you simple click the ‘Add new’ button, fig 7.1.1, in the location where you would like this to be added. Then you select whether you would like this to be a condition, fig 7.1.2, or an action, fig 7.1.3.

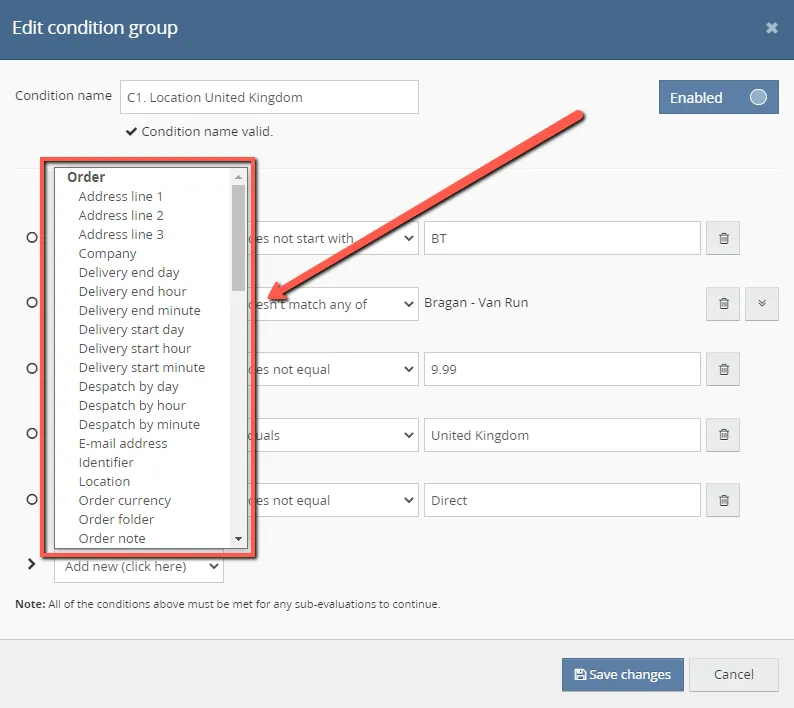
7.2 Conditions
There are a limited number of conditions that can be applied through the rules engine. These can be found by clicking the wrench icon on the rule you wish to edit,
To add a new condition, click the ‘Add new (click here)’ button shown in fig 7.2.3. This will show you a list of available conditions, fig 7.2.4. If the condition you require is not available here, then a macro may be needed for accomplishing what you require, please refer to section 6 for this.
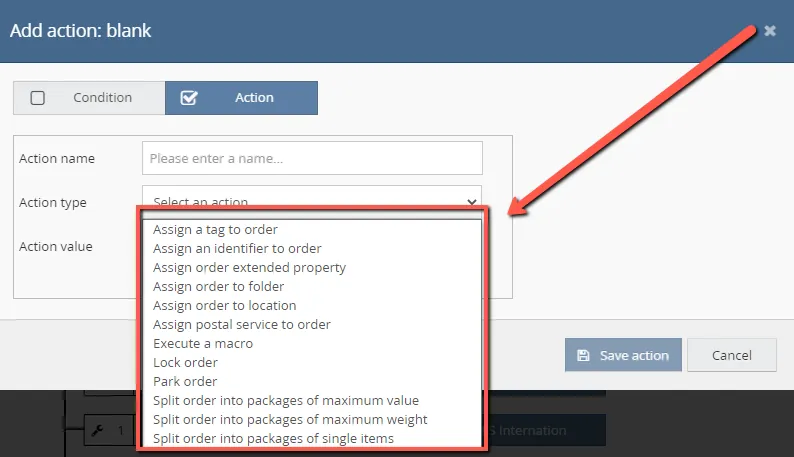
7.3 Actions
Once an action is added, it can be set up and edited the same way a condition is. First select the wrench, fig 7.3.1, and then the pen, fig 7.3.2.
Similarly, to the condition, there is an extremely limited number to select from, fig 7.3.4, but these can be accessed by clicking ‘Select an action’ button under the ‘Action type category, fig 7.3.3.
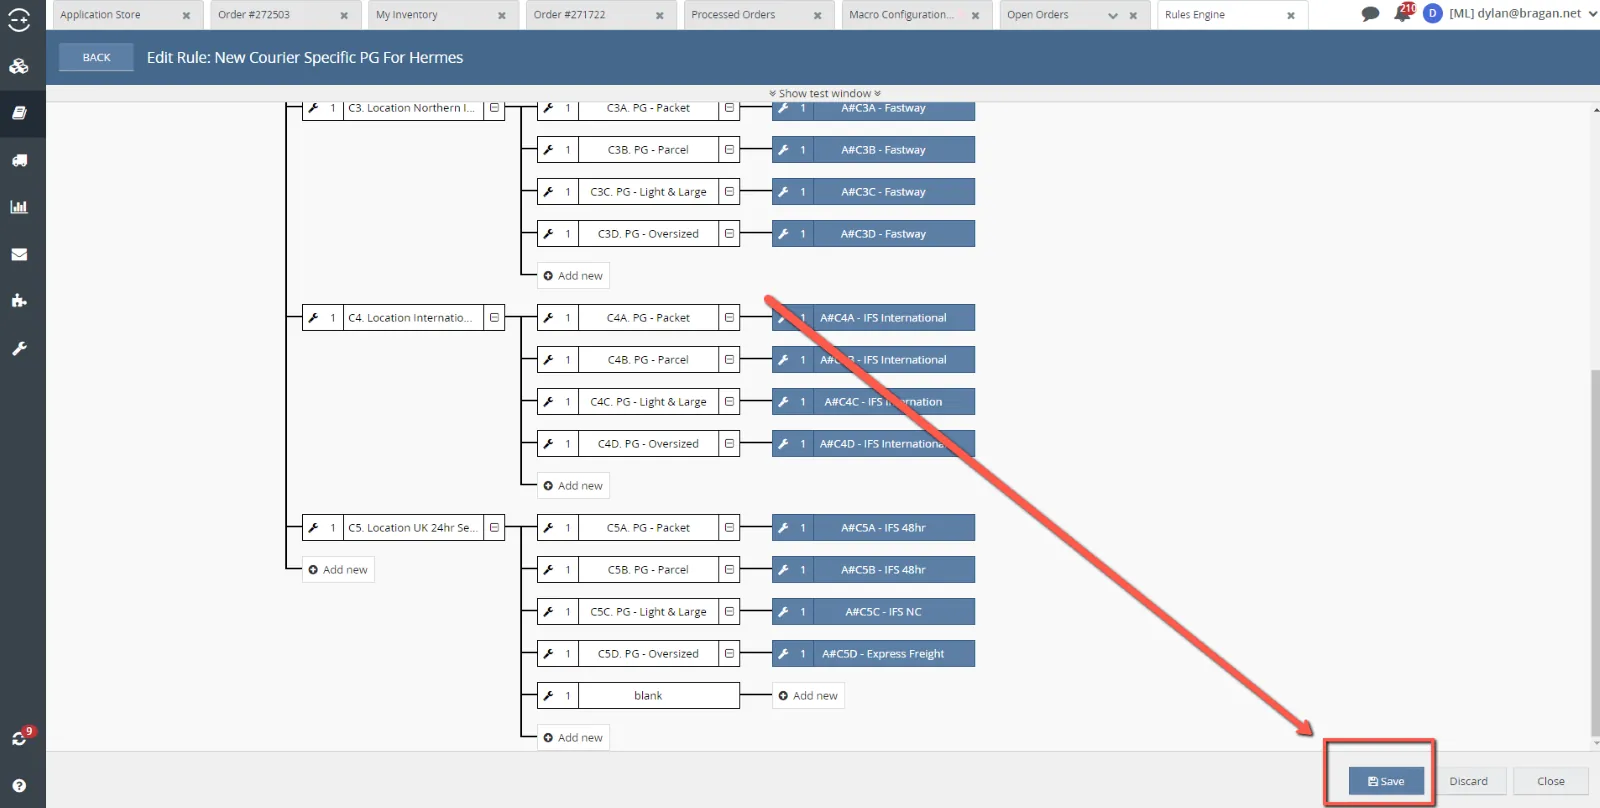
7.4 Saving rules
It is extremely important to hit the save button in fig 7.4.1 when you are finished with a rule. Even if you have not actually made any changes to the rule you must click this button.
If you do not save the rule whenever you are exiting, the rule will be marked as ‘Pending changes’ fig 7.4.2. When a rule is marked as pending changes then the entire rules engine will not function properly and cause major issues in order processing, even if the rule is not enabled. If you see any rule with ‘Pending changes’ as the status, then you need to go into the rule and click save, as shown in fig 7.4.1.
If you do not save the rule whenever you are exiting, the rule will be marked as ‘Pending changes’ fig 7.4.2. When a rule is marked as pending changes then the entire rules engine will not function properly and cause major issues in order processing, even if the rule is not enabled. If you see any rule with ‘Pending changes’ as the status, then you need to go into the rule and click save, as shown in fig 7.4.1.

7.5 Only One Action Per Rule
There can only be one action carried out per order per rule. The three rules that are enabled now happen to virtually every order that is placed with Bragan. The reason there needs to be three separate rules is because once the order has made its way through all conditions and found an action to carry out, as seen in fig 3.3, the order can not start this rule again and try to come to a different action. It can however move on to the next rule and see if there is another action that it can meet there. So, for every new action you need to be done for orders, you will need to create and enable a new rule, the action cannot be added to a current, enabled rule.
Notes#
This section is important so Adhoc points and issues can be logged. Also, Q&A can be logged for suggestions for potential issues encountered. Also, log important notes needed for this system. Additional Notes:
This shows the process of Linnworks Rules Engine SOP. This explains the different tab in Linnworks.
Potential Issues:
1 - ISSUE ENCOUNTERED: Stuck on Loading
RESOLUTION: Refresh Browser
2 - ISSUE ENCOUNTERED: Broken Links
RESOLUTION: Get the external link as this will allow other people to access the SOP without the need for login credentials and avoid broken links.