B2B Master Trade File Update
The Trade File is the company’s repository of all listed items on the website with all
Overview#
Purpose: The Trade File is the company’s repository of all listed items on the website with all relevant data including retail prices, supplier purchase prices, calculated trade prices, and other item details. An extract of this file containing the SKU, item title, trade price will be sent to the trade customers of the company via an email macro of which customer service agents are responsible for sending to the qualified trade customers.
Scope: This procedure applies to Bragan employee who is entrusted by the management to handle and update the trade file.
Responsibility: It is the responsibility of delegated personnel to ensure the process set out in this procedure is followed.
Objective: The objective of this procedure is to guide the personnel on how to update the Trade File.
Procedure#
Master Trade File Overview#
The Trade File is the company’s repository of all listed items on the website with all relevant data including retail prices, supplier purchase prices, calculated trade prices, and other item details.
The latest Master Trade File can be accessed through this link (please provide link).
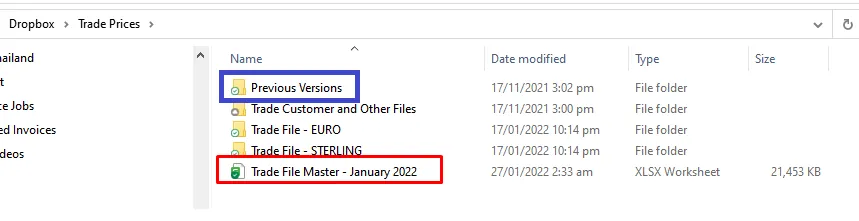
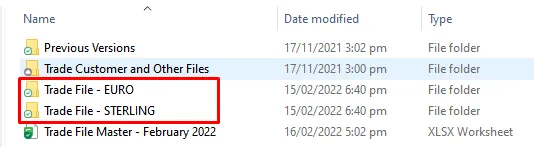
Note: In Figure 1 below, the trade file is for January 2022. If February comes, a copy should be saved in the Previous Versions Folder for the January 2022 file and then it should be renamed to Trade File Master - February 2022. Same is true for the next succeeding months.
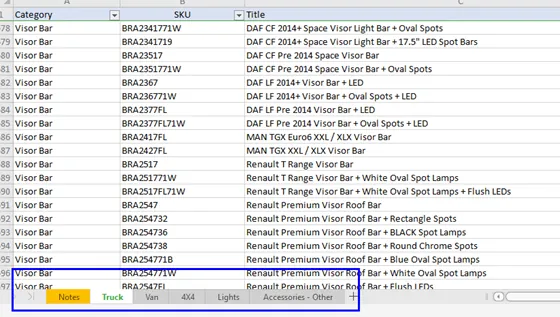
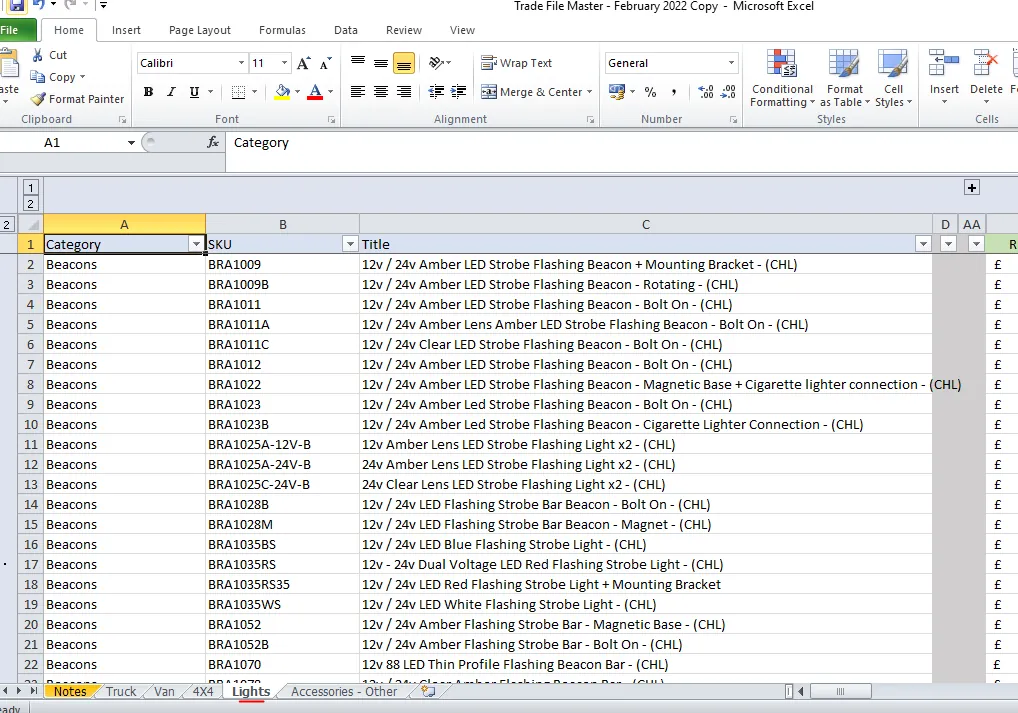
When file is opened, you will see the 6 visible sheets (See Figure 2). Sheet for Truck (all items we have for trucks both parent and child SKUs are found here), Van, 4x4, Lights and Other Accessories. There are also hidden sheets here such as the sheets for individual suppliers, Bundle Pricing Reference, and many more.
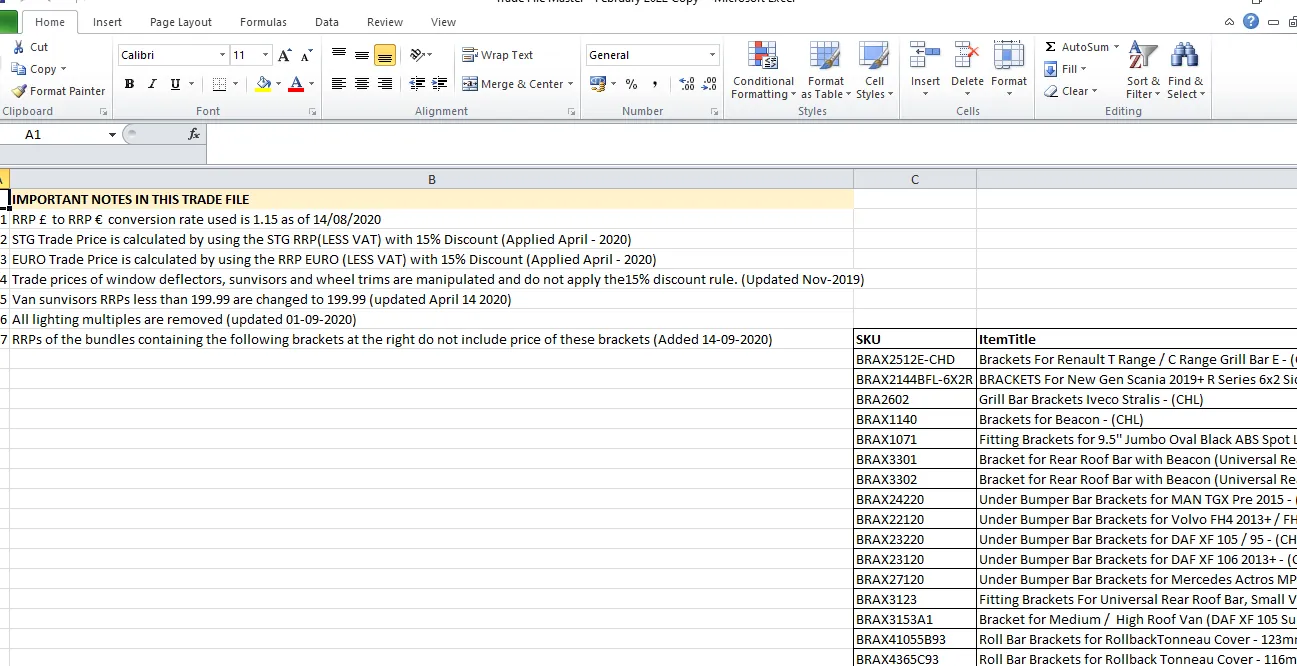
The note sheet looks like the snipe below. It contains important notes for the Trade File.
There are different scenarios wherein you need to update the Master Trade File here are the most common ones:
When there are new SKUs being listed.
When there are changes in the bundle pricing
When there are changes in the price
Updating Master Trade File with Newly Listed Items#
- Export Newly Listed SKUs from Magento Back End
Every time there is a new SKU being listed, it should be added to the Master Trade File. Person in-charge in updating this file will do this weekly or every two weeks.
The easiest way to know what are the new SKUs listed for the past week or past two weeks is to download the Inventory Catalogue File from Magento back end. Do not get it from Linnworks since the created date found in the SKUs are not the date the listing was created, instead it is the date when the SKU was created. Thus it is not a reliable source.
Follow the steps below on how to export these information from Magento.
1.1 Go to Magento back end and login using the credential provided by management.
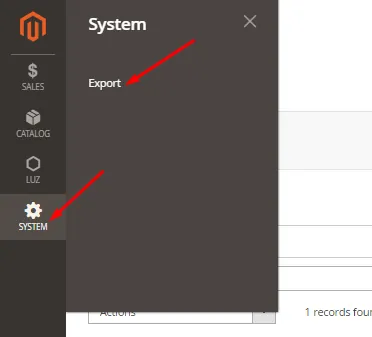
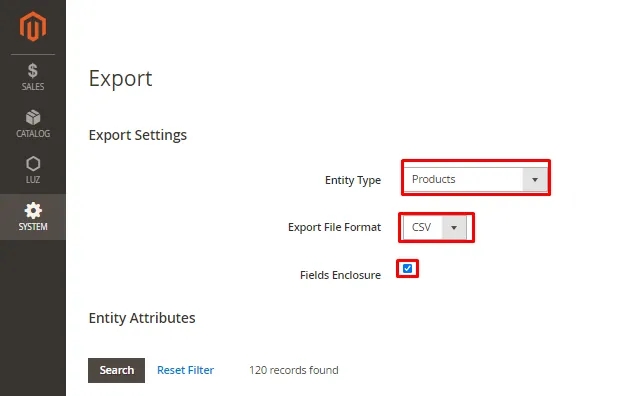
1.2. Click System > Export
1.3. Select Products for the Entity Type. CSV for the Export File Format and make sure to check File Enclosure.
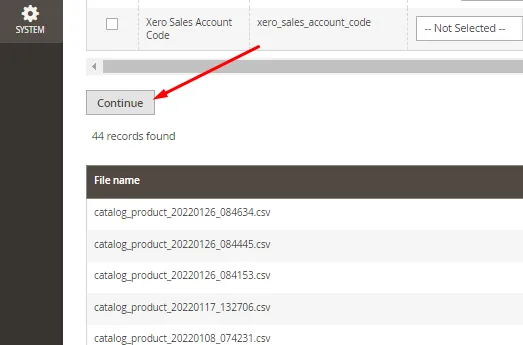
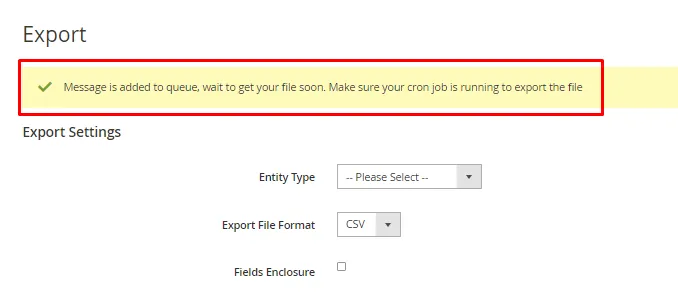
1.4. Just scroll down to the bottom and click the Continue (FIG 5). You will see a message of confirmation at the top of the page (FIG 6).
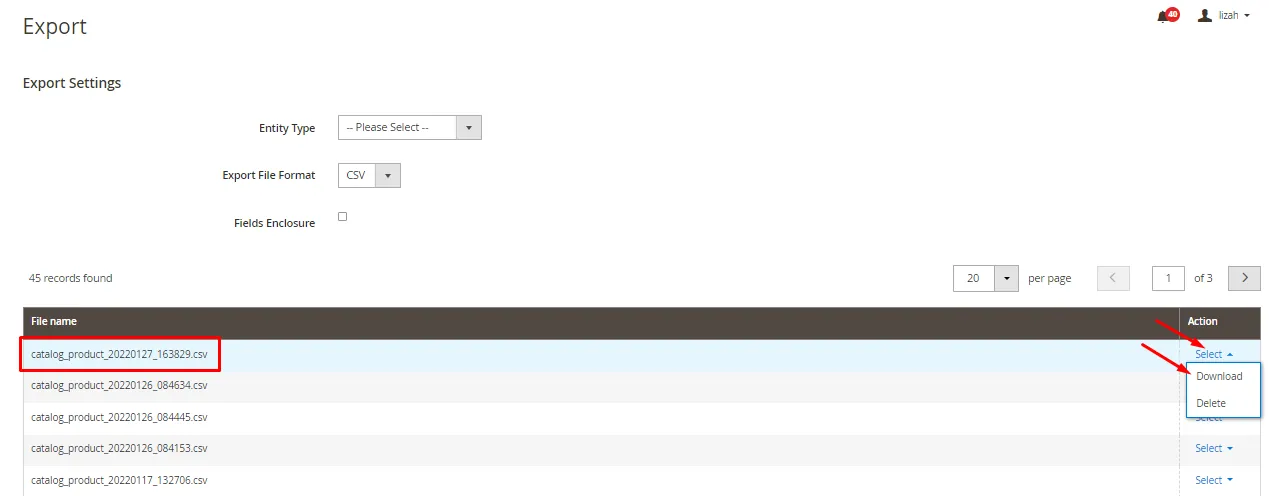
1.5. Wait until a new filename is added in the list. You may need to reload or refresh the page to see the new filename added in the list. Sometimes you need to do it again if it still won't appear. Once the filename is added at the top of the list, select Download in the dropdown list found the at right (FIG 7).
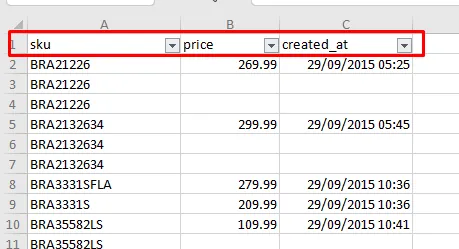
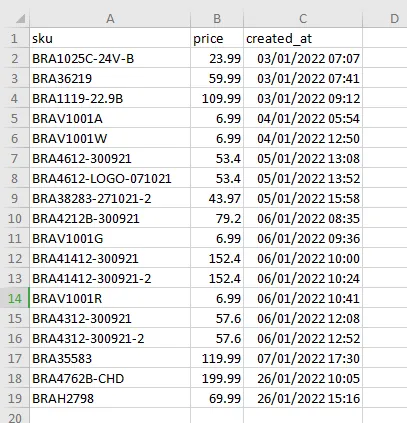
1.6. This is now the latest Inventory Catalogue, it contains all the items (both child and parent SKU) listed in Bragan website. Open the file and filter the columns. Open the CSV file and remove other columns and leave only the 3 columns as seen in
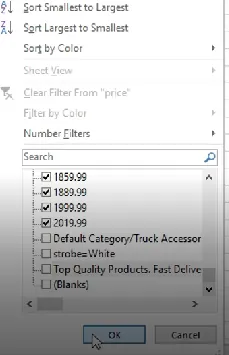
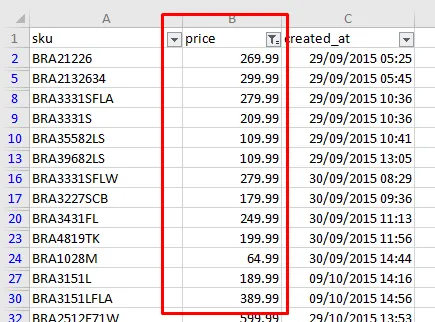
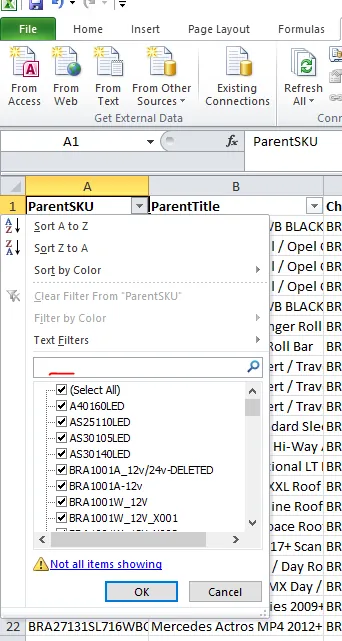
1.7. Click Filter icon of excel and then filter the price. SKUs with no prices should not be included so filter it and uncheck those with Blank and the others with different value (See Figure 9 on what to uncheck). This Price column now will show all SKUs with prices.
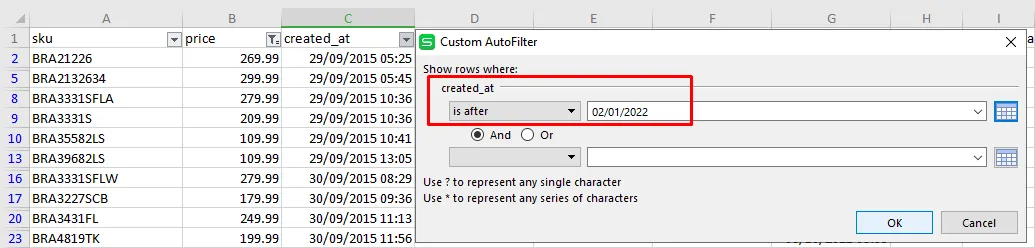
1.8. Filter also created_at date to see only SKUs listed after a certain date. For example, you want to see newly added listings for the past week, then select the date you want to see.
1.9. Copy the filtered rows in a new sheet. You will be left with just fewer rows after the filter. This would be your working sheet. These are now the new SKUs/listings added for the past week. These are the SKUs you need to add in the Master Trade File.
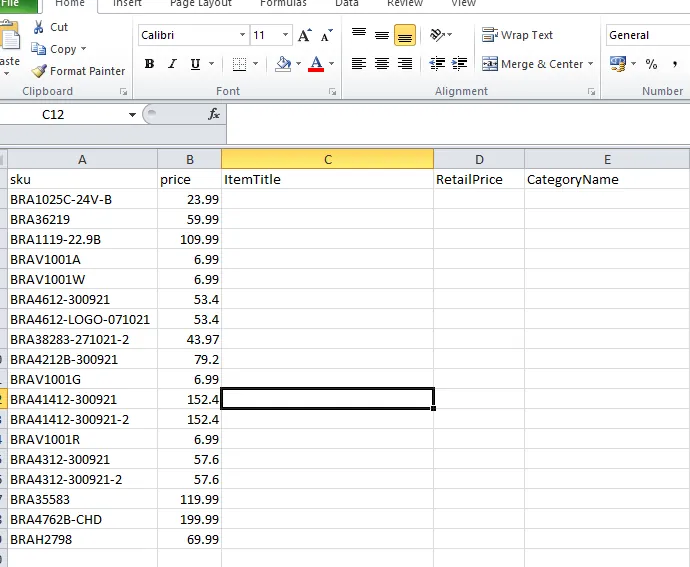
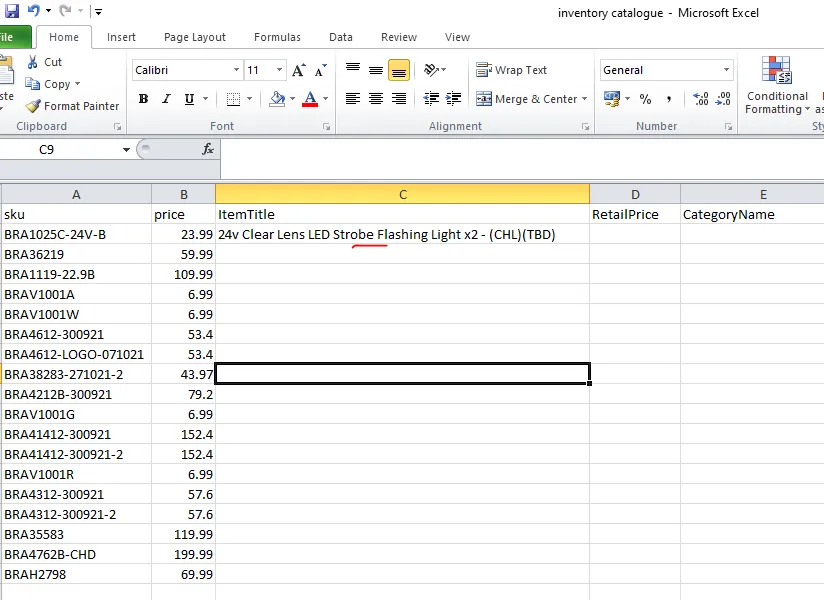
1.10. You can then remove the created_at column since you won't be needing this anymore. In this new sheet, you need to add three more columns for the item title, retail price and category. To get this information you need to go to Linnworks and do query data.
1.11. Open Linnworks > Dashboards > Query Data
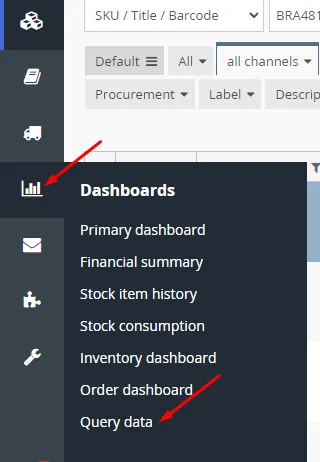
1.12. For the Query Type select Stock items (with levels). Location should be Default and then click Download (CSV file).

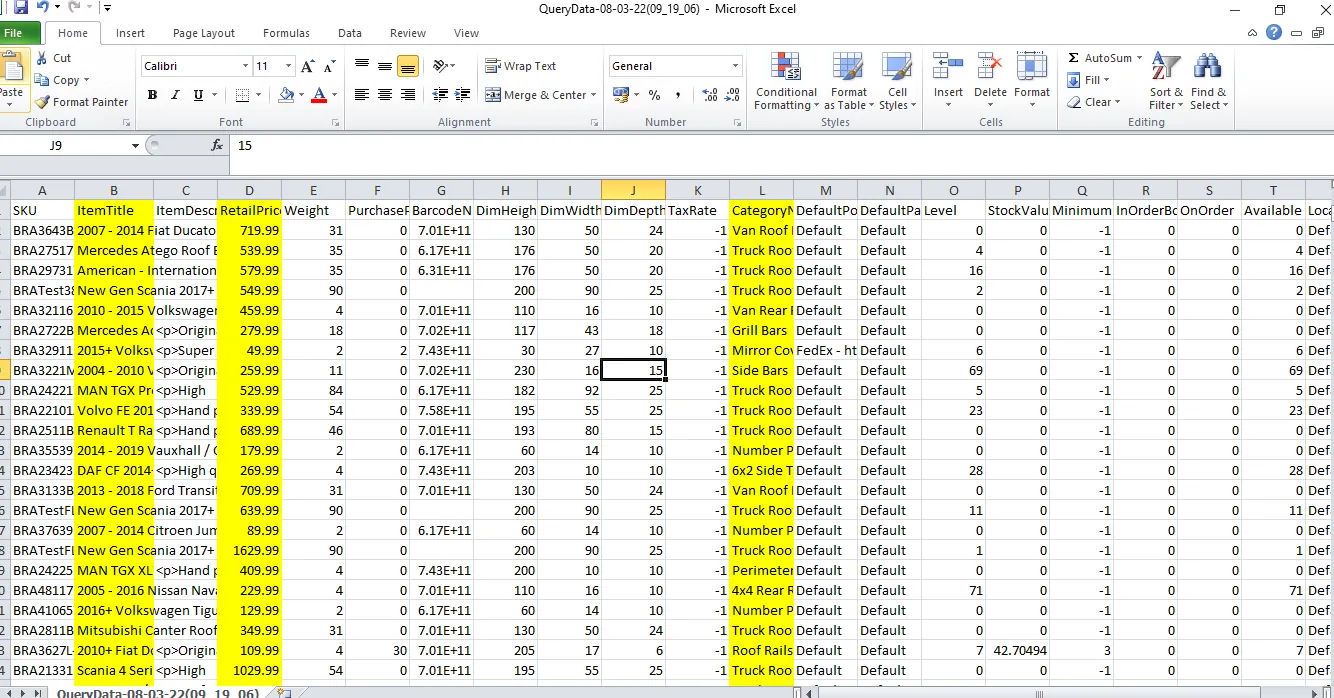
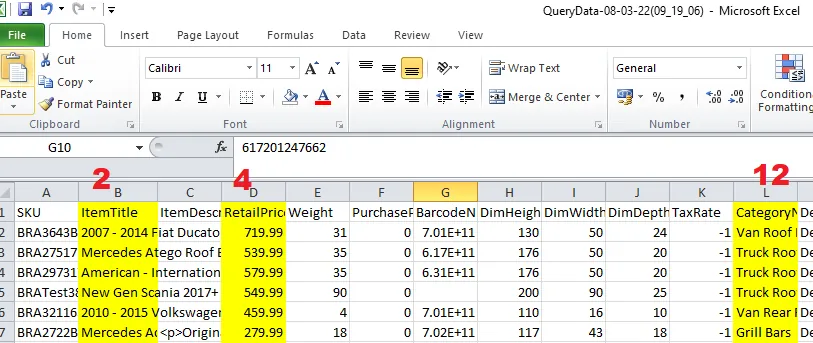
1.13. This CSV file contains more information details for all SKUs in Linnworks, but what you will only need from this file is the Item Title, Category Name and Retail Price. You can highlight the column so it is easier for you to see when doing the vlookup process for the next step.
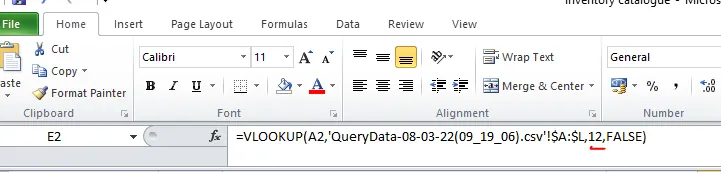
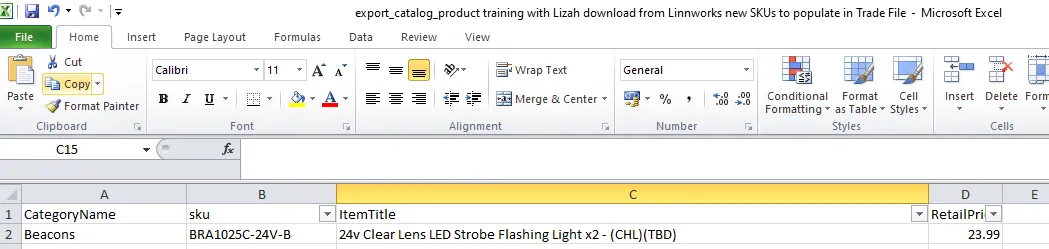
1.14. Go back to your working sheet, your working sheet should look like the Figure below. Use the vlookup formula to get the values for Item Title, Retail Price and Category of the newly listed SKUs.
For the vlookup formula for the item title follow this process:

Go to the downloaded Stock Items (with level) CSV file and select the columns from the first (Column A) up to category (Column L).
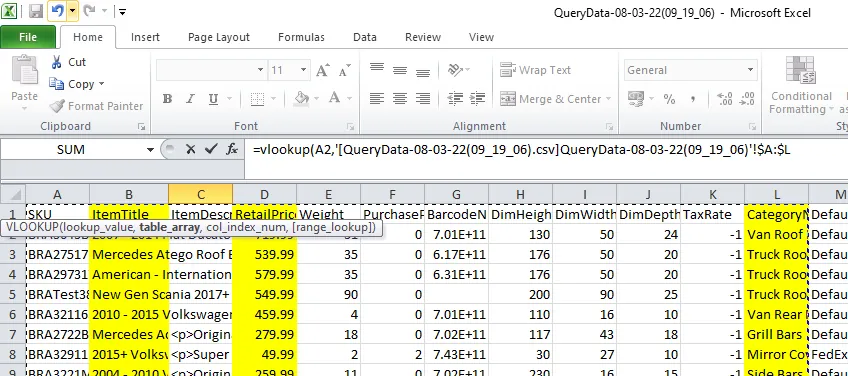
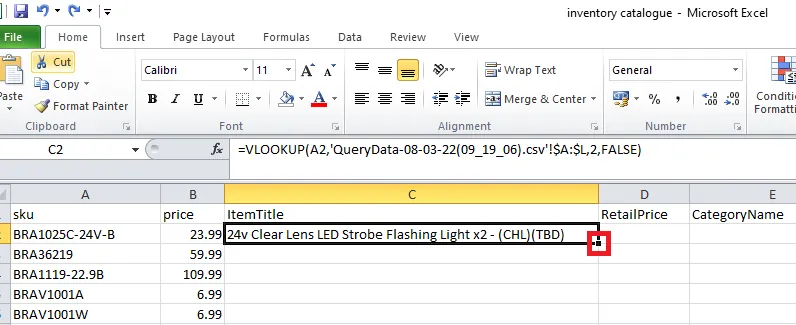
Put a comma (,) after L and then type 2 (this is because the Item Title which we are doing the lookup is located at column B or column 2. Then put a comma (,) again then type FALSE then add a close parenthesis then enter.

As you can see there is now a value for the item title for this SKU.
Double click on the one with the red box to automatically copy the formula for the next rows.
You can now delete the SKUs that are auction items or the one with DAMAGED, also delete ARCHIVED items. You can filter the item title to determine these SKUs or
since there are only few you can just directly delete it. Delete also the SKUs with no value on the title, one with #N/A.
Another way of knowing if an item is an auction item is that the SKU has a date on it. For example: BRA4612-300921. the 300921 (Sept. 30, 2021) is the date the auction item was posted in the Returns Skype Group.
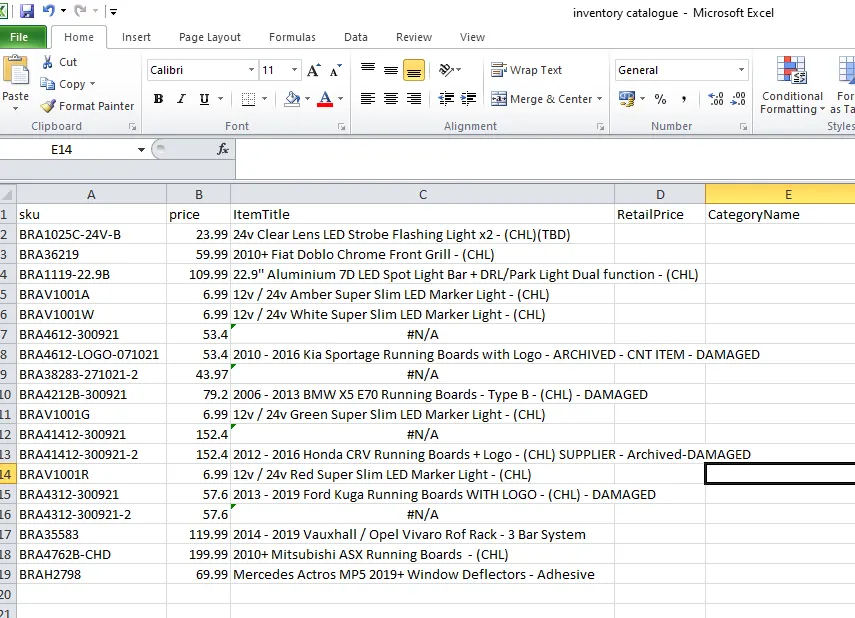
For the Retail Price and Category Name, do the same process for the vlook-up. But instead of 2 put 4 for retail price since it is in the 4th column and put 12 since it is in the 12th column.
Note: These numbers are not fixed, it depends on which column number these properties were located so make sure to count it.
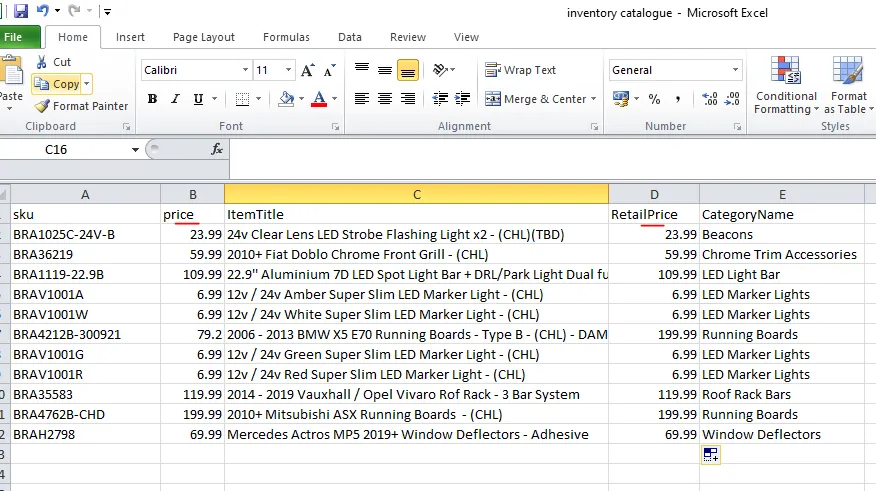
1.15. Once all the columns are filled your working sheet would look like the snipe below. As you can see, the Price and the Retail Price are just the same so you can delete column B. Then transfer Category Name to Column A for easier copying to Master Trade File.
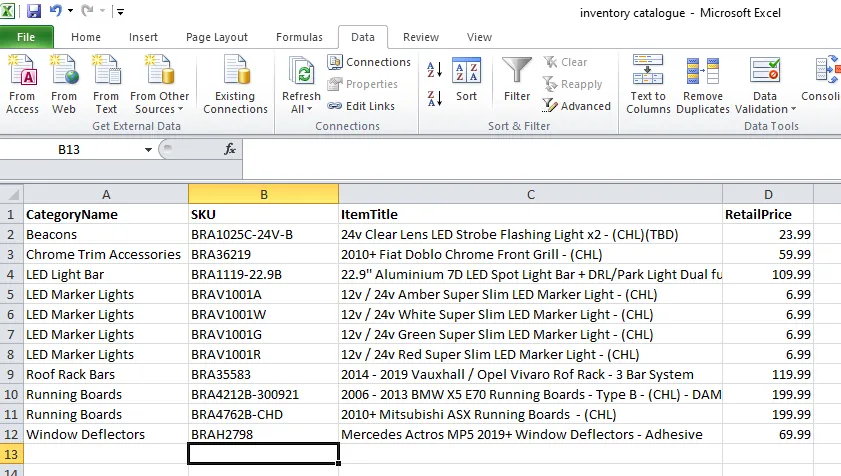
Sort it also by category name so that items with the same category are adjacent to each other. Final sheet should look like this:
- Updating Master Trade File (Main Sheets - Truck, Van, 4x4, Lights & Accessories Others)
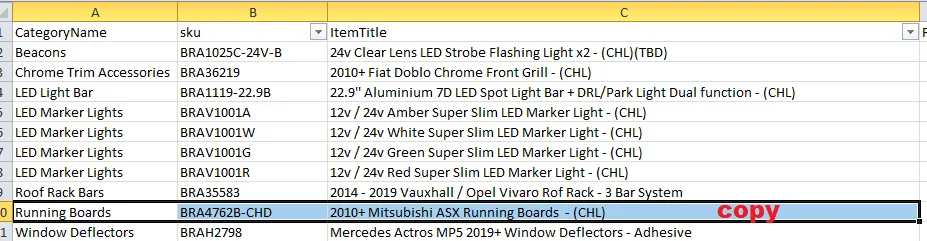
2.1. Figure 27 shows all the newly created listings for the date period you chose. These SKUs are not yet added to the Master Trade File. Add the listed SKU to its correct sheet in the Master Trade File.
For example, the first item is a beacon, therefore add this in the Lights Sheet of the Master Trade File.
Another example, the running board BRA4762B-CHD 2010+ Mitsubishi ASX Running Boards - (CHL). From the SKU you will know that this is a 4x4 because there's a 4 after BRA. See this SOP on SKU Code Creation so you will know what vehicle based on the SKU code. Add this in the 4x4 Sheet. To know more also about parent and child SKU, see this SOP.
2.2. Once you determine the correct sheet where you are going to add the SKU, you need to check the category of the SKU to know where you are going to insert it.
Let's go back to our first example, the beacon. We know that we will add this to the Lights Sheet in the Master Trade File.
Category is beacon so you need to filter the category so that it will only show beacons.
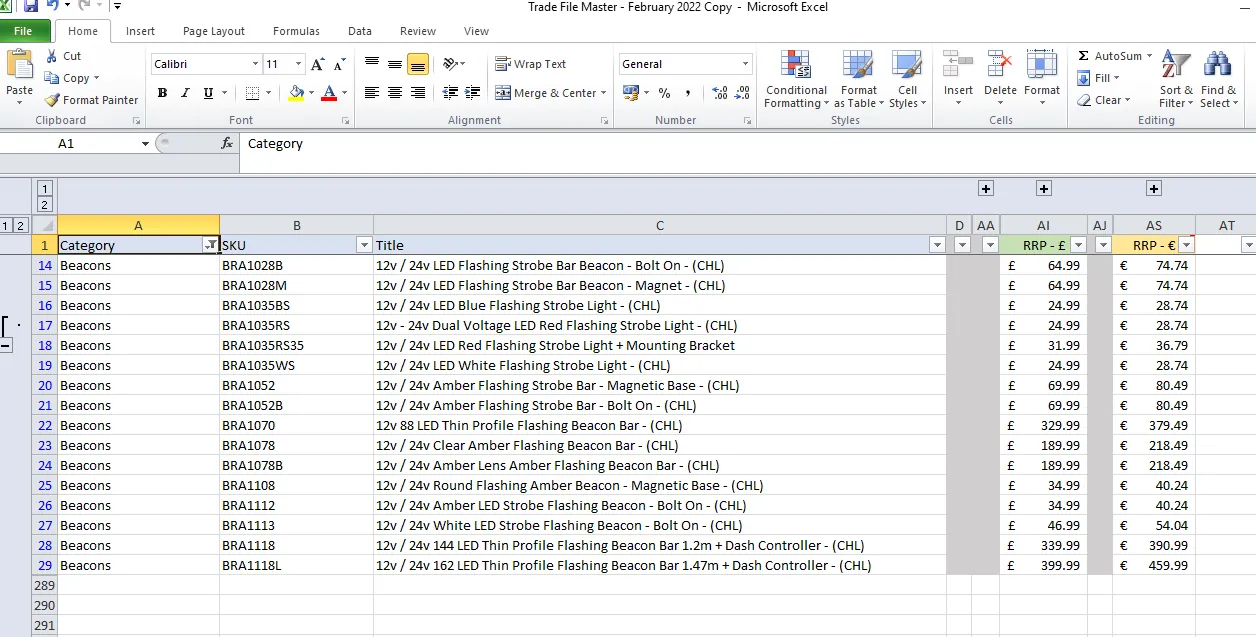
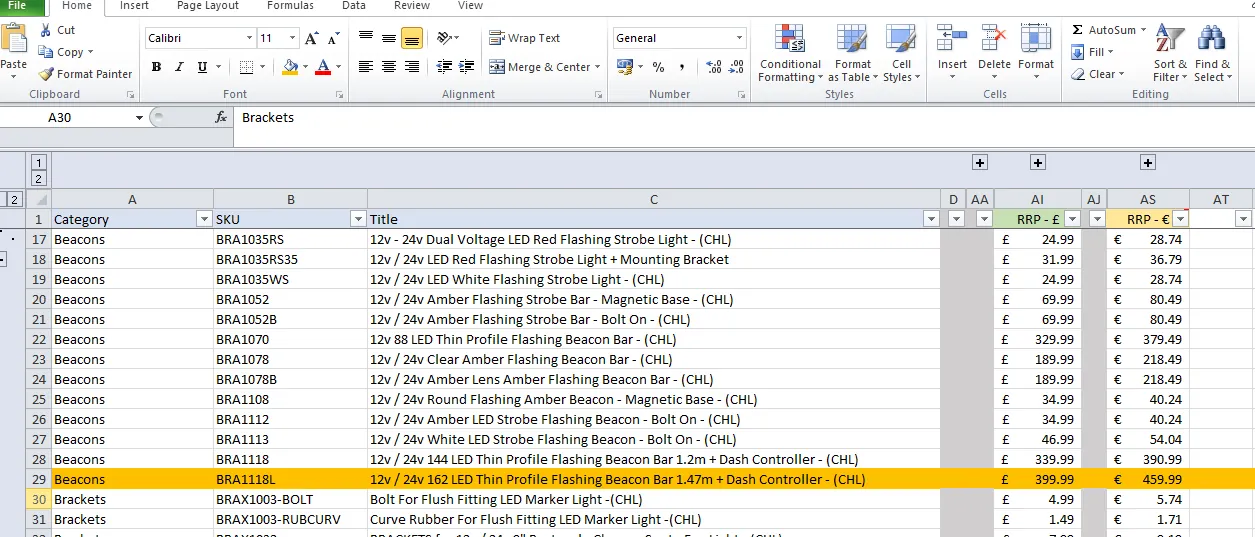
We need then to insert a row in order to input the details for this beacon. You should insert it after the last beacon item. The highlighted SKU is the last beacon item so insert a row below it and add this new item.
For Trucks, Van and 4x4 items, aside from checking the category, you also need to check the correct make, model and year of the vehicle in the item title to know where to insert it.
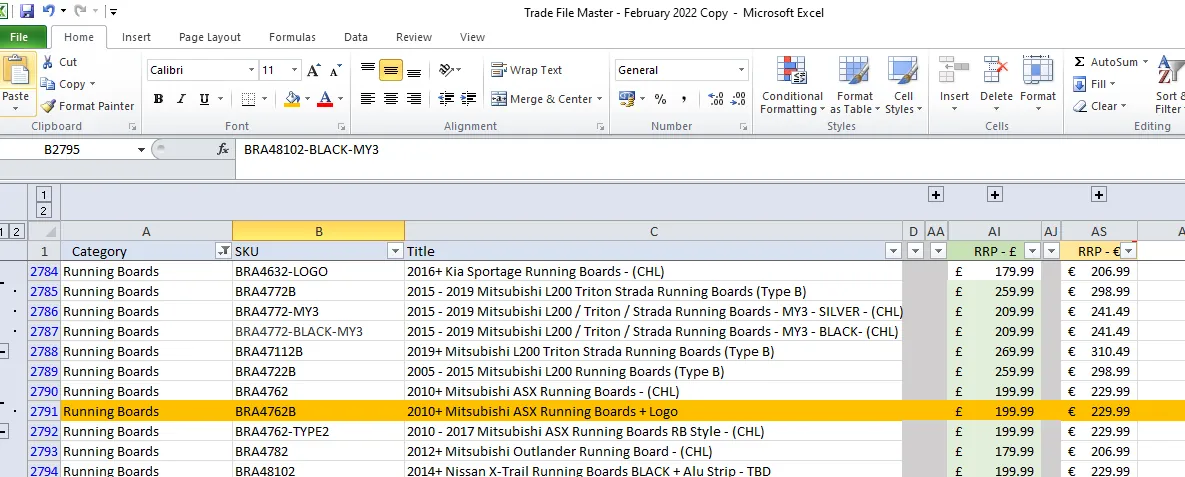
Back to our example the running board BRA4762B-CHD 2010+ Mitsubishi ASX Running Boards - (CHL). Go to the Truck Sheet, then filter so that running boards are the one showing. Then filter the item title for Mitsubishi ASX 2010+.
Insert the row after the highlighted SKU and add the item.
2.3. Copy the first three rows in your working sheet and paste it in the new row you created in the Trade File.
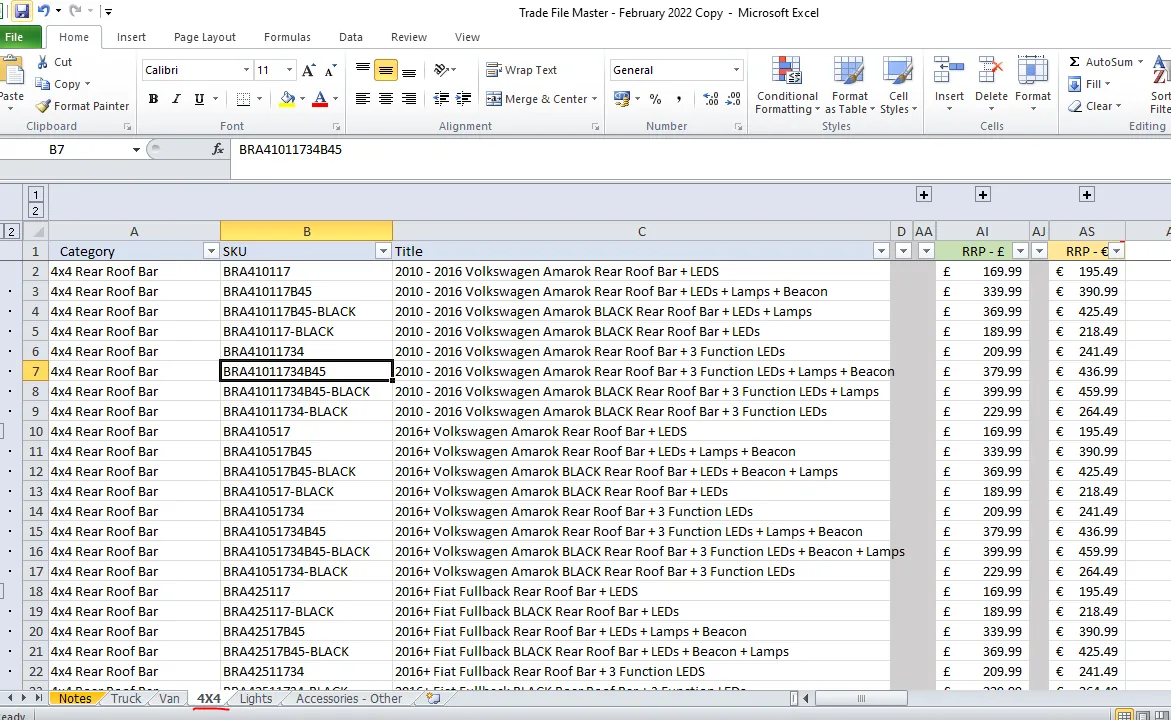
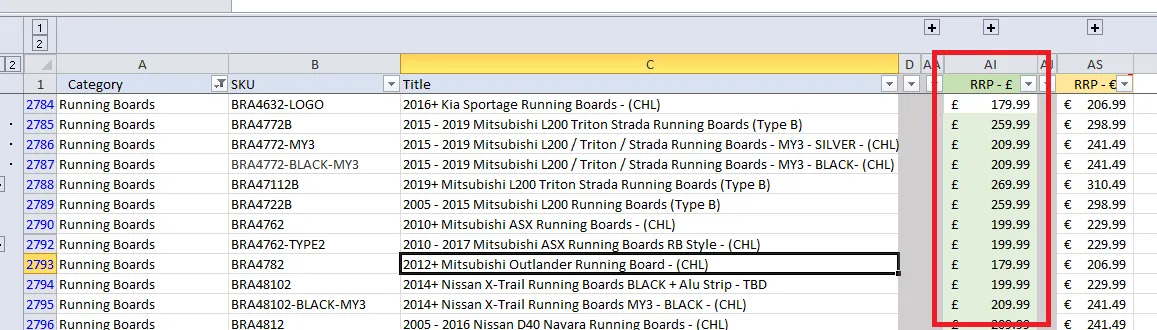
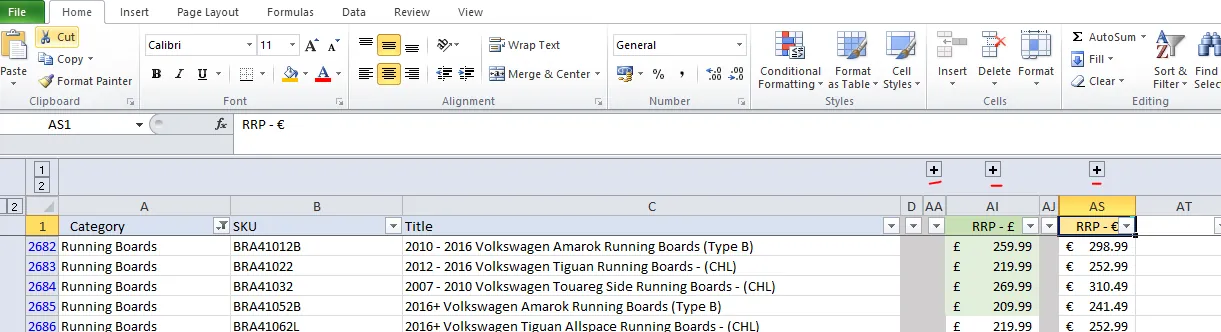
2.4. Input the price in the RRP - £ column. The value in the RRP - € column is a formula where it automatically converts the value you input in the RRP - £ column to euro.
2.5. Then expand the sheet by clicking the plus signs. And add composite items. If the SKU is a child item meaning it has a CHL or CHD in the item title, it is considered as a composite to itself.
For the example below, it has a CHL in the title so it is a child item, simply copy the SKU and paste it in the Child 1 Column and put 1 in the quantity. Quantity is always 1 for child items.
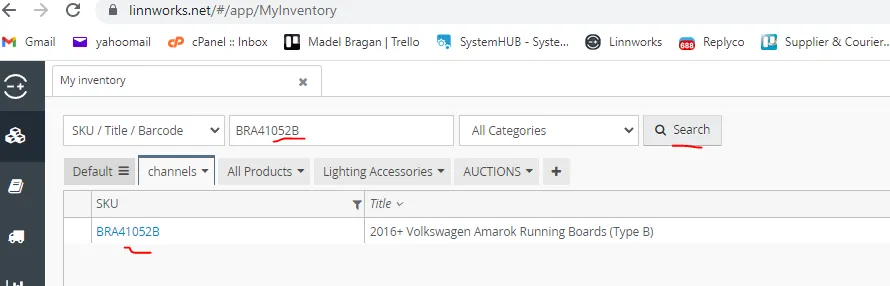
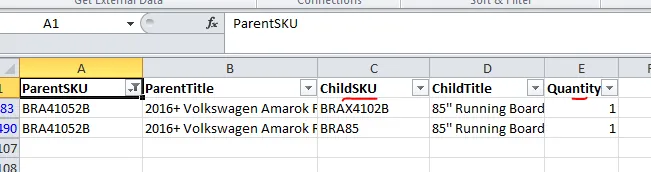
If SKU is a parent item, meaning it is composed of 2 or more child items then you need to check this in Linnworks Composition tab. Copy the SKU and search it in My Inventory tab in Linnworks, click the SKU and go to Composition tab. For the example below, it don't have a CHL or CHD in the title so this is a parent item. Copy the SKU BRA41052B and search in Linnworks

Copy the SKU BRA41052B and search in Linnworks then click on the SKU to open the Product Details Screen.
From here you can see that there are two child items and the corresponding quantity.
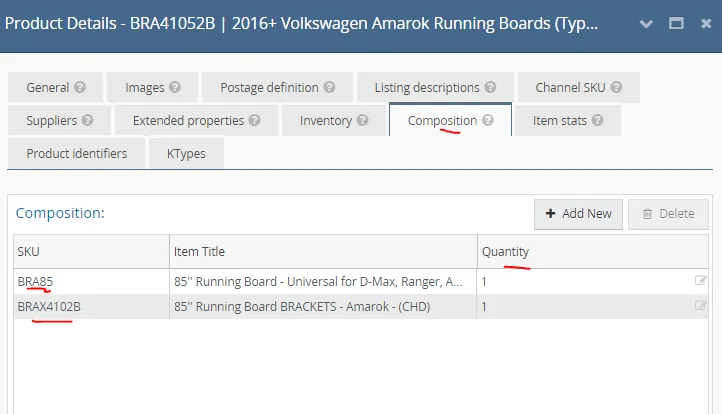
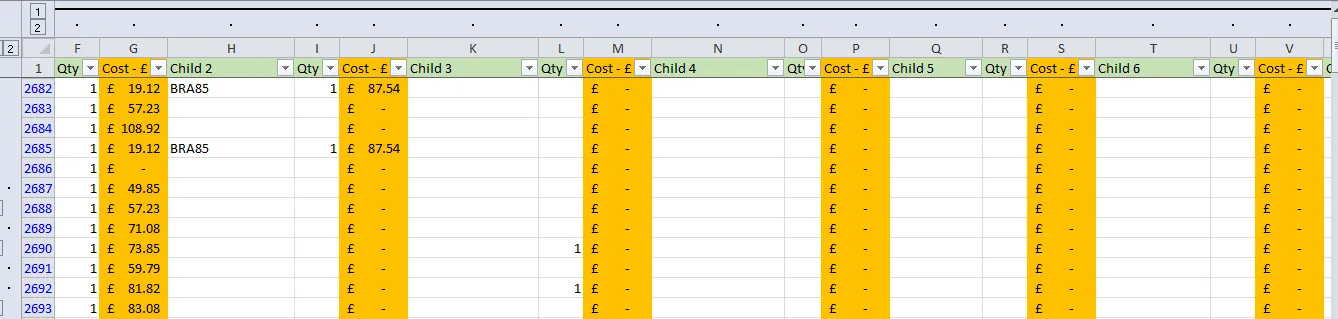
Input the first child SKU BRA85 to the Child 1 column in the Master Trade File and its quantity. And input the other child item BRAX4102B in the Child 2 column. They can be interchanged it doesn't matter which child items goes to what column, as long as all child items are added.

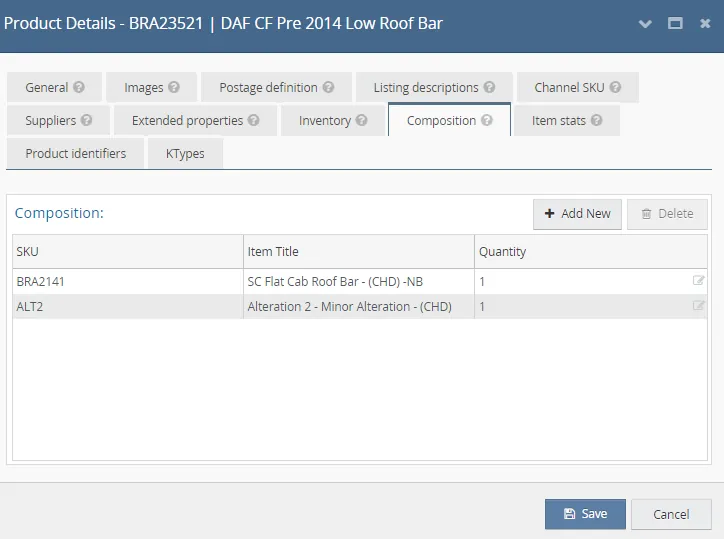
There are also items with ALT as part of a composite. Make sure also to add this as a child item in the Master Trade File. ALT means alteration. It means that bar or item is being altered in order to fit the vehicle. See this SOP on ALT. See sample below for an item with an ALT.
For the costs columns, value is a formula, just copy the formula and paste it to the cell. Cost will automatically appear if the child item is already added in the Child - SKUs COST Reference Sheet (process on how to add to this sheet will be discussed in details in next sections)
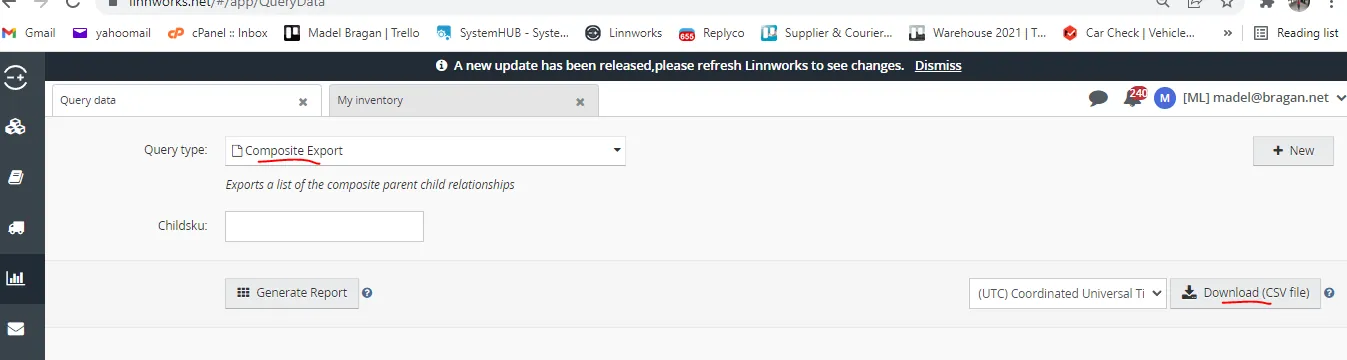
2.6. Another more efficient way of checking for the composites is to do export it from Linnworks. You need to do a Query Data. To do this, go to Linnworks > Dashboards > Query Data

Query Type should be Composite Export and then click on Download CSV File.
The CSV file for this composite export report should look like the figure below.
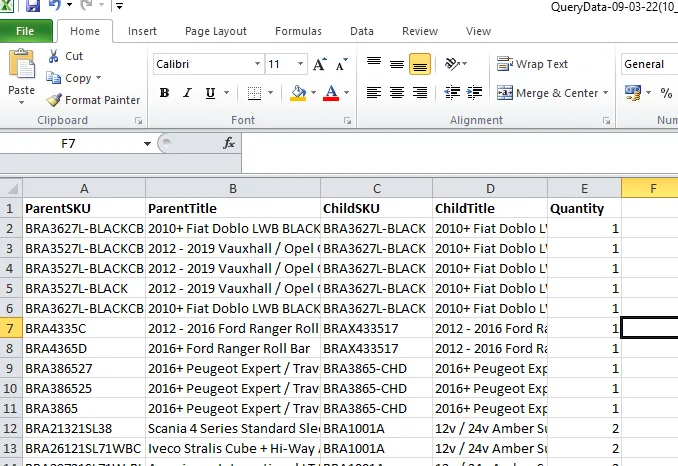
Filter ParentSKU column and then search for the parent SKU that you are going to add. In our example above it is BRA41052B
You can see its two child SKU and the quantity, which is the same data we input in Step 5.
2.7. For columns AB-AH and AK-AR values are also formula so just copy. Once every column are filled-out then you can proceed to the next SKU and add it to the Master Trade File.

- Adding Items in Suppliers Sheet, SKUs COST Reference Sheet and Bundling Pricing - Composite £ Sheet
After you input the child item and then no corresponding cost appears, it is possible that this child item is a new one and not yet added in the Suppliers Sheet, Child - SKUs COST Reference and Bundling Pricing - Composite £ Sheet.
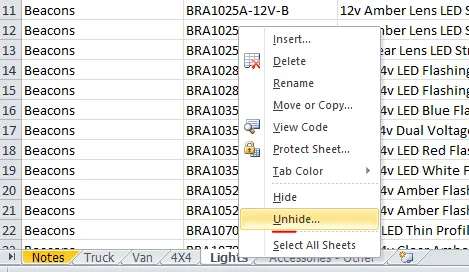
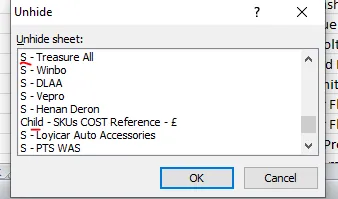
Each supplier has its own sheet in the Master Trade File, you just need to unhide the sheet in order for you to see it. Right click on any sheet and click Unhide. All that has S on it are suppliers sheet. (See Figure 54 )
3.1. Know first which supplier sheet you are going to add the Child item SKU. To know the supplier, go to Linnworks, search again the SKU, click on it to open the Product Details Screen and go to Suppliers tab.
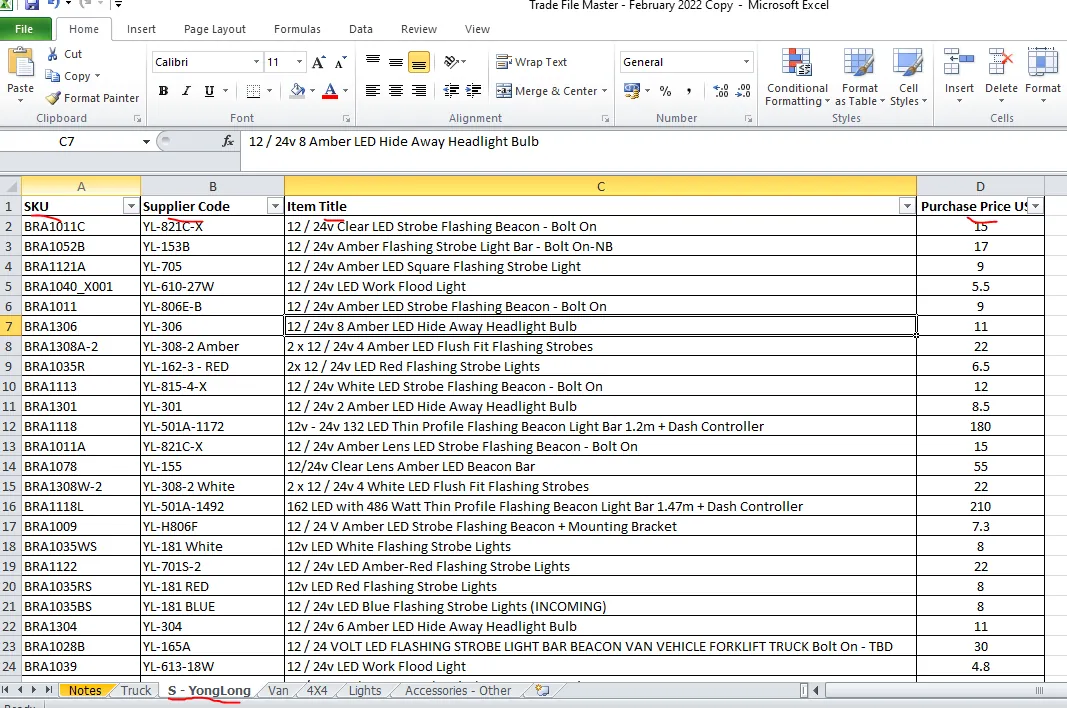
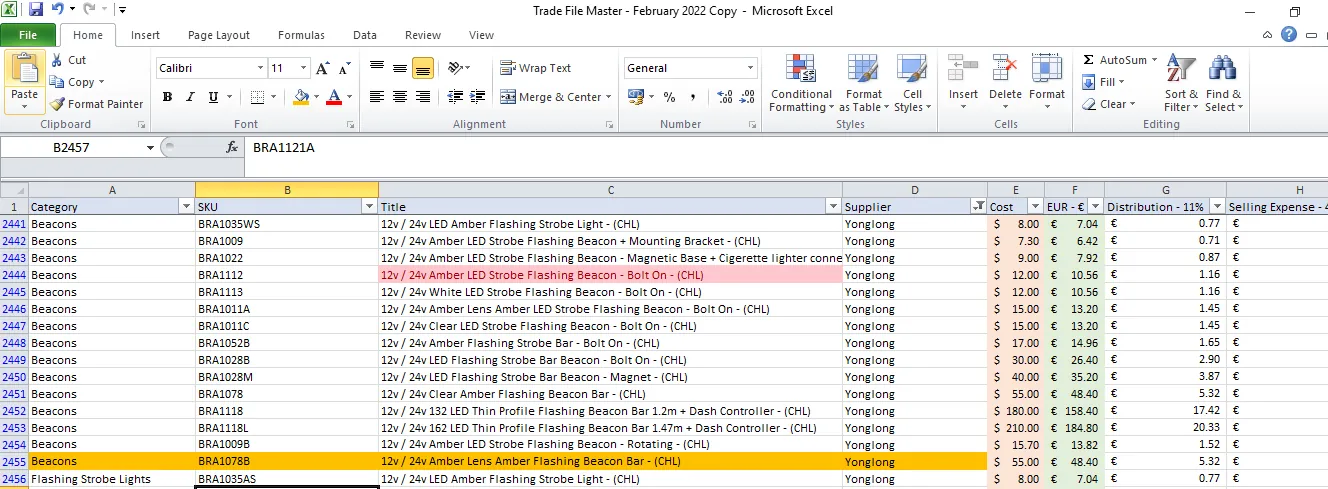
For example, let us assume that BRA1009 12v / 24v Amber LED Strobe Flashing Beacon + Mounting Bracket - (CHL) is a new SKU and not yet added to suppliers sheet. Search supplier details of this in Linnworks, you can see that supplier is Yonglong with Purchase Price of $7.3, you can also see the supplier code. You will need these details and add it in the the Yonglong Supplier Sheet in the Master Trade File.
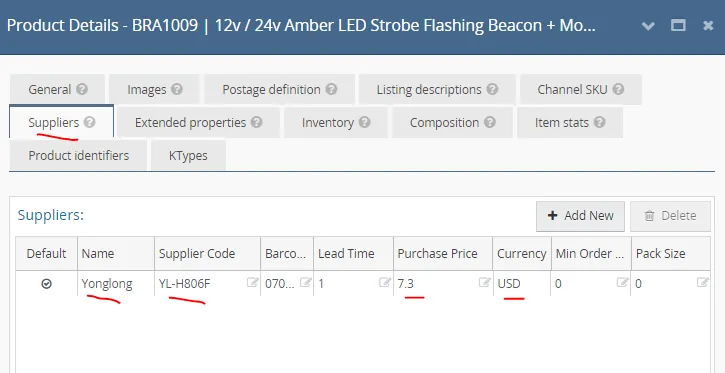
3.2. Go now to S-YongLong sheet and then add the item and corresponding required details.
3.3. If it is a new supplier and there is still no sheet for this supplier. You will need to create one. Just follow the format shown in Figure 56. Follow the column titles as these are the details you need. Rename also the sheet following the same format of the other suppliers sheet.
3.4. Once you fill-out this sheet, go now to the Child - SKUs COST Reference Sheet.
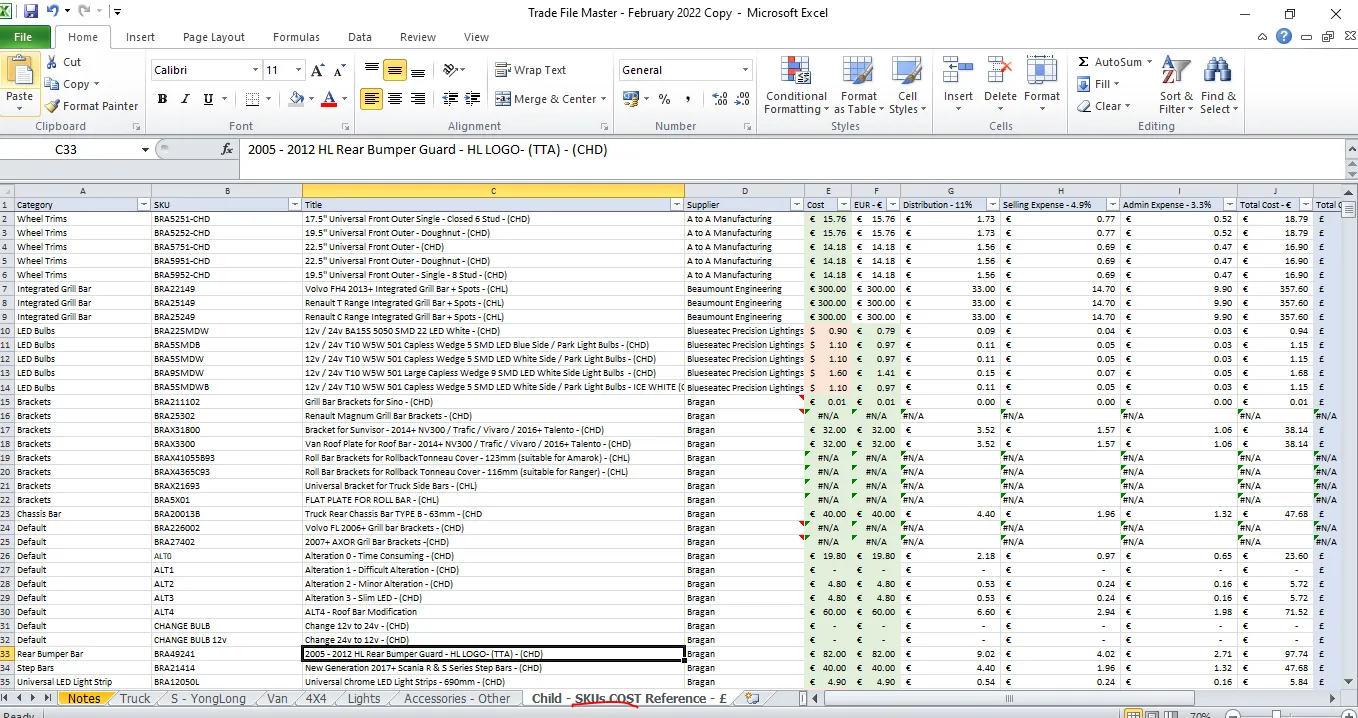
Filter the Supplier so that only YongLong will show. Then since our example is a beacon, insert a row after the last beacon item and fill the details. Fill-out only the highlighted part as shown in Figure 58. As the other columns are formula, just copy the formula and paste it in the cells of the new row.
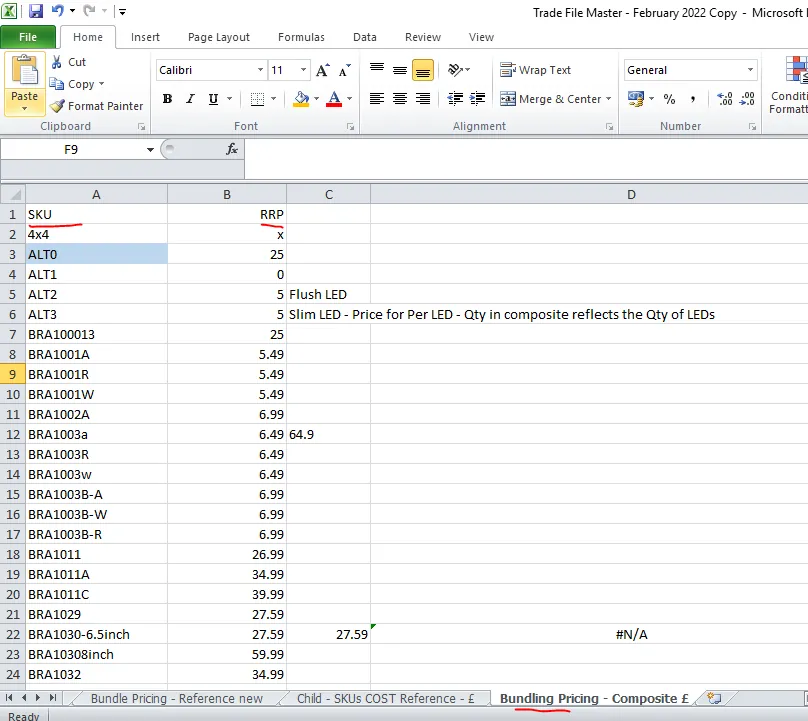
3.5 Add also the new SKU in the Bundling Pricing - Composite £ Sheet. The RRP here is just the RRP found in Linnworks.
The process for updating the Master Trade File for newly created listings end here. Below is another way of updating the Master Trade File. You do this update when there are changes in the bundle pricing as stated by management.
Updating Master Trade File due to New Bundle Pricing#
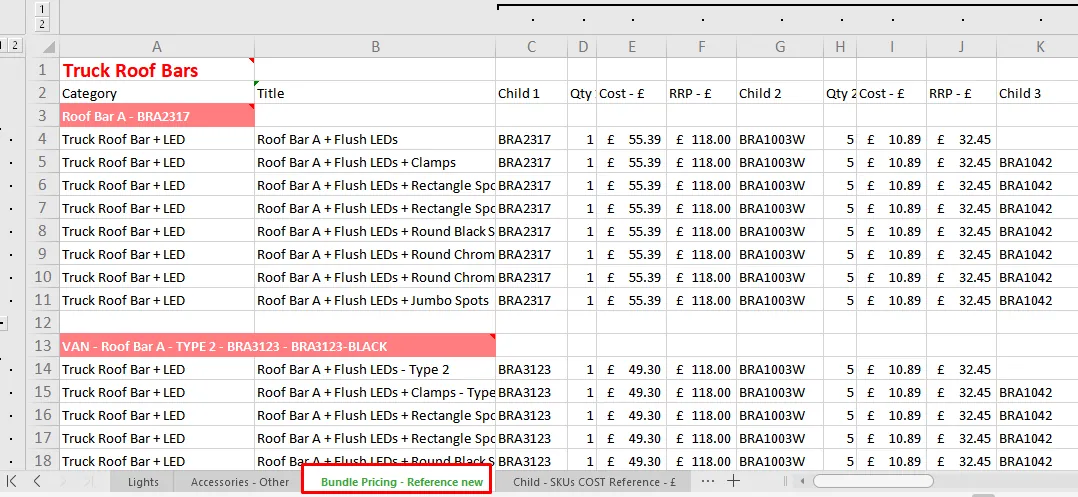
- If there are any changes in the bundle pricing, create it in the Bundle Pricing - Reference New Sheet in the Master Trade File. Just unhide it for the sheet to show. Bundle pricing changes because there are changes in the retail prices of its component child SKU.
-
All components or child SKUs should be in the Bundling Pricing - Composite £ Sheet, just unhide for the sheet to show. The RRP found here is the one found in Linnworks. If the component or child SKU is not yet found in this sheet then just add it.
-
Once you put in the RRP of the child SKU in the Bundling Pricing - Composite £ sheet, the RRP column of each child SKU will automatically fill.
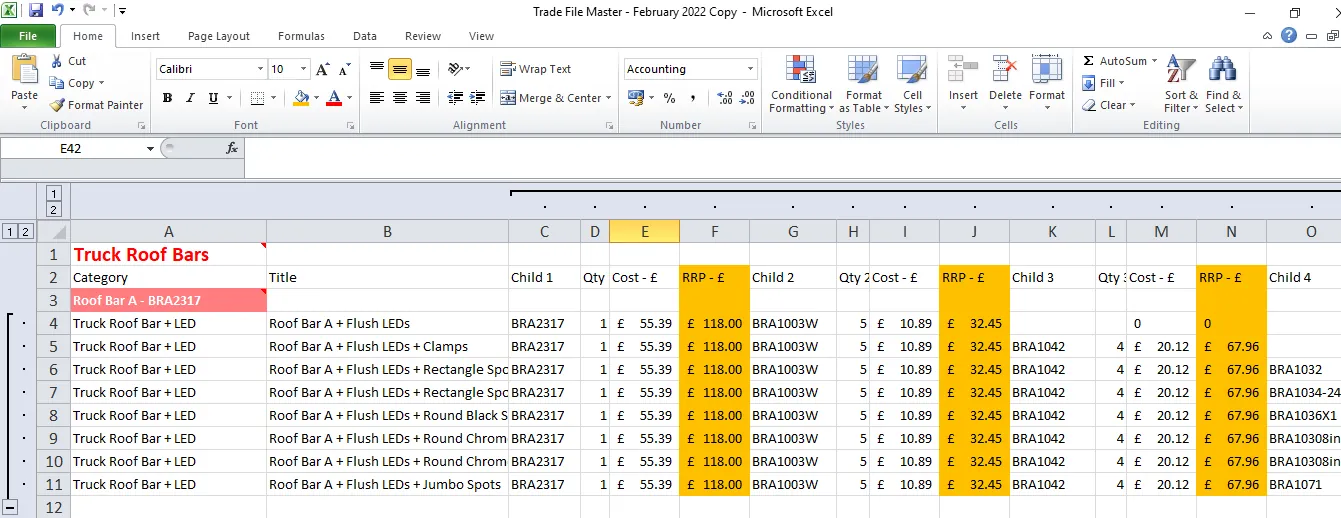
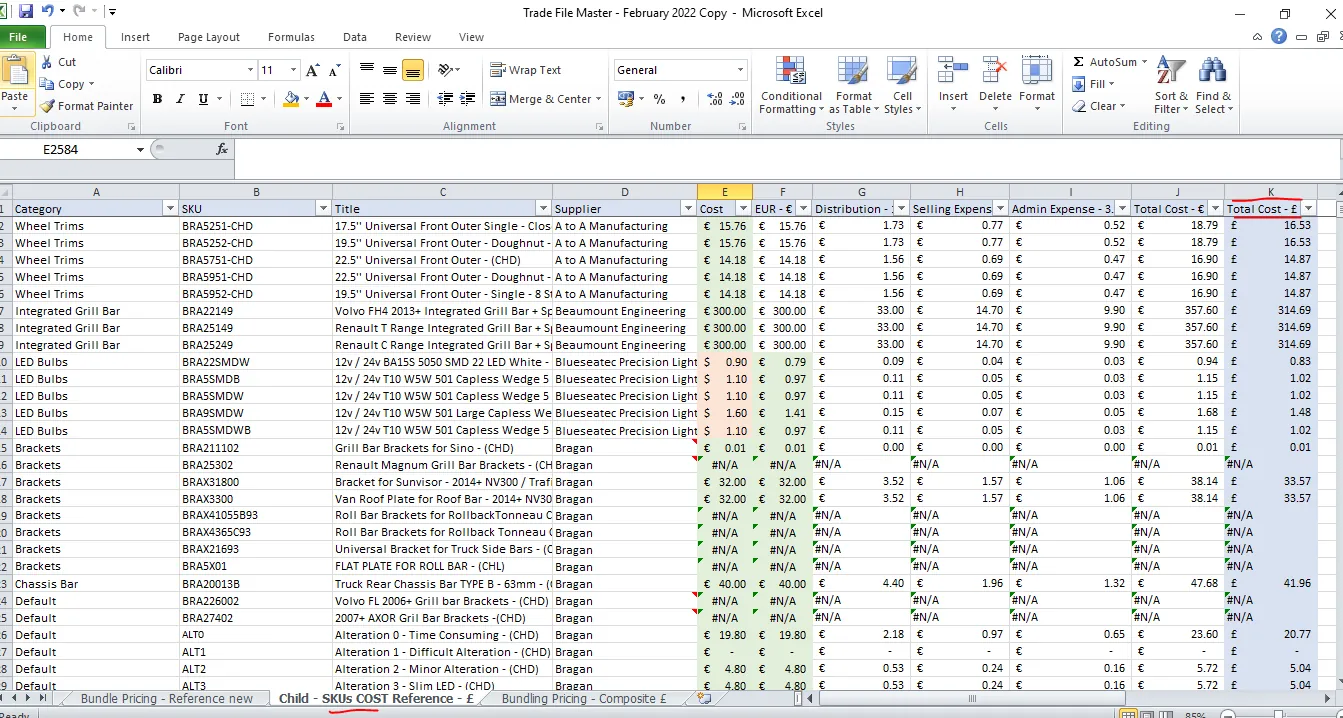
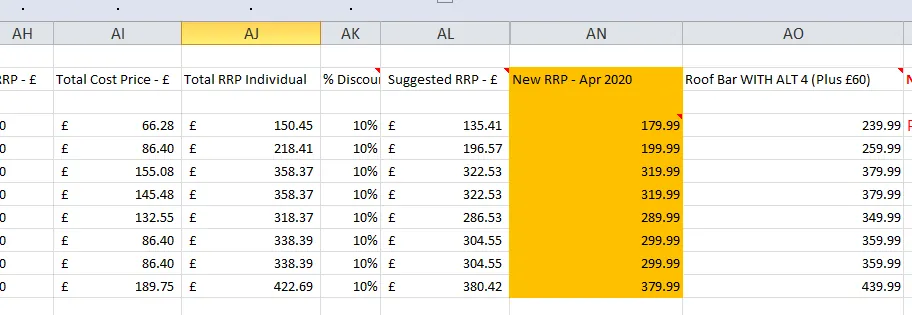
- The cost column (highlighted in orange) is the total cost-£ of the item found in the Child - SKUs COST Reference - £ Sheet (see Figure 63). So make sure also that the child item is already in this sheet. If not then add it. Follow step 3 in Updating Master Trade File with Newly Listed Items to know how to add child SKUs in this sheet.
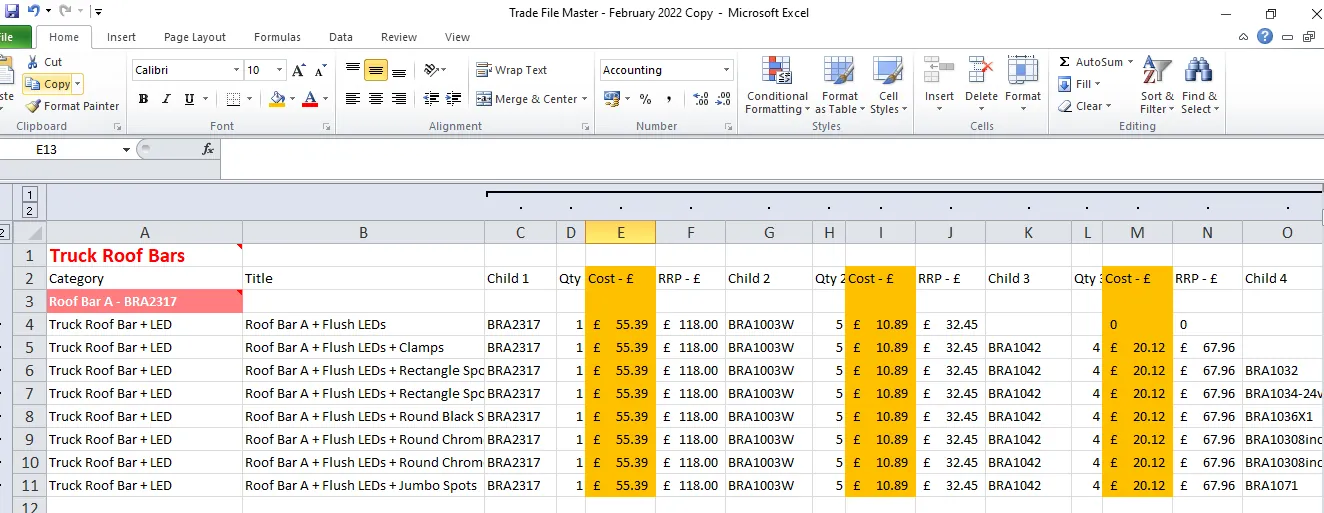
- The other columns except the highlighted one (column for the New RRP) are all formula, so just copy the formula in the respective columns.
For the new RRP column, round off the calculated Suggested RRP to the nearest xx9.99 value. For example, Suggested RRP - £ is 196.57 as shown below, round it off to the nearest xx9.99 so it becomes 199.99.
You might wonder why the first RRP the 135.41 becomes 179.99 when it should be 139.99. This is because the minimum price for truck roof bar with LED is 179.99. And for this example we are using the Truck Roof bar + LEDs.
- These new RRP that you rounded off, submit this to management for review and for their approval.
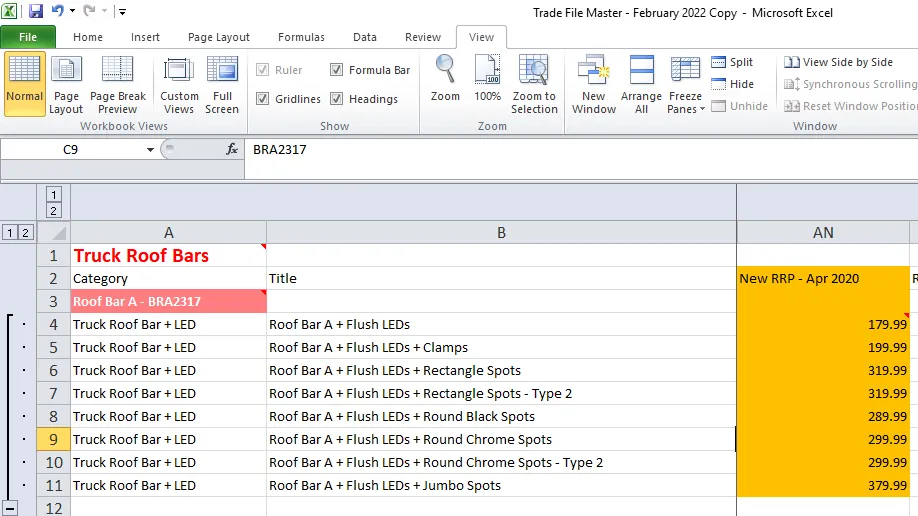
- Once it is approve the parent SKU will now have a new price. Therefore you also need to update the corresponding sheet of the parent SKU. The example above is for the new prices of truck roof bar + LED bundles, you therefore need to go to the Truck Sheet, filter the category so that it will only show the truck roof bars + LED and then update the prices found in the RRP - £ column (highlighted in orange).
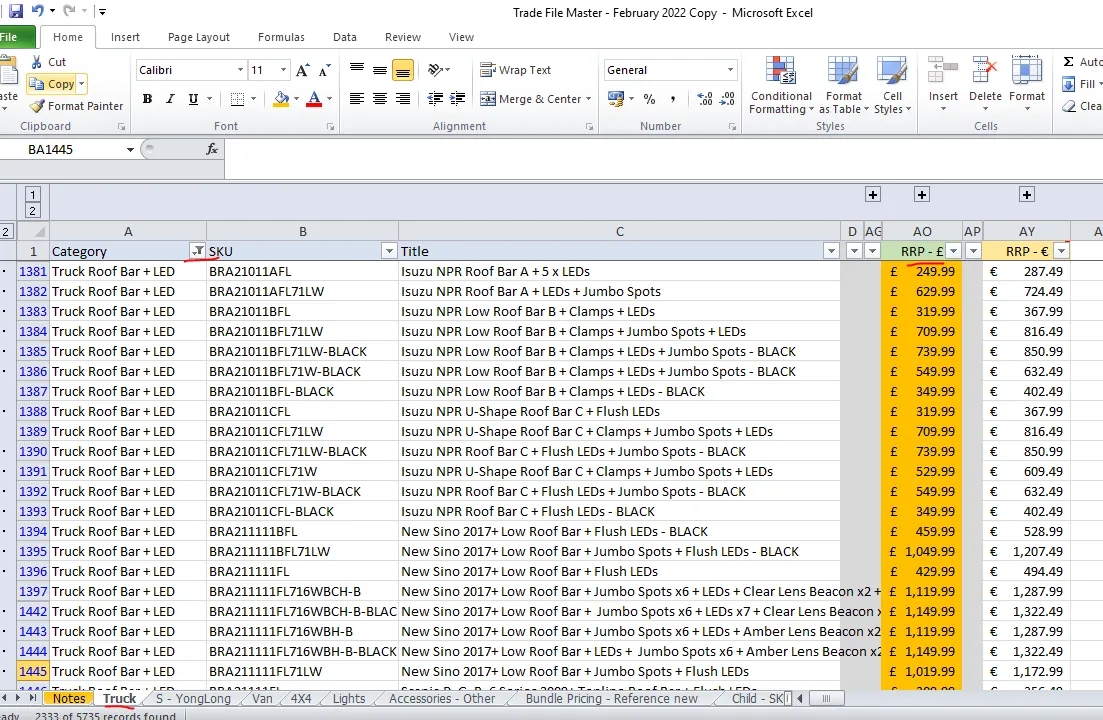
This part here is tricky since the parent SKU is not given, you need to search manually, check which SKU has the same components found in the Bundle Pricing - Reference new Sheet and update their prices. For example, you need to search all roof bar A with flush LEDs and change the price to 179.99. Then search again for all roof bar A with flush LEDs and clamps and change the price to 199.99.
- Once the Truck Sheet is already updated with the new RRP, you need to upload these new prices to Linnworks and the live listings. To know how to bulk upload these new prices in Linnworks and live listings refer to this SOP on How to Bulk Update Prices in Linnworks.
Creating the Trade File copies from the Master Trade File#
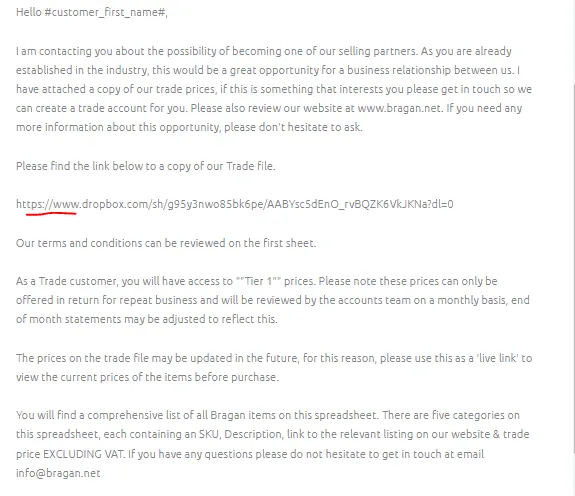
The Trade File copies (which mainly comprises of the trade prices of all items on sale) are the files shared to the company’s Trade Customers. This files are found in the email macro so we can send it to customers. See snipe below for macro for trade file that we send to qualified customers.
There are two Trade File copies that are created from the Master Trade File:
Trade File - EURO
Trade File - STERLING.
These are saved in the company’s Trade File designated Dropbox folder. You need to request for access to this from management.
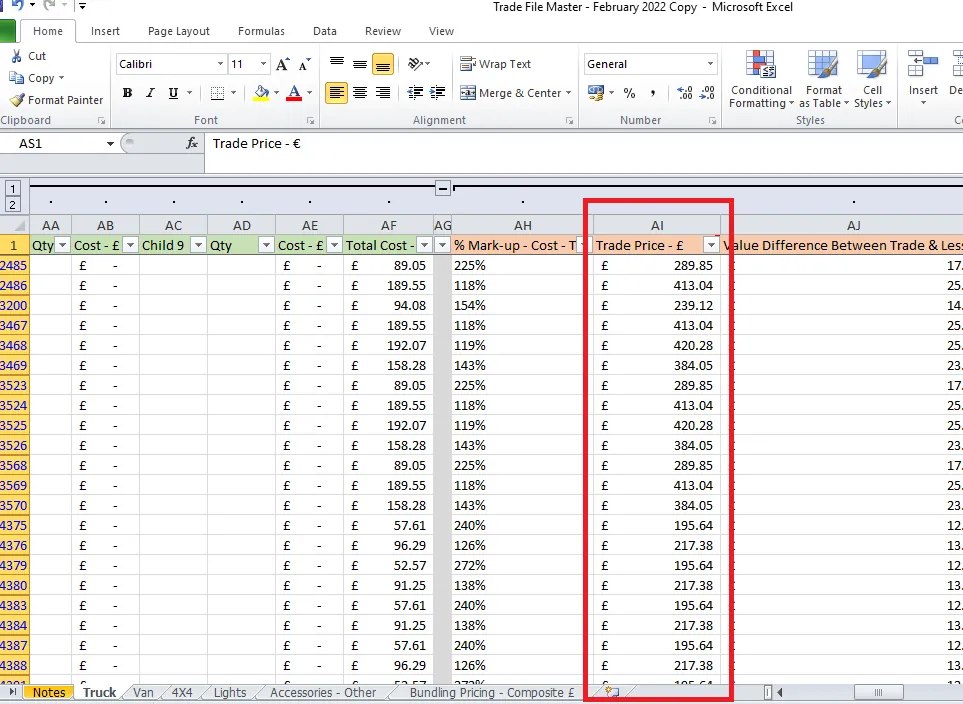
The Five (5) main sheets from the Master Trade File are copied to the 2 Trade File copies these are the Truck, Van, 4x4, Lights, Accessories - Other Sheets. But the other columns are deleted since those were not relevant to the customers. In
addition to the 5 main sheets, added as the first sheet is the “Terms & Conditions - Overview”
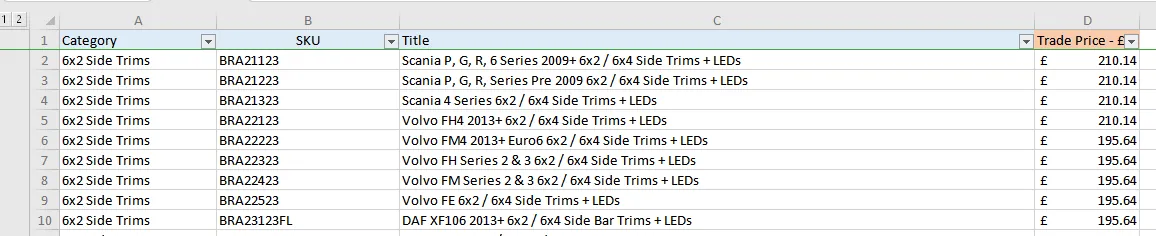
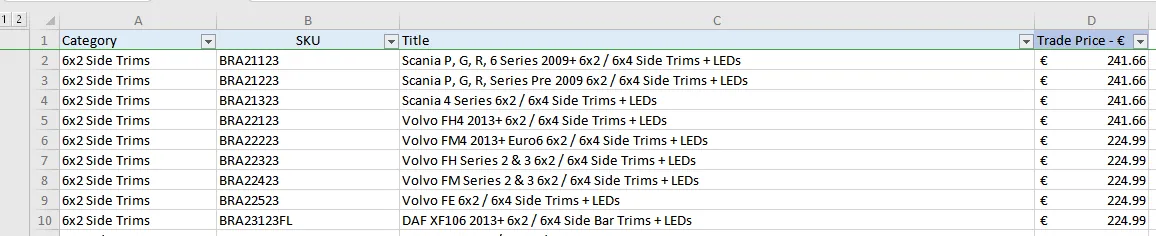
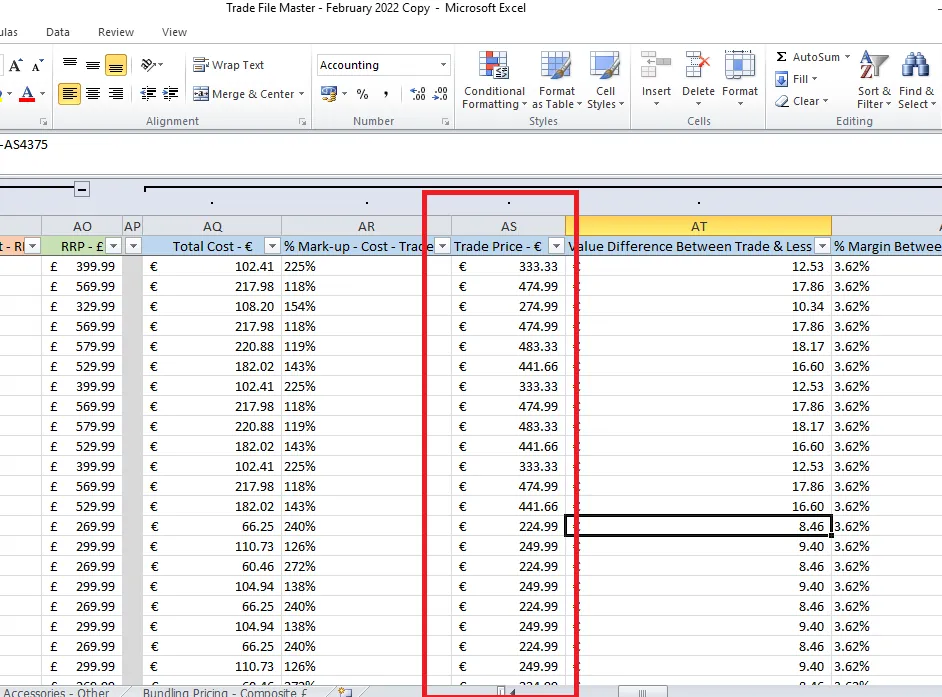
The columns that you will find in the Trade File copies for the customers would be the Category, SKU, Title and the Trade Price in £ if its for Trade File - STERLING and if its for Trade File -EURO the Trade Price is in €.
If there is an update being done to the Master Trade File, these two copies of the customer Trade File should also be updated. Make sure that whatever is added or changes in the Master Trade File is also reflected in these files. Make sure that you put the Trade Price and not the RRP from our listings for non-trade customers. Also make sure that if you are in the Trade File - Euro file then the Trade price you put is the one in euro. Same if you are in the Trade File -STERLING, make sure trade prices are in sterling.
When you update do it the same way with the Master Trade File. Select the correct sheet. So if there is an update in the Master Trade File Truck Sheet then update also the Trade File for customer Truck Sheet. Choose the correct category, make, model and year of the vehicle to know where you are going to insert the new item. The difference is that you need to put in the Trade Price. Just expand the sheet so you can see columns for Trade Price - STG and Trade Price - euro.
Uploading Trade Prices of new SKUs in Magento. All new SKUs trade prices should be uploaded thru the Magento Admin.
Please see this SOP on How to Upload Trade Prices to Magento.
Video & Media#
🎥 trade file training 2 🎥 trade file training
Notes#
This section is important so Adhoc points and issues can be logged. Also, Q&A can be logged for suggestions for potential issues encountered. Also, log important notes needed for this system. Additional Notes:
Trade file must be updated weekly and trade price of new listings should also be updated in Magento. Make sure to update also the Trade Files for customers every time you update the Master Trade File. Make sure that it is the Trade Price that you put in these files.
Potential Issues:
1 - ISSUE ENCOUNTERED: Stuck on Loading
RESOLUTION: Refresh Browser
2 - ISSUE ENCOUNTERED: Broken Links
RESOLUTION: Get the external link as this will allow other people to access the SOP without the need for login credentials and avoid broken links.