SOP for Editing Agent's Name in Zendesk
Zendesk is Bragan’s primary tool for customer service support and email handling.
Overview#
Purpose: Zendesk is Bragan’s primary tool for customer service support and email handling. The purpose of this document is to outline to new and existing staff how to edit the agent’s name in Zendesk.
Scope: This procedure applies to management/IT in charge of Zendesk accounts.
Responsibility: It is the responsibility of each employee to ensure the process set out in this procedure is followed.
Objective: To standardise the process of renaming agents in Zendesk.
Procedure#
Editing Agent’s Name in Zendesk#
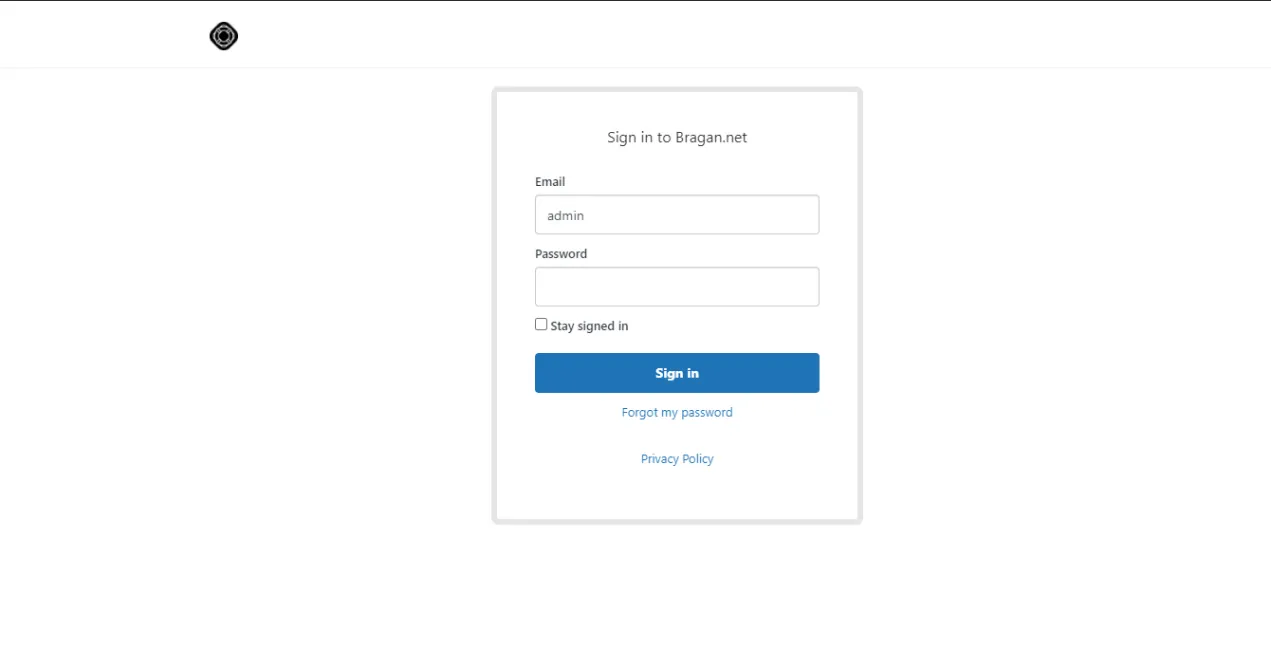
Login to dashboard..
Important note: You’ll need an account with Administrative Privileges to do this. Ask management for access.
After logging in. You will be redirected to Zendesk Dashboard.
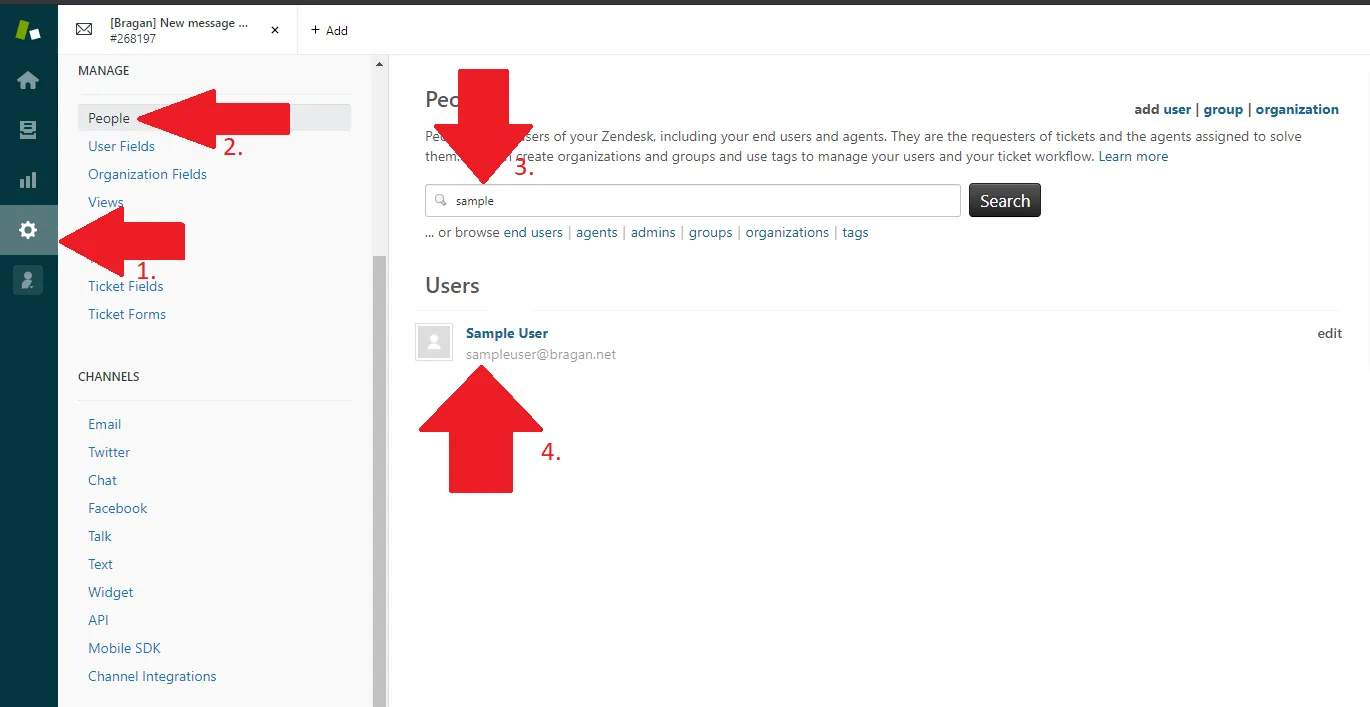
Click the Gear icon on the left side of the screen. Click People. Input the name or email of the agent you want to edit. Find and click the correct user.
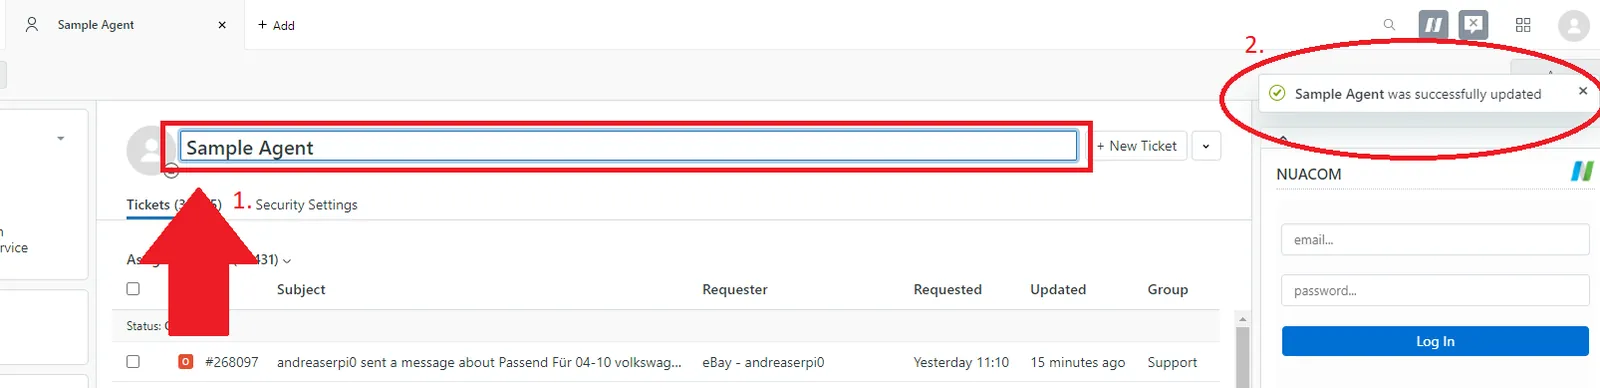
You will be redirected to this page (see picture below). Click the agent’s name and you should be able to edit the field. After editing, click outside the field and it will be automatically saved (see picture).
Notes#
This section is important so Adhoc points and issues can be logged. Also, Q&A can be logged for suggestions for potential issues encountered. Also, log important notes needed for this system. Additional Notes:
You’ll need an account with Administrative Privileges to do this. Ask management for access.
Potential Issues:
1 - ISSUE ENCOUNTERED: Stuck on Loading RESOLUTION: Refresh Browser
2 - ISSUE ENCOUNTERED: Broken Link RESOLUTION: Get the external link as this will allow other people to access the SOP without the need for login credentials and avoid broken links.
Attachments#
Attachments_and_Recordings… 16/12/2025