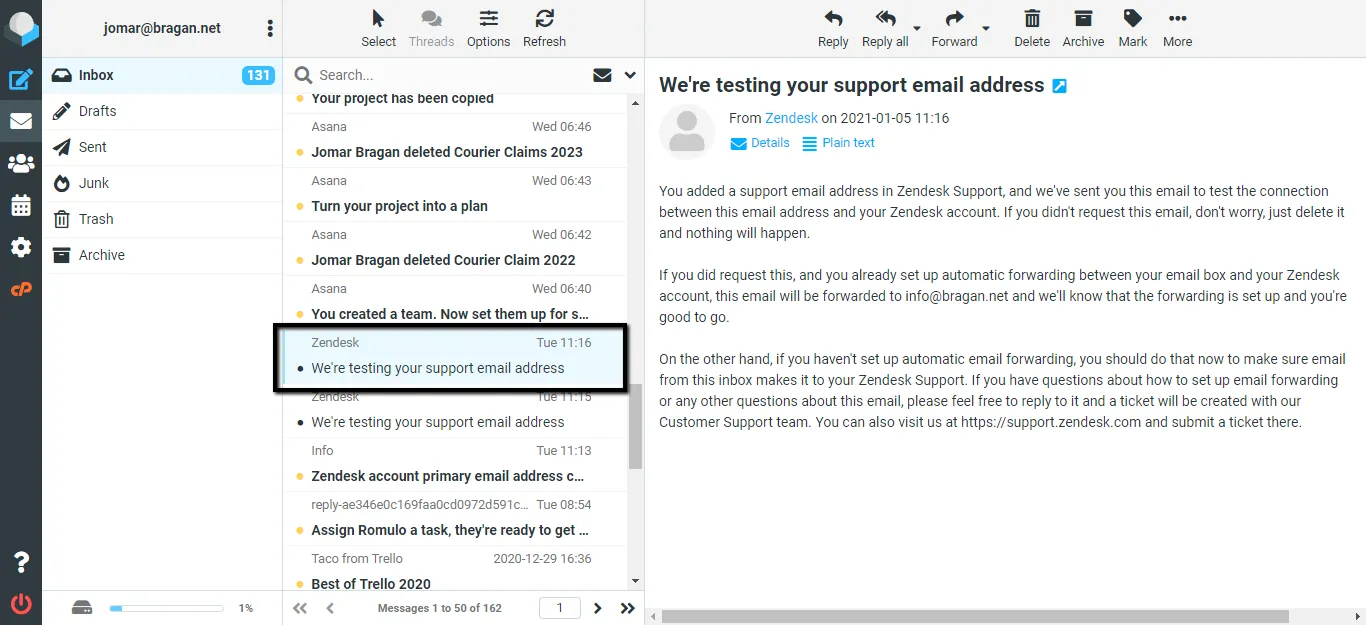
Zendesk Account Creation
Bragan uses multiple tools for communication.
Overview#
Purpose: Bragan uses multiple tools for communication. The purpose of this document is to outline the process of zendesk account creation.
Scope: This procedure applies to management/IT in charge of creating accounts.
Responsibility: It is the responsibility of each employee to ensure the process set out in this procedure is followed.
Objective: To standardize the process of creating a zendesk account and to provide an explanation on using zendesk functionalities.
Procedure#
Zendesk Creation#
Open Zendesk and log-in using administrative access (ask Management)
- Click Admin > People > Add user
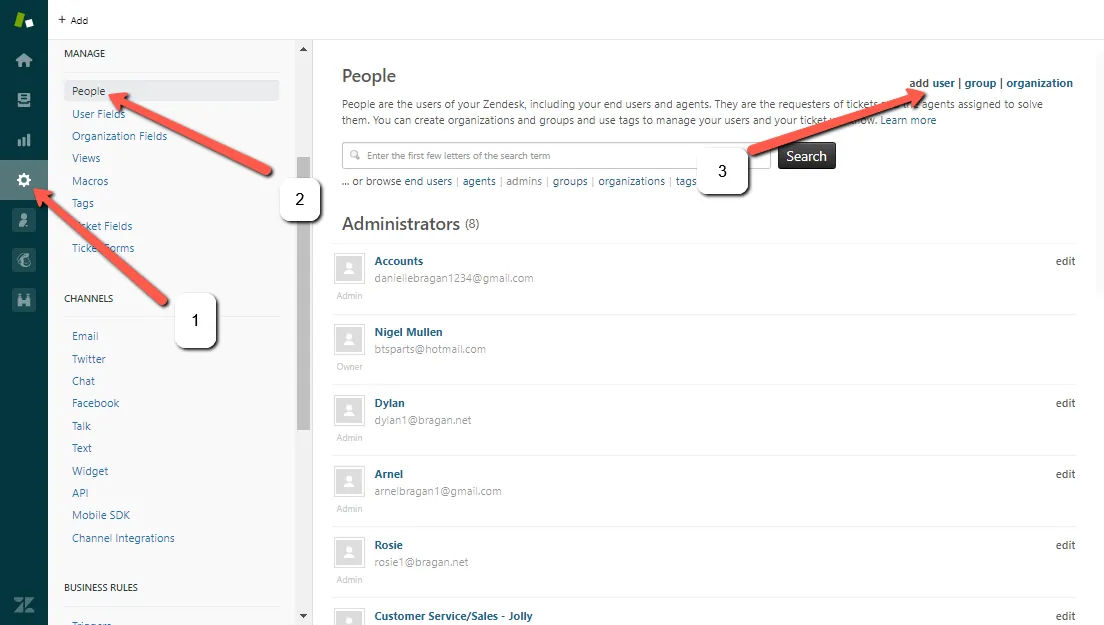
- Type Agent’s name and email. Note: use the email with 1 for Zendesk credential.
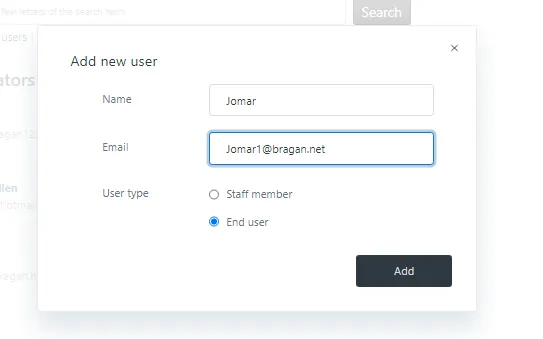
- Change the Agent’s role
Contributor – able to receive and open the email but cannot send. Agent – able to receive, open and send an email (Requires seat). Admin – able to receive, open and send an email. Have an access to change view folder, macros, add new agent, etc. (Requires seat). End-user – restricted to receive, open, and send an email.
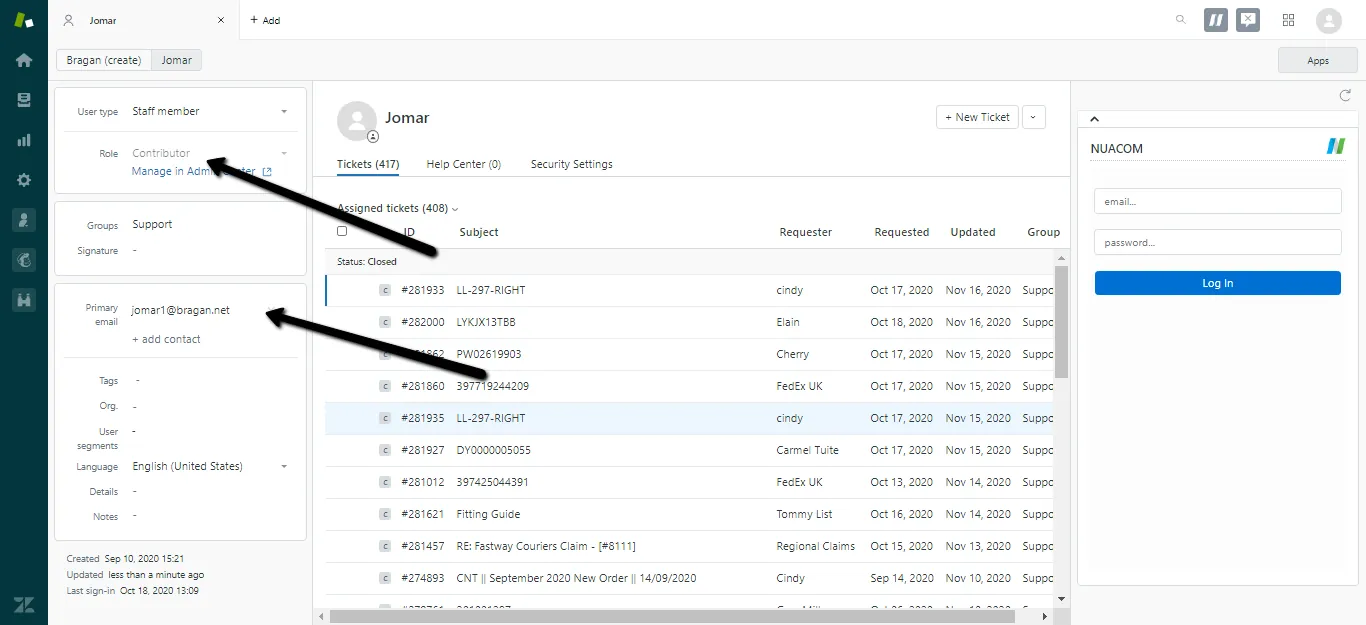
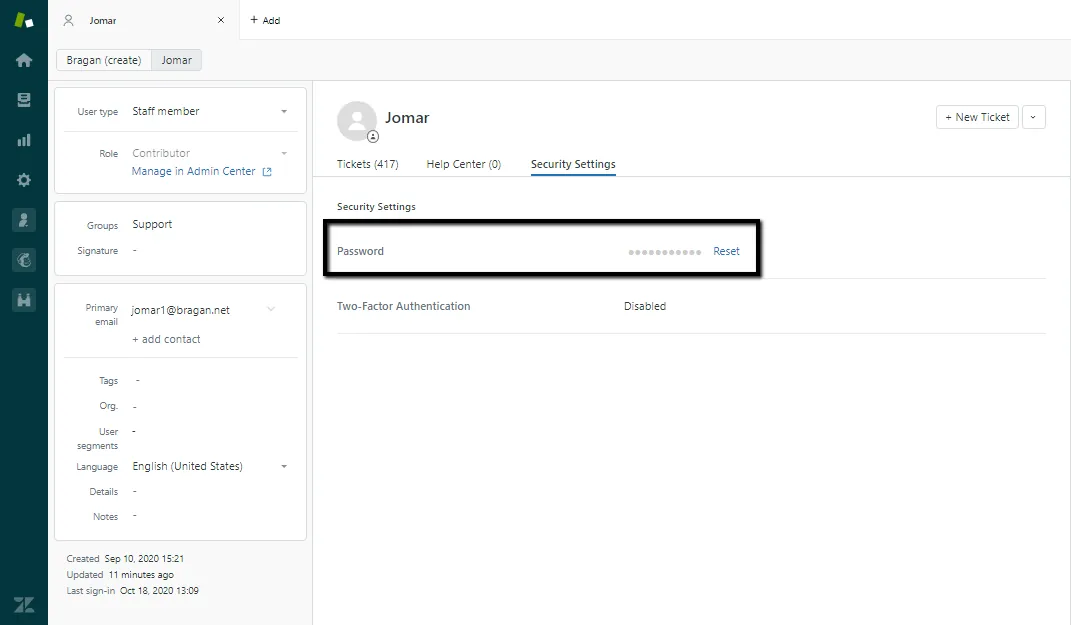
- Change the password same to Cpanel’s password.
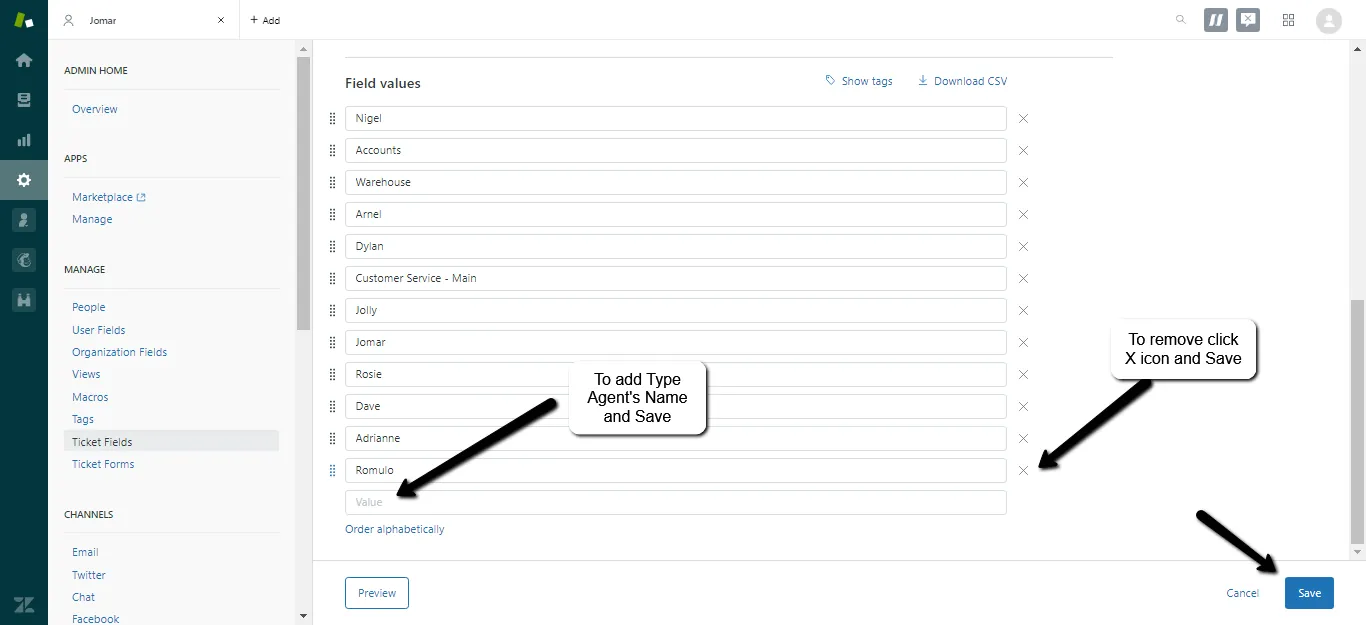
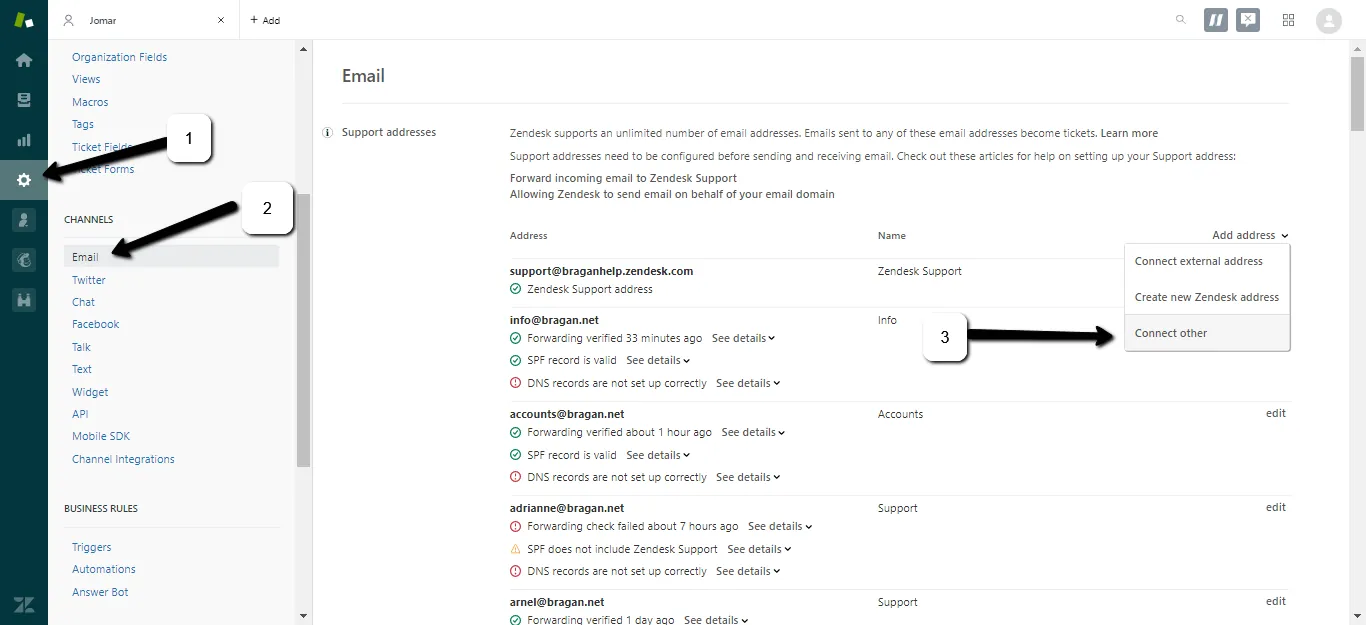
- Click > Admin > Ticket Fields > Staff CC (3 dots icon) > click edit.

- Then link the support email (the main email ex: [email protected]).
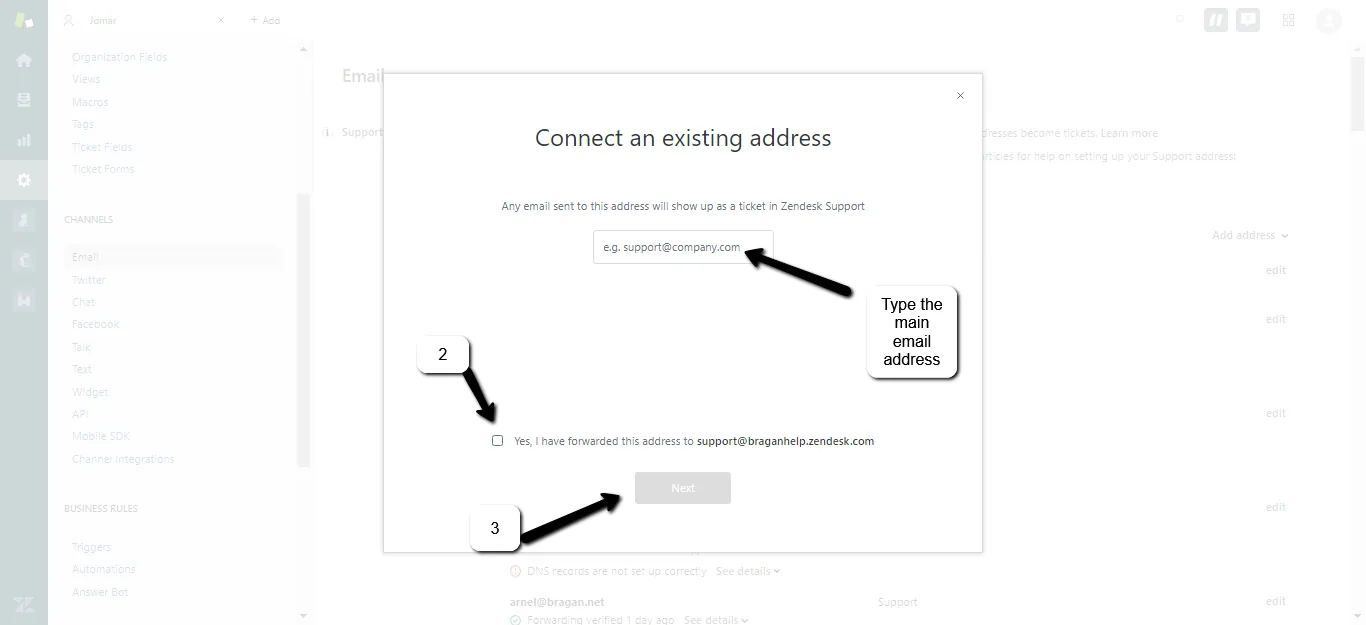
- Open cPanel of the main email address and wait for Zendesk and received this message (the Cpanel email is now linked to Zendesk).
Zendesk Functionalities#
How to buy an Agent seat in Zendesk
All zendesk functionalities can be accessed and edited only by administrative account.
Click the Zendesk Products icon
- in the top bar, then select
- Admin Center
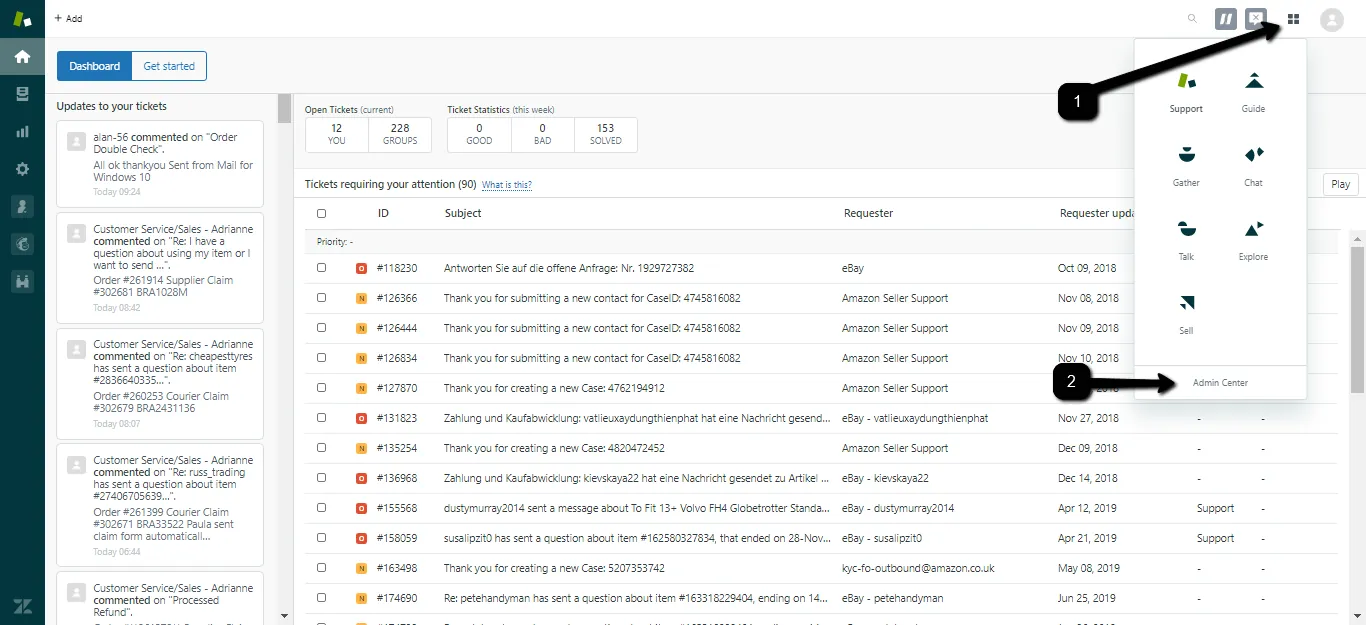
- Click the Billing icon in Admin Center
- Click Subscription
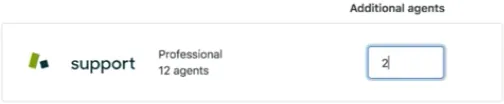
- Click manage and add desired seat(s)
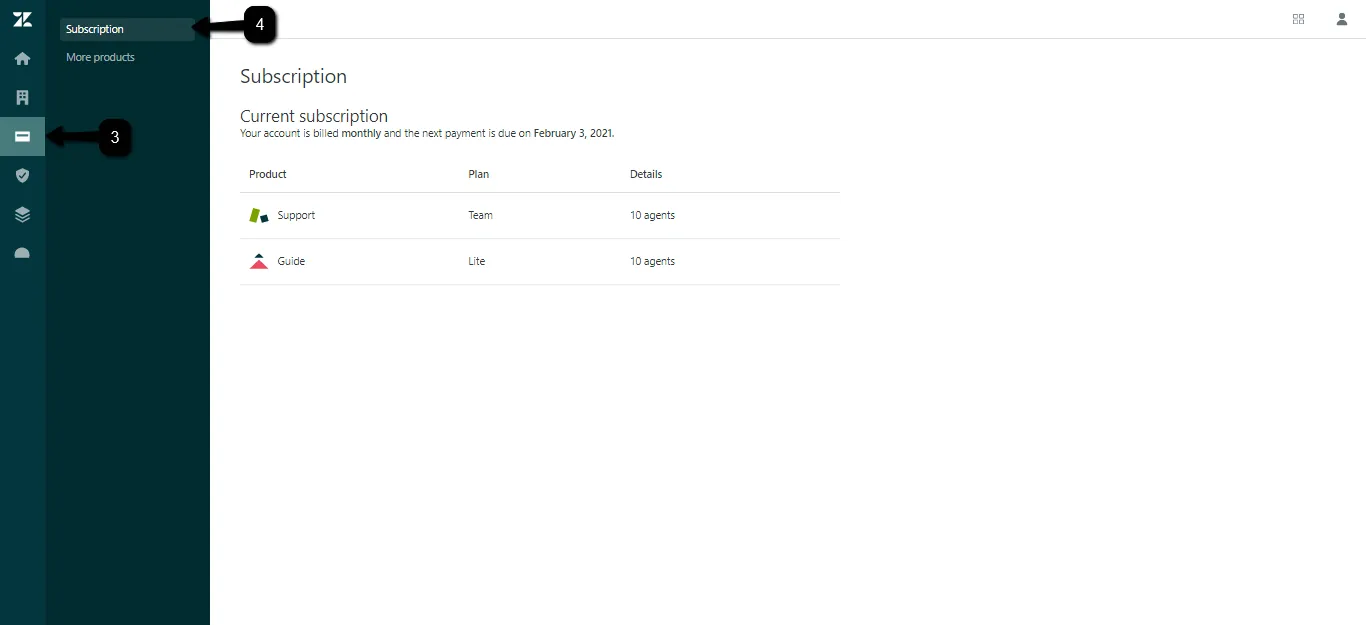
(If you don't see a Manage button on the Subscription page, then you don't have permission to make changes. Instead, contact your sales representative or contact Zendesk Customer Support to make changes to your account.)
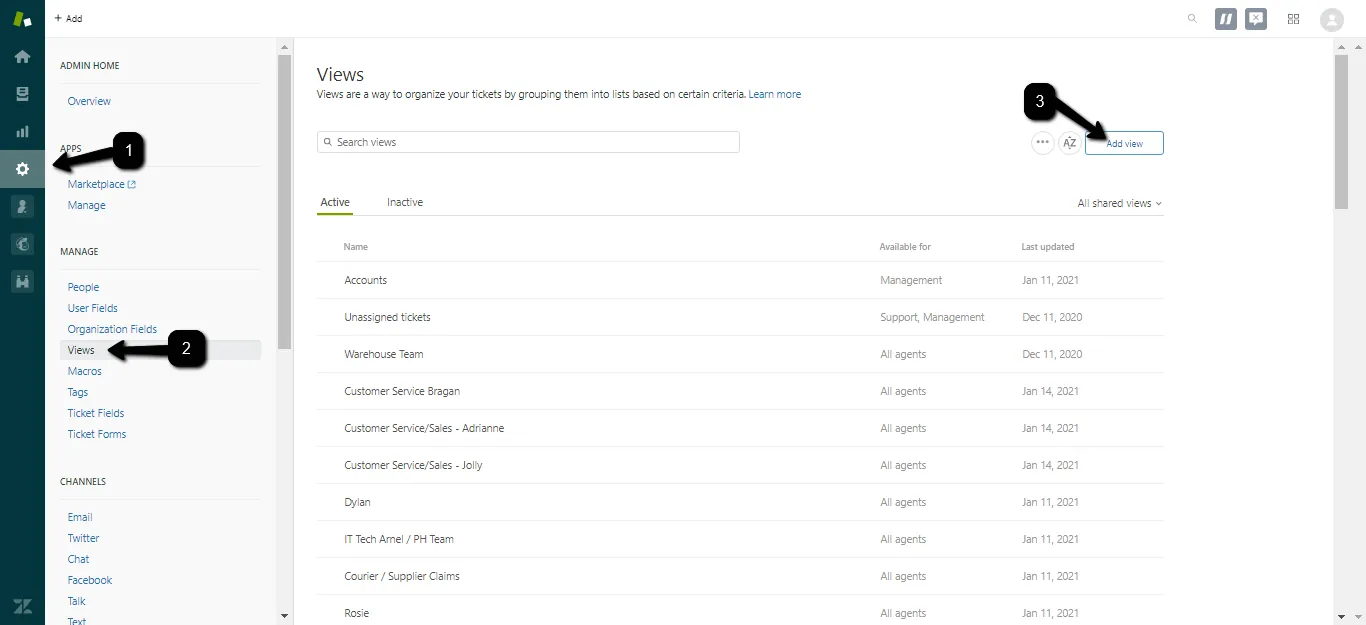
How to make a view folder
- Admin (Gear Icon)
- Views
- Add Folder
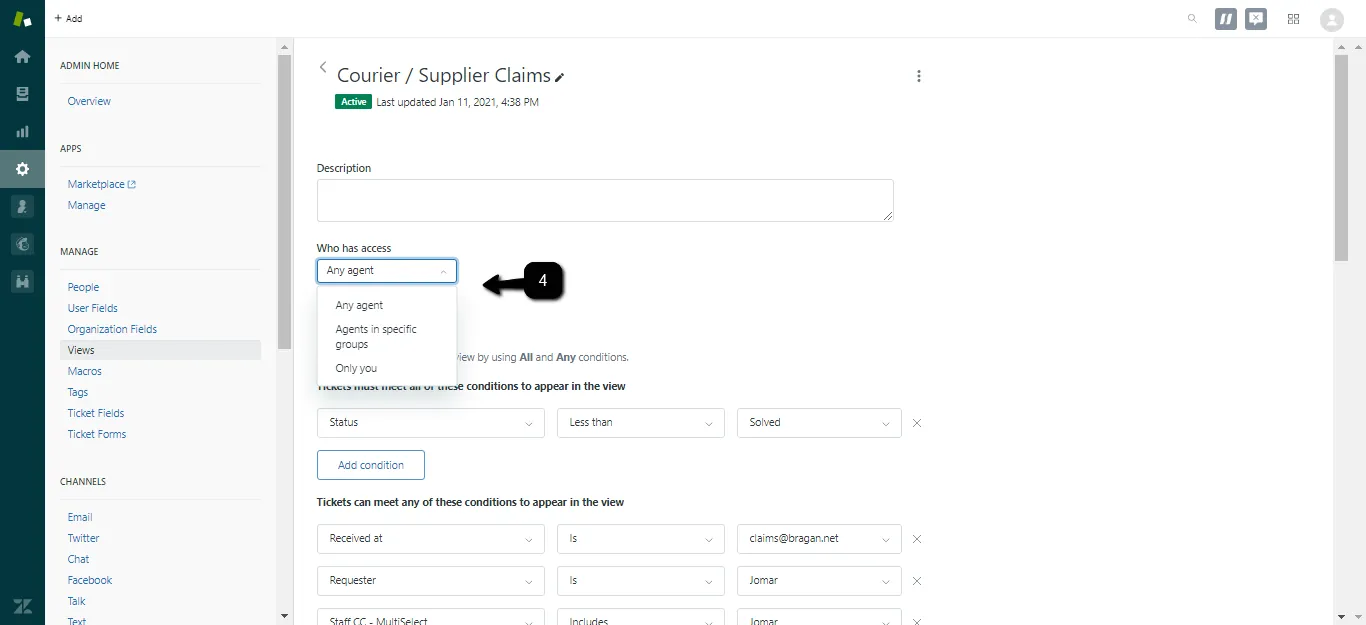
- These are the settings for view access in which you can have restrictions to open:
Any agent - available to all agents, no restriction. Agents in specific groups - (Support, Developer, Management, Warehouse), available only to agents in the groups specified. You can enter one or more groups in this field. If you enter multiple tags, hit Enter between each tag. Only you - available only to you as a personal view
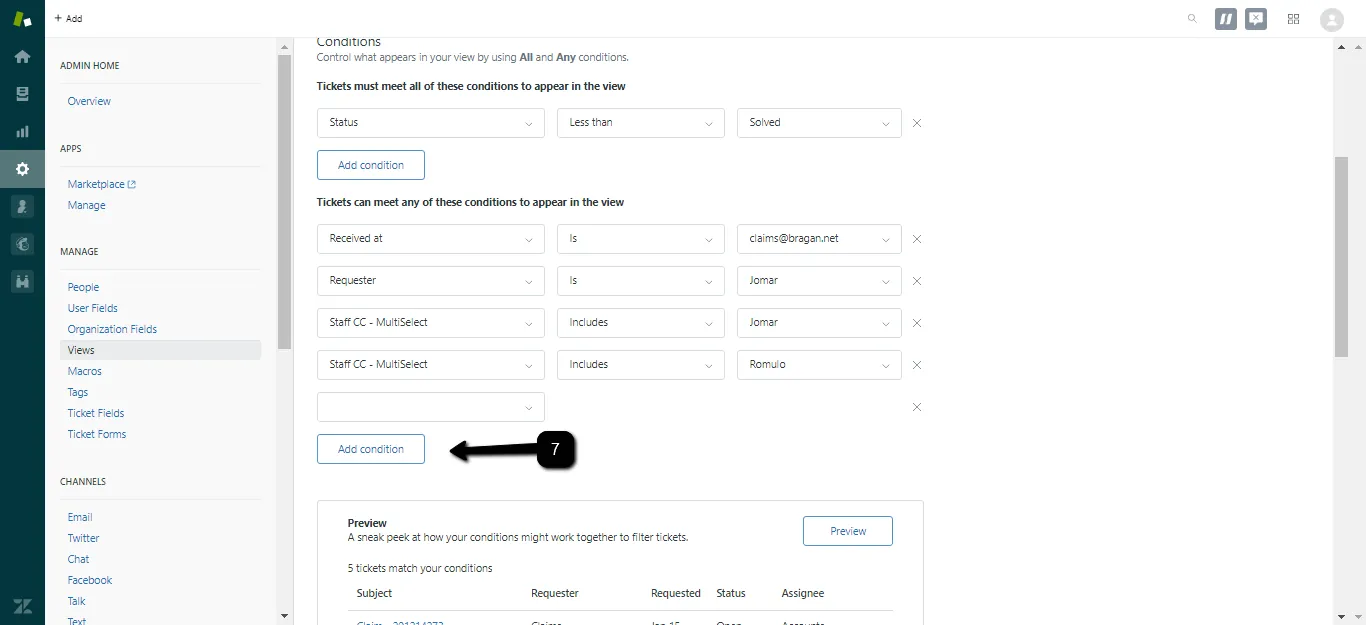
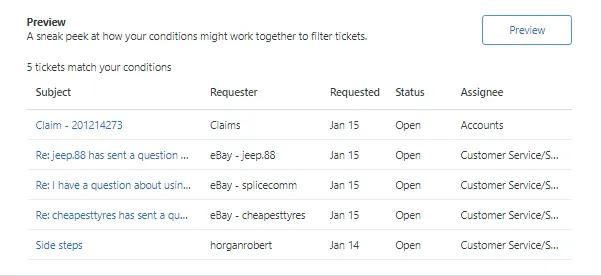
- Add condition and select Status (means the email will disappear correspond with the condition of the status. When selecting a status, you can use the field operators Less Than and Greater Than to specify a range of tickets based on their status.
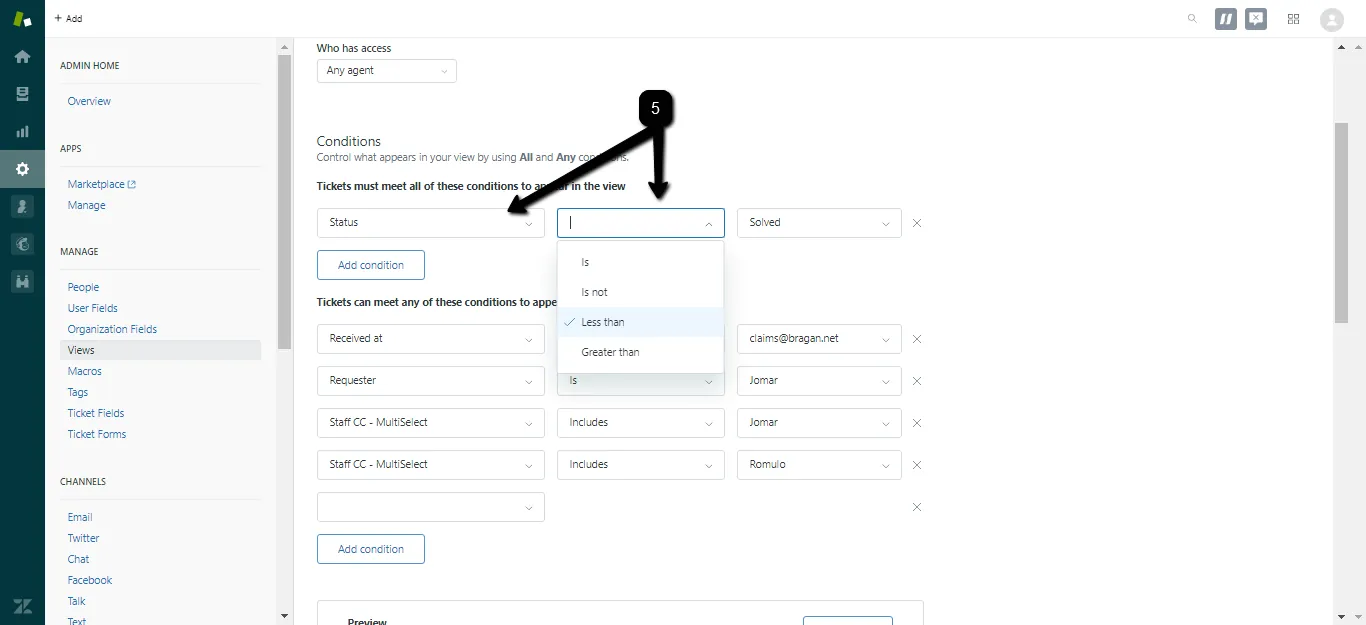
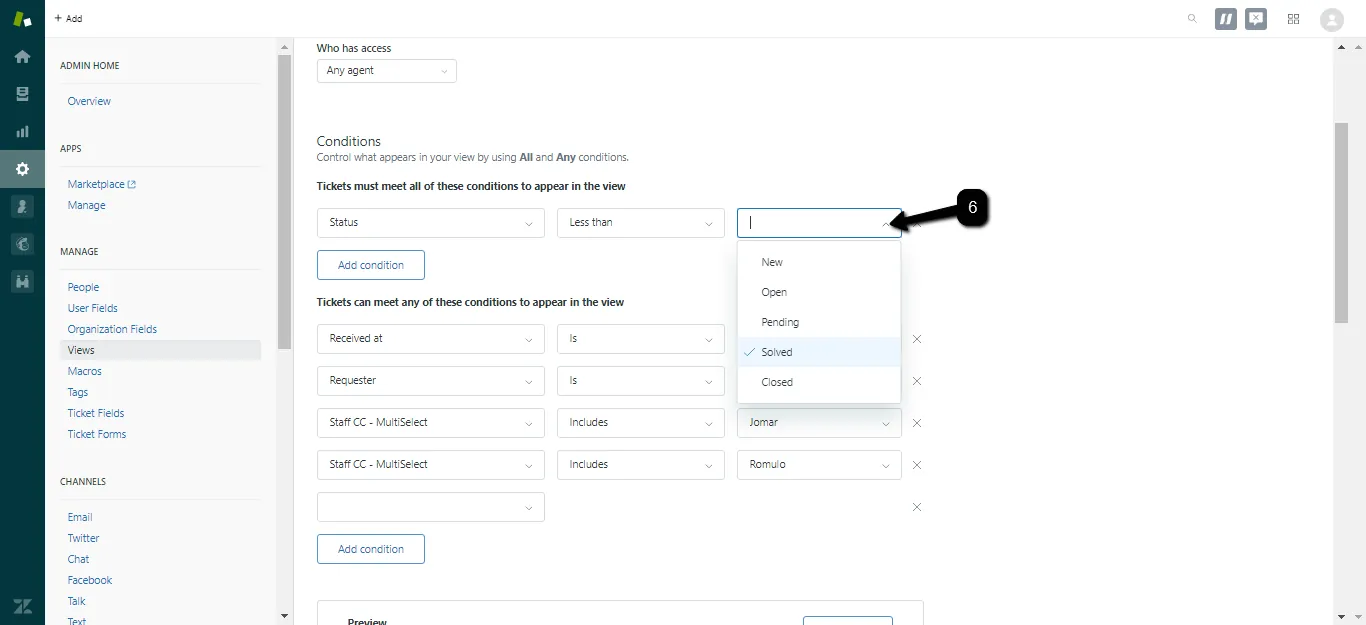
- Select Ticket Status
New - is the initial status of a newly created ticket (not assigned to an agent). Open - means that the ticket has been assigned to an agent. Pending - is used to indicate that the requester has been asked for information and the ticket is therefore on hold until that information has been received. Solved - indicates that the customer’s issue has been resolved. Tickets remain solved until they are closed. Closed - means that the ticket has been locked and cannot be reopened or updated.
For example, a condition statement that returns only New, Open, and Pending tickets look like this: Status is less than Solved.
- Is the condition in which the email will appear in the folder view.
Here is the following condition in Bragan zendesk.
Status – It will appear in the view based on Status. Group – it will appear in the view if it belongs to the group (ex: support). Assignee – It will appear to the view of the person assigned (ex:romulo, jomar). Requester – It will appear to the view based on the requester (ex: expressfreight claim). Received at – It will appear to the view if the emails were sent to specific email (ex: [email protected]). Tags – It will appear in the view of the person that has been tagged (ex: accounts). Staff CC – It appears to the view of the person which been CC (ex:romulo, jomar). Action – It will appear to the view of based on actions (ex: technical) Folder – It will appear to the view if is assigned to your folder (ex: courier claim).
- Add a column in which will appear in the folder view.
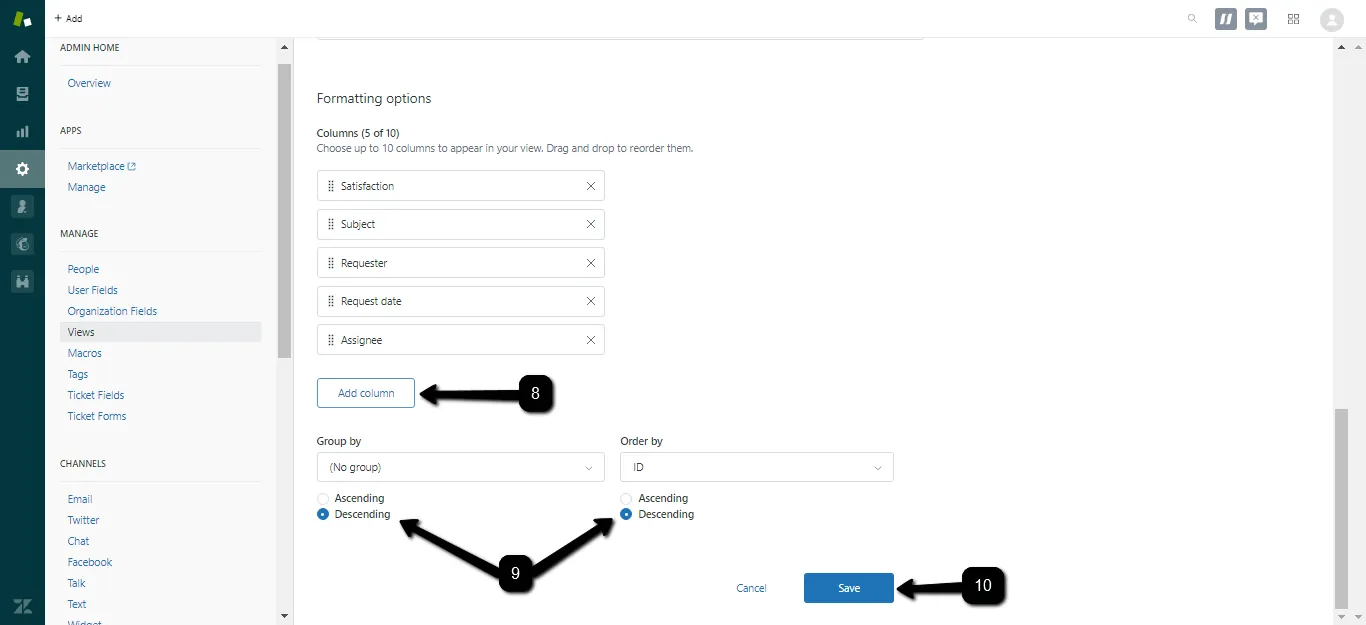
- This is where you can set and sort the email in Ascending or Descending.
Alphabetical - Ascending will rank A>Z and Descending will rank Z>A. Numbers - Ascending results in smallest to largest (1>10) whereas Descending results in largest to smallest (10>1).
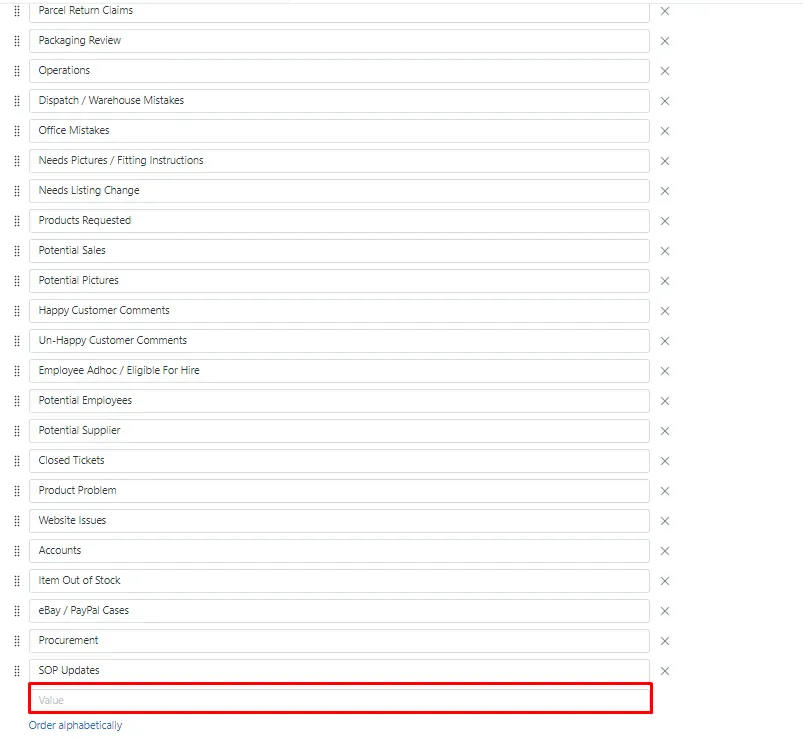
Adding a Folder in Zendesk
Adding a folder is the same process as adding a Staff CC as these are both under Ticket Field Section.
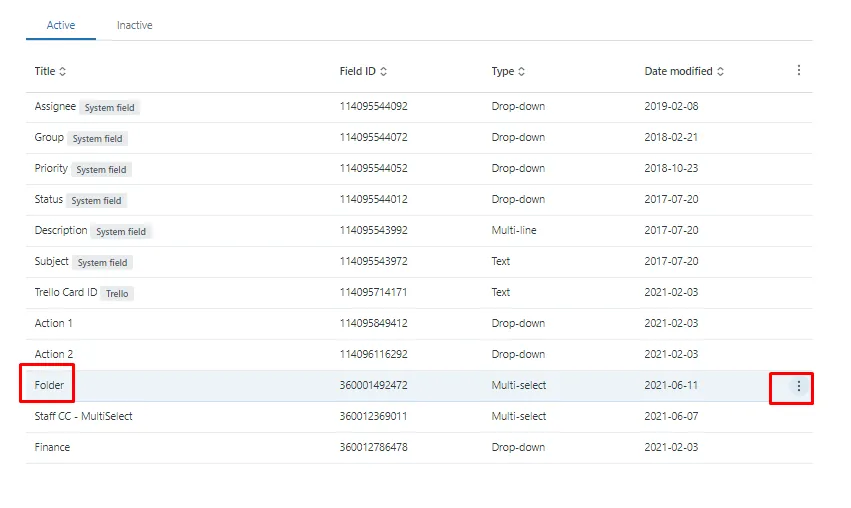
And input the desired folder you want to add and click Save.
Notes#
This section is important so Adhoc points and issues can be logged. Also, Q&A can be logged for suggestions for potential issues encountered. Also, log important notes needed for this system. Potential Issues:
1 - ISSUE ENCOUNTERED: Stuck on Loading RESOLUTION: Refresh Browser
2 - ISSUE ENCOUNTERED: Broken Links RESOLUTION: Get the external link as this will allow other people to access the SOP without the need for login credentials and avoid broken links.